Calendar resources
Calendar resources are a great way to manage the availability of shared resources, such as conference rooms, offices, cars, and anything else your company may use communally.
Adding resources
To add a new resource to your calendar, first navigate to your Calendar using the top bar menu. If you don’t see the calendar option, simply add it by clicking more and searching Calendar.
To the left of your calendar is a monthly overview, where you can use the top arrows to navigate between months. Underneath the monthly calendar, you’ll find a list of calendars belonging to both other system users and resources, as long as you have the relevant permissions. The resource permission options will be detailed below.
.png)
Now click the + button on top of the calendar list, click Resources, and then click Add Resource. This will open a dialog box where you can set the details and then save your new resource.
Relating resources to meetings
To start using your resources, you’ll need to relate them to meetings. First create a new meeting, or click on an existing one. Within the meeting’s fields, you’ll find the Resource lookup field. Here you can choose which resource you’d like to add to this meeting.
For example, you can create a new interview meeting in the purple meeting room. Start by clicking the time slot in the calendar which you would like to add the meeting to, which will open a new meeting at this time. Next, click on the Resource field to open a searchable list of all the resources you have access to. Select the resource you would like to connect this meeting to. You can also choose to add a new resource by clicking the Add button on the top right. Once you choose a resource, all the chosen resource’s current meetings will be displayed, and you can make sure to select a time when your resource is available. Click Save to create your new meeting.
You can now view both your new meeting and the slot where your resource is being used, which will be displayed as duplicate slots with different colors. In this way, you can choose to display only the resource’s calendar, or only your own meetings. Use the colors to easily categorize which system user or resource the meeting belongs to.
View existing resources
To add existing resources to your calendar list and easily access their availability, first click the + button and choose the Resources option. By clicking on a resource, you’ll add it to your user and resources calendar list on the bottom left.
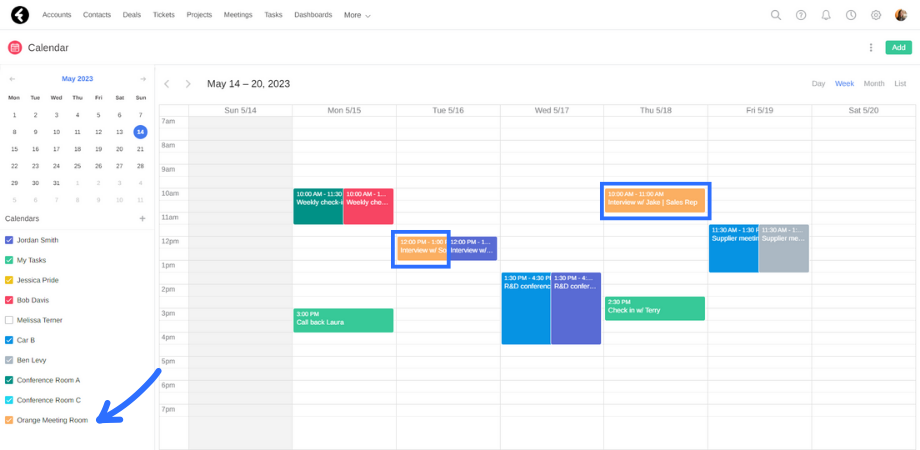
The newly added resource will automatically have a checkmark next to it, which means that all its meetings will now be displayed in your calendar. In this way you can check the availability of a resource regardless of who the related meetings belong to. You can differentiate between different resource and user meetings using the colors.
For example, there is now a check next to the newly added resource “Orange Meeting Room". All the meetings which are colored orange belong to this resource, and you can easily see when the orange meeting room is free or busy.
By using the checkbox next to a user/resource’s calendar, you can choose if you’d like to display their meetings in your calendar. To remove an option from the calendar list, click the X to the right of its name.
Editing and deleting existing resources
You can edit existing resources, add or change fields within the Calendar Resources object, and set the color of a resource.
To start editing an individual resource, first make sure the resource appears in your calendar list on the bottom left of the Calendar page. If the resource is not in your calendar list, add it by clicking on its name under the Resources option of the + button.
Once the resource is displayed in your calendar list, hover over the resource and then click on the three dot menu. This will open a pop up where you can choose to switch a resource’s color or edit its details.
Clicking on one of the colors will set it as the selected resource’s new color. You can choose any color in the system, or enter any custom color using a hex color code.
Clicking Edit will bring you to the editable page of the resource you selected. For example, you can change the name of a resource from “Purple Meeting Room” to “Green Meeting Room”, as well as any other value you wish to change in the record.
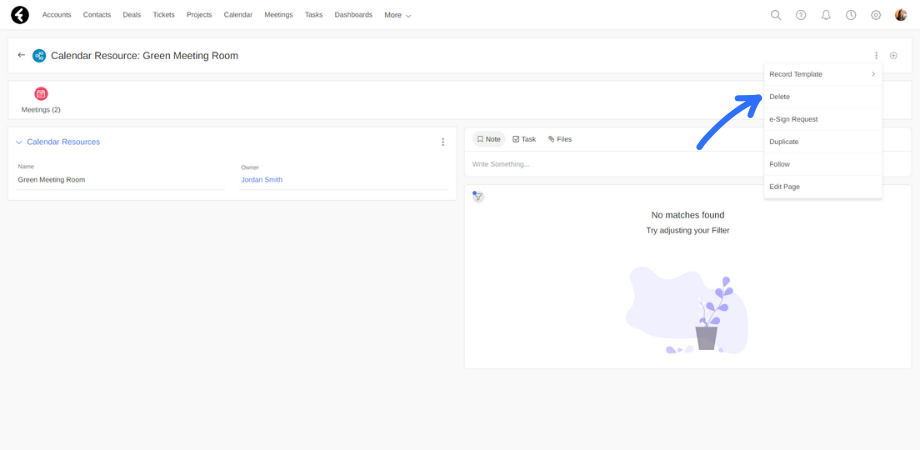
You can also delete a resource using its editable page. Simply click the three dot menu, select the Delete option and type in DELETE.
Editing resource fields
You can edit the existing fields of the Calendar Resources object and add additional fields, such as type, location, priority, etc.
To start, go to the main menu and select the Calendar Resources object. If you don’t see it, search for it using the More option.
Now choose any random record within the object, click the three dot menu on the form of the page, and choose the Edit Form Layout option. You can now use the Add New Field button on the left to add new fields, or click on an existing field to change its settings. For example, you can add a Type field.

For more details about editing forms and fields, see the following article.
Resource permissions
You can manage the resource permissions based on system user roles. In order to set the permissions for a specific role, click the settings gear and choose the Roles page within the System tab. Then choose the role you would like to set permissions for. Below the resource specific settings are explained; For an overall explanation, see the following article.
Under the Object Name column find the Calendar Resources option, and set your preferences. Each permission option works as follows:
- Create: Users can add new resources to your system.
- Edit: Users can edit a resource’s details.
- Delete: Users can delete resources. This will delete all instances of the resource within your system.
- Read: Users can see the existing resources within your system, and change the display colors in their personal calendars. Users who don't have this permission will not see the resources option on the Calendars page.
- Sharing: Choosing a sharing level will set the visibility level of your resources, based on who created the resource. Options vary from Only me to Everyone.