How to use custom sharing
The sharing permissions for an object, such as Only Me, Team Only, etc., control when access will be provided to each record based on the user set as the owner of the record. Custom sharing allows you to choose when a record will be shared with each system role based on fields instead. By using filters, you can set the access to an object’s records according to any field within it.
For example, you can choose to add a filter to the Sales Rep role where each account record will only be displayed if the account’s status field is set to Lead. In this way, your sales representatives will only see the accounts they need to reach out to, and won’t have access to accounts which are being taken care of by other departments.
Setting up custom sharing
To start, you’ll need to open a specific role’s permission page, which you can learn how to do here. Next, find the object you’d like to add custom sharing to by looking at the Object Name column. This column is alphabetized for easy finding.
Custom sharing only works on editable objects. This means that you cannot apply custom sharing to any of the permissions under the Actions title, or to any of the following objects: Charts, Dashboards, Documents, Emails, Facebook Connections, Forms, Pages, Record Fields, System Objects, Team Inbox, and View Designers.
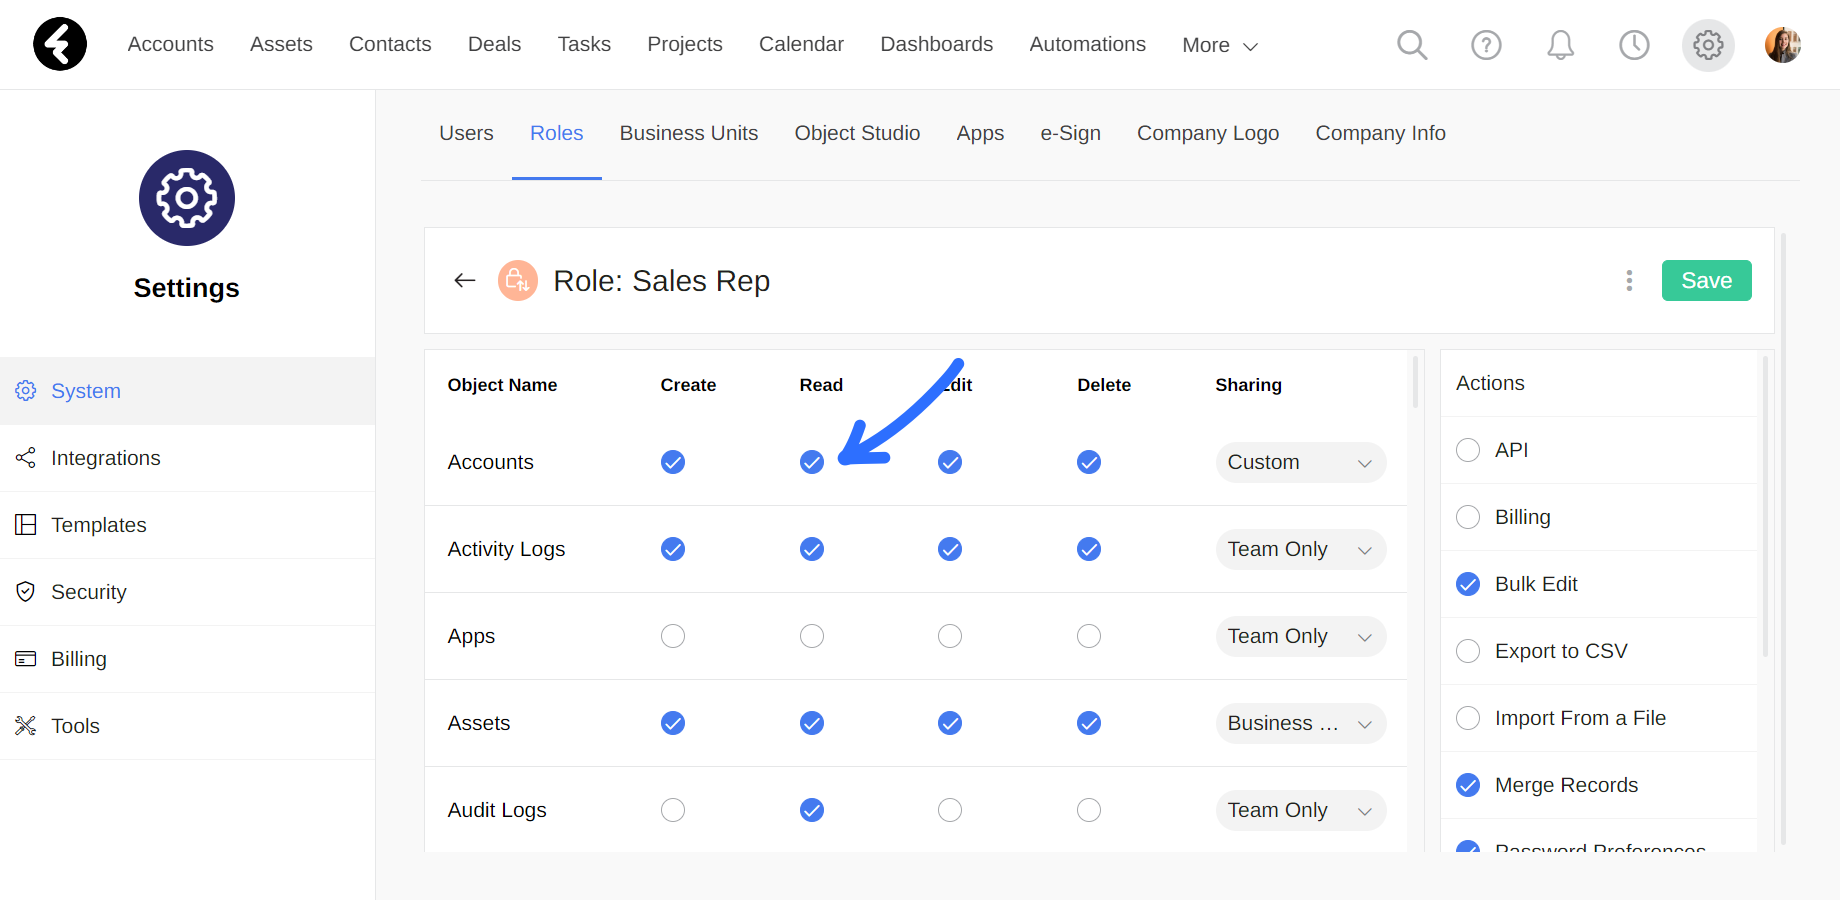
Once you’ve found and ensured Read permissions are active on the desired object, open the dropdown list under the Sharing column. For details on the sharing options, click here. Choose the Custom option to open a dialog box where you can create custom filters. For the above example, open the Sales Rep role permissions page, find the Accounts object, and click Custom.
Building your filter
You can now click the Add Filter button to start building your filter. The Field section contains a searchable dropdown list of all the fields which belong to the selected object. Select a field to base the filter on it. Next, use the Operator dropdown list to select an evaluation method for the field, such as Equals or Starts with. Most operators will also require a Value, which will be used to check the chosen field using the selected operator.
For example, you can choose the Status field in the accounts object, and set the operator to Equals. Then set the Value to Lead and click Apply. This will check if an account record’s status field is set to Lead. If it is, this record will be accessible to your sales representative. However, any account whose status is not set to lead will not be accessible to the sales representatives. In this way, your sales team will be sure to only reach out to accounts who are relevant to them, and will not have access to data which they don’t need access to.
Multiple conditions
Once you’ve set your condition, you can choose to add more by clicking the Add Filter button. For example, you may wish to provide the Sales Rep role with access to any lead accounts, but only when the account type is not a partner account. To do so, click the Add Filter button and set your filter to Account Type Is not equal to Business Partner. Now your sales representatives will not have access to or accidentally reach out to potential partners, and a different role can be put in charge of the partner leads.

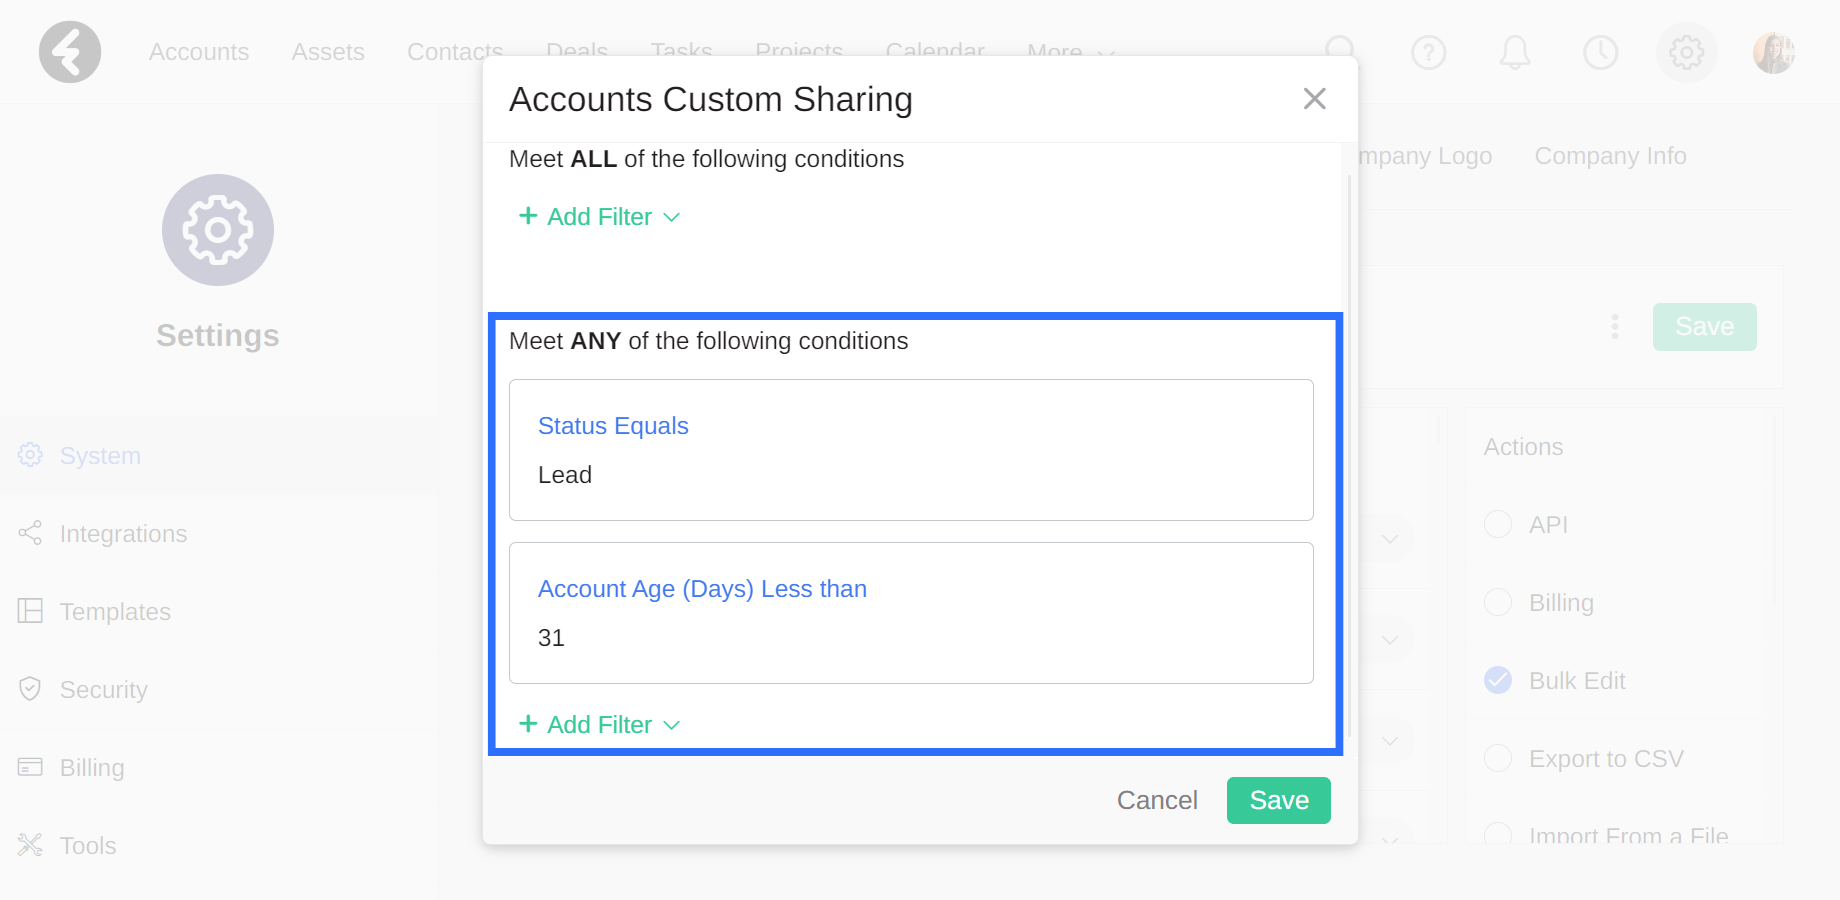
You can also create group filters to check that a record meets one of multiple conditions. For example, you can set your sales representatives to have access to accounts whose status is set to lead, or who were created in the past 30 days. To do so, click the arrow to the right of the Add Filter button and then choose the Add Group Filter option. Under the Meet ANY of the following conditions heading you can add both the Status Equals Lead condition and the Account Age (Days) Less than 31 condition. Now even accounts with an active status will be accessible to your sales team if they are less than 30 days old.
To learn more about filters, click here.
Saving your filter
After all your conditions have been applied, click the Save button on the bottom right. If you change your mind at any point and want to revert any changes you’ve made, click Cancel. By clicking Save, you’ll be brought back to the main role page, where you can choose to change more settings. Be sure to click Save on the top right of the page to save your custom sharing settings. A green message will appear at the bottom of the screen confirming your changes have been saved.

Below you’ll find useful examples of when and how to use custom sharing.
Example: External employees
Many companies use external employees for specific services. For example, an insurance agency may use outside agents to offer and provide policies for their accounts. In addition to the outside agents, each account has an account manager who is in charge of any needs that may arise from the account. The agency would like each agent to have access to the customers which use their policies, and to the record for the customer’s policy. They do not want the agents to have access to accounts which they have not created a policy for, or for policies which belong to other agents. The managers on the other hand need access to any account where they are set as the manager, as well as the policies of the accounts which belong to them.
To set up this set of permissions, first make sure you have both the Account Manager and Agent roles, which you can learn how to add here. Next, make sure each policy has the Policy Agent user lookup field with the relevant agent filled in and the Policy Manager user lookup field with the relevant manager filled in. In addition, make sure that each account has both the Account Owner and Account Agent user lookup fields. To learn how to set up custom lookup fields, click here. You can now set up your custom share permissions.
Open the Agent role page and find the Policies object. Choose Custom from the sharing options, set the field to Policy Agent, and choose the operator Current user. Now each agent will only see the policies where they are set as the agent. Find the Accounts object and use the Account Agent field to set up the same custom sharing settings. In this way, each agent will only have access to the policies they’re in charge of and won’t be able to compare rates from other agents. Additionally, they’ll only have access to private account data when the account has agreed to allow data access through the policy. They’ll also be able to see any relevant accounts, regardless of the manager of each account.
For the Account Manager, follow similar steps, but this time use the Policy Owner field in the Policies object and the Account Owner field for the Accounts object. In this way, each account manager will be able to see any policies which relate to their accounts, even if the policies have different agents. They’ll also only see the accounts which they are personally managing, which will keep all the account data in the right place and with the right manager.
Example: Temporary employees
The most common use for custom sharing is outsourced or temporary employees. It’s quite frequent that you may have temporary employees who need access to specific data in your system, but who you don’t want to give full access to.
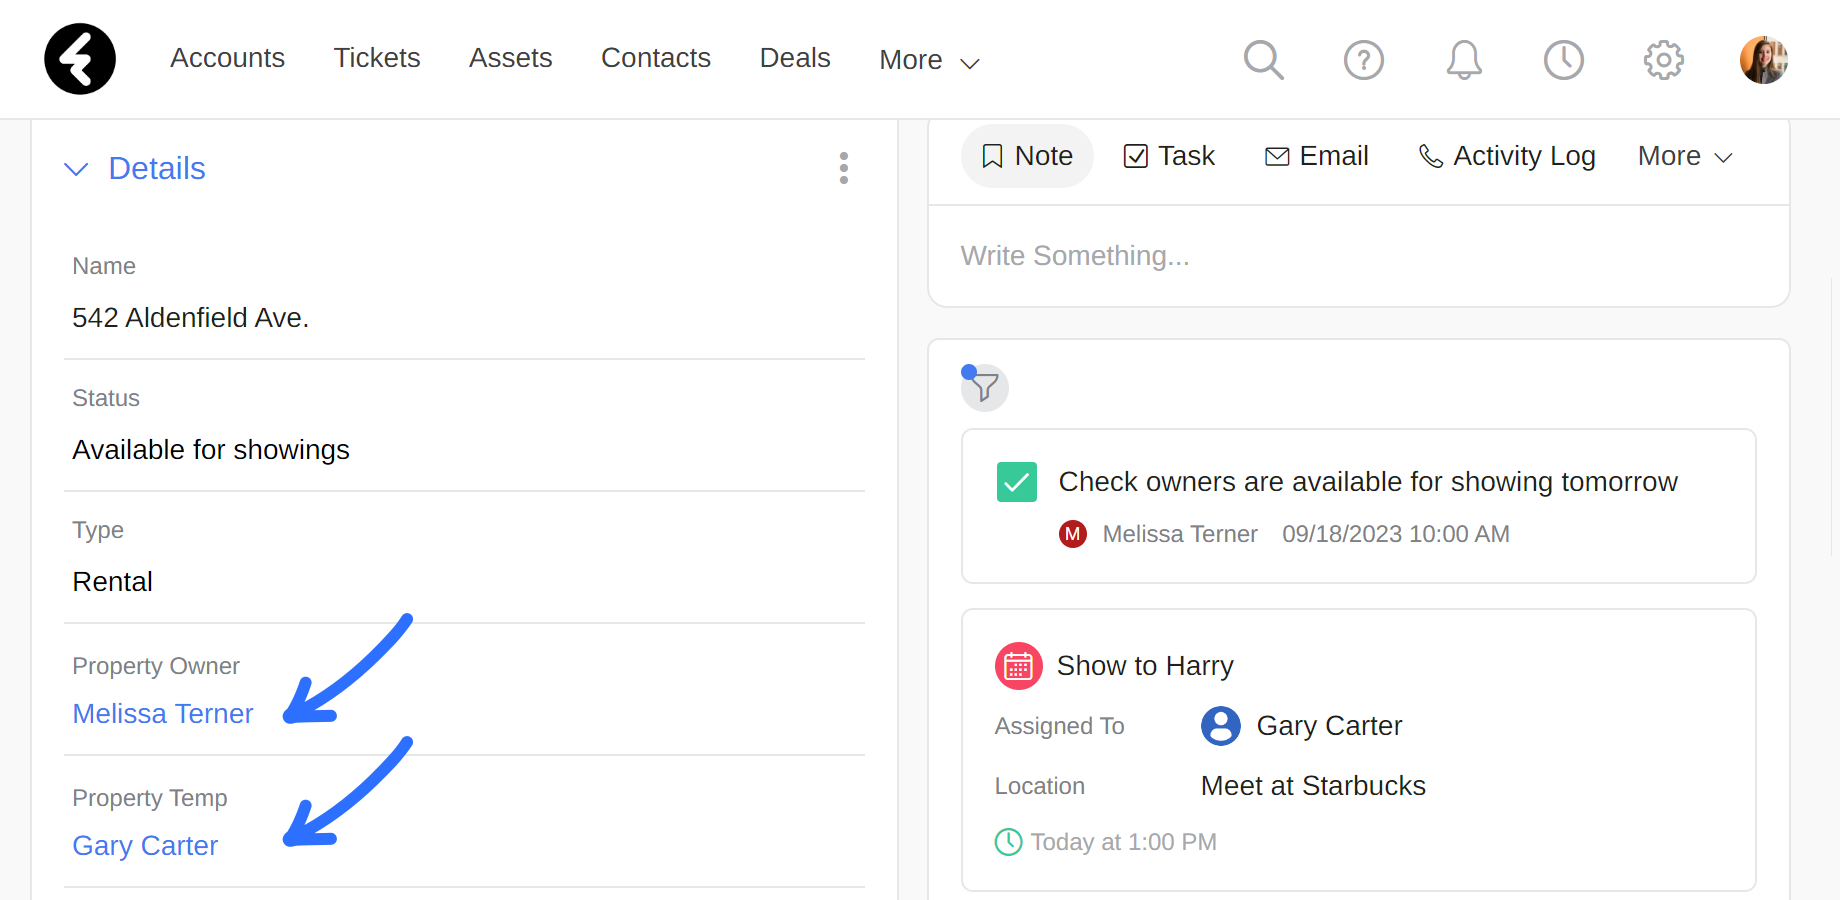
For example, a real estate agency may have ten set property managers who are set as the managers for each property. These are assigned in the property object using the user lookup field Property Owner. In addition to the main property managers, the agency hires temporary employees during busy seasons to show properties. Busy properties are assigned a temp who helps with the property, but is not the official manager. The temp is assigned in the property object using the user lookup field Property Temp. To learn how to create custom lookup fields, click here.
Temps are often assigned to multiple properties from different managers. The agency would like to provide each temp with access to data on the properties they are assigned to, without allowing them access to other properties. This means that the sharing level cannot be done through the property managers, who are the system owners of the property records, because each manager may be assigned to properties which the temp is not assigned to and vice versa. By using custom sharing, you can set up a filter which solves this problem.
To start, create a role for your temporary employees, such as the role Temp. Click here to learn how to set up a new role and open its settings. Next, make sure that each temporary employee's user profile has their role set to Temp.
Once you’ve set up and opened the Temp role settings, find the object you’d like to provide conditional access to, in this case the Properties object. Under the Sharing column of the Properties role, select the Custom option from the dropdown menu. You can now create a custom filter which compares the user set in the Property Temp field listed above and the current system user. Choose the PropertyTemp lookup field option from the list of object fields, and then choose the operator Current User. Click Apply, Save in the bottom corner and then Save in the top right of the Temp role page. Now each system user whose role is set to Temp will only be able to access properties where they are set as the Property Temp.

Example: Accounts by status
Another common use for custom sharing is when you’d like to provide access to accounts based on their status. In this way, you can make sure that your employees are only dealing with customers who are relevant to their responsibilities. This is great for organizations where accounts cycle through account owners from different departments based on their status. For example, you can set the sales team to view leads, proposals, negotiations, and qualifications, while the account managers and customer success teams will only see active customers. This will help keep your organization well segmented between each employee's separate responsibilities.
To set this up, you’ll need to set custom permissions for the accounts object on each relevant role. Open up the Sales role page, find the Accounts object, and select the Custom option under the Sharing header. Now add a filter where the field is set to Status, the operator is set to Equals, and the value has the options Lead, Proposal, Negotiations, and Qualifications. Next click Apply, Save, and then save the main sales role page.
Now go to the Account Manager and Customer Success role settings pages and follow the same steps. This time, when choosing the value options only choose the Active option. Once you’ve saved all three role settings, you’ll successfully provide access to your accounts based on their current status and keep each account in the right hands.
Example: Assets by product
One useful way to implement custom sharing is when choosing which assets employees have access to. You can use the product field in the assets object to set which assets each role has access to. For example, a furniture company does home deliveries, installations, and assemblies. Each role in the company has different assets they need access to. The Assembly role needs access to any assets where the product needs to be built for the customer, like closets or beds. The employees under the Installation role need access to any of the assets which need to be installed individually, such as appliances. The owner of each asset is the employee who made the sale, and cannot be changed as they are in charge of the asset throughout the entire process and receive a commission for each asset. By using custom sharing, you can control which assets each employee has access to, so that they only see assets which they are in charge of the installation or assembly of.
To start, open the Assembly role page, or create one if it does not yet exist. To learn how to create and access role pages, click here. Next, find the Assets object and click Custom under the sharing settings to open the custom sharing filter. Now click Add Filter, set the field to Product and the operator to Equals. You can now choose any of the products in your system to set which assets the assembly team will view. For example, you can choose beds and closets. Click Apply, Save, and then Save on the assembly role page to save your settings. Now the assembly team will only have access to the assets with the selected products. They can easily organize any assets they are responsible for without getting mixed up with other teams.
You can now follow the same steps for the Installation role, but choose the products which require installation. Under Assets Custom Sharing, create a filter which only displays assets when the Product field is set to appliances, such as dishwashers, ovens, and washing machines. By saving this filter, your installation team will only see the assets which they need to handle. They’ll be able to easily access installation details for any relevant assets and won’t accidentally use other assets.
By setting up custom sharing for each role, you not only protect sensitive information, but also ensure that your employees don’t get confused with assets that are not relevant to them.