Setting user roles
Updating a user’s role
Each user has access to their own role through their profile page. In addition, access to all the roles and users can be found in the system settings. By accessing a user's role, you can either change the role assigned to the user or access and change the role’s settings.
Opening your profile
You can use your profile to check which role your personal user is set to, change which role is assigned to your user, or edit the permissions of your role, as long as you have the relevant permissions.
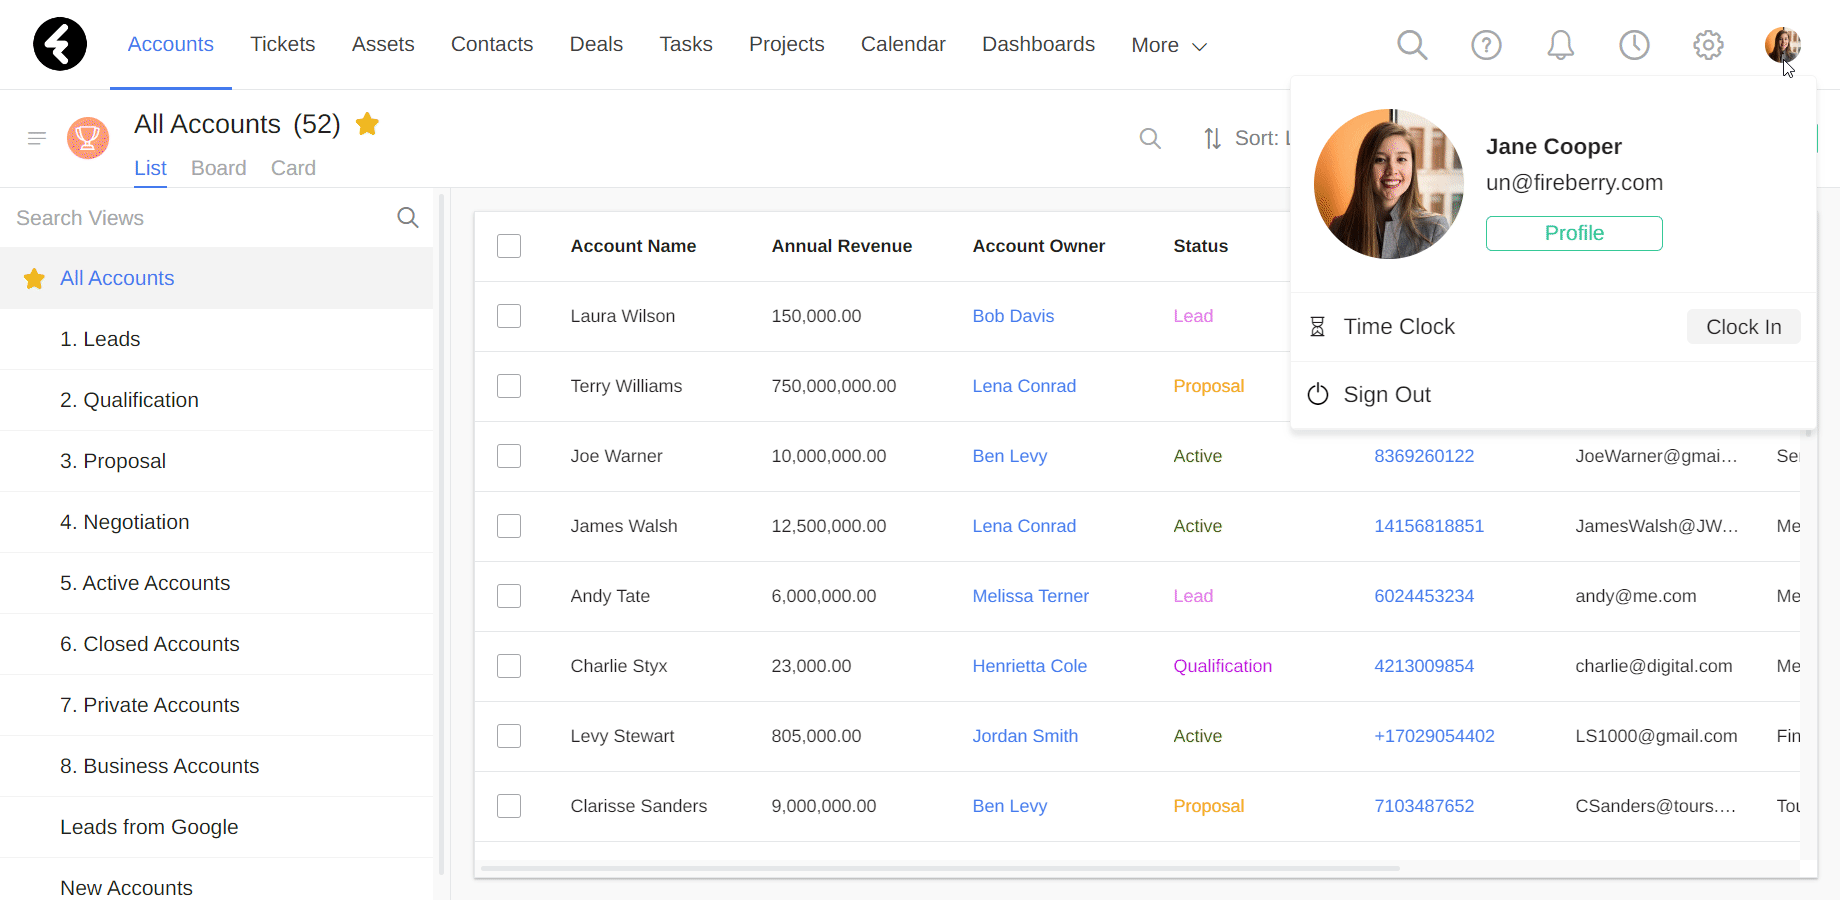
To start, click your profile picture in the top right corner of the page and then click the green Profile button. This will open your profile, where you can find a section titled User Settings, and the Role field within it. By clicking on your assigned role, which will be displayed in blue under the Role heading, you’ll open the role’s permission settings. For example, if your role is set to Admin, you’ll open the admin role settings.
Opening all user profiles
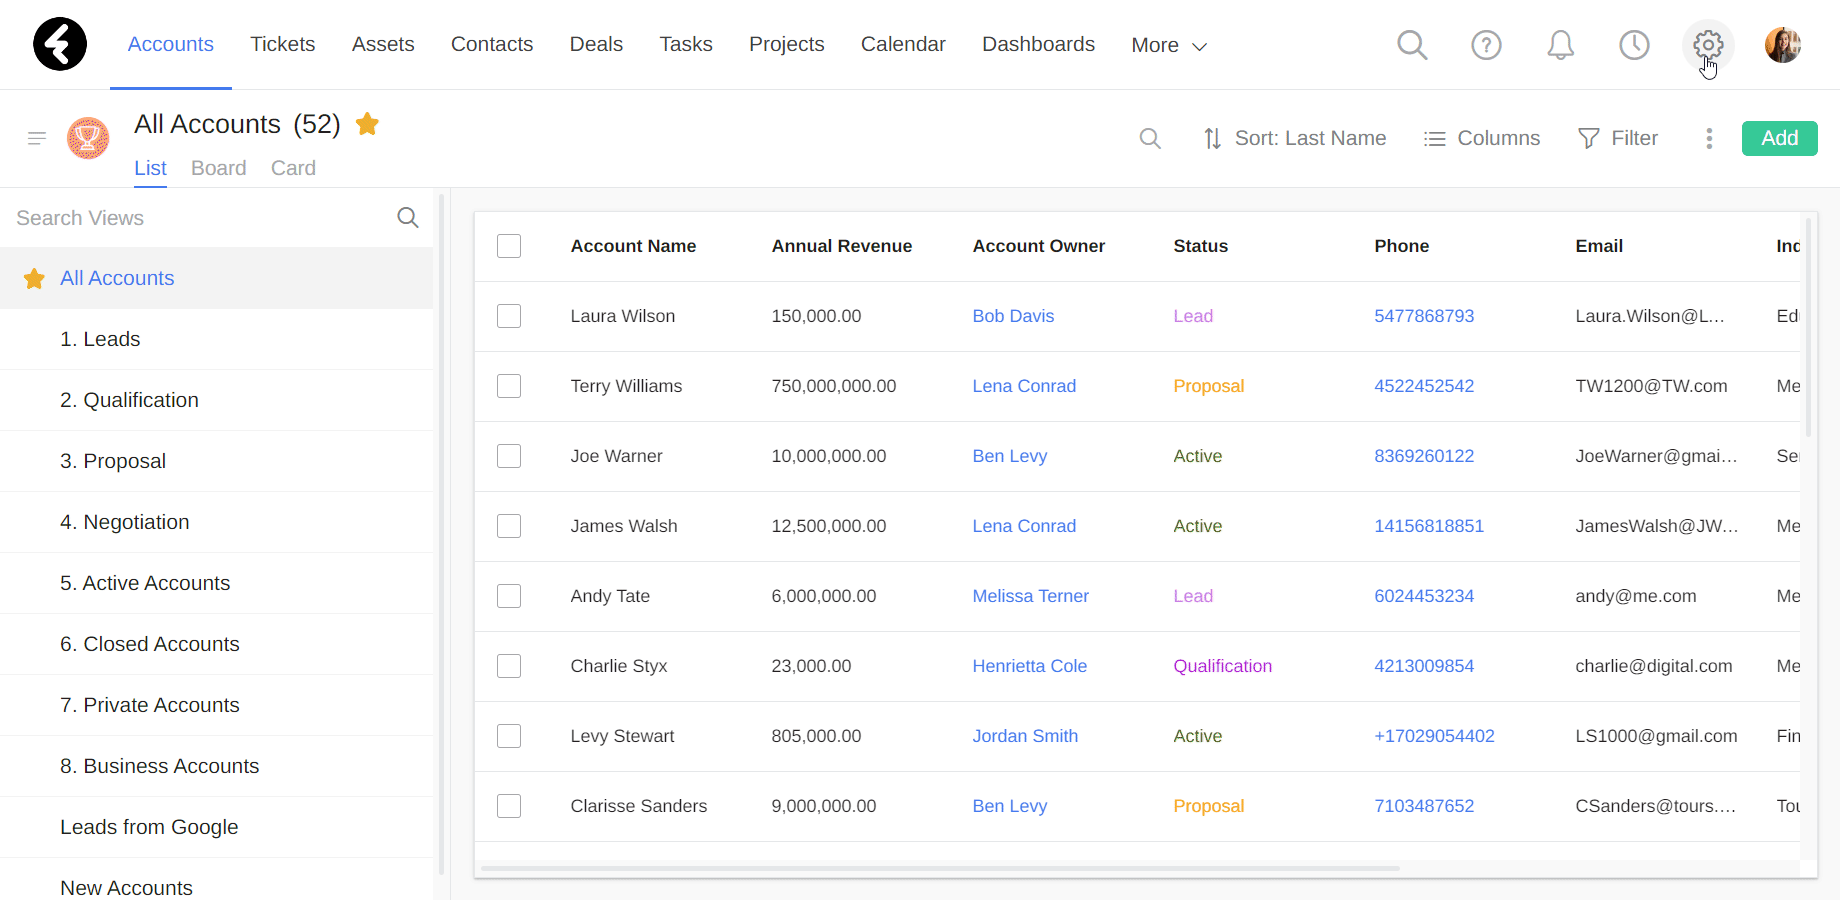
If you’d like to update a user’s role, you’ll first need to open the user’s profile. Start by clicking the gear icon on the top right of any page to open the system settings. This will automatically open to the Users page, where you’ll find a list of all the system users. Find the user you’d like to update, click on their record to open it, and then find the Role field under the User Settings section. Here you’ll be able to see the user’s current role in blue. By clicking on it, you’ll open the selected role’s settings.
Changing a user’s role
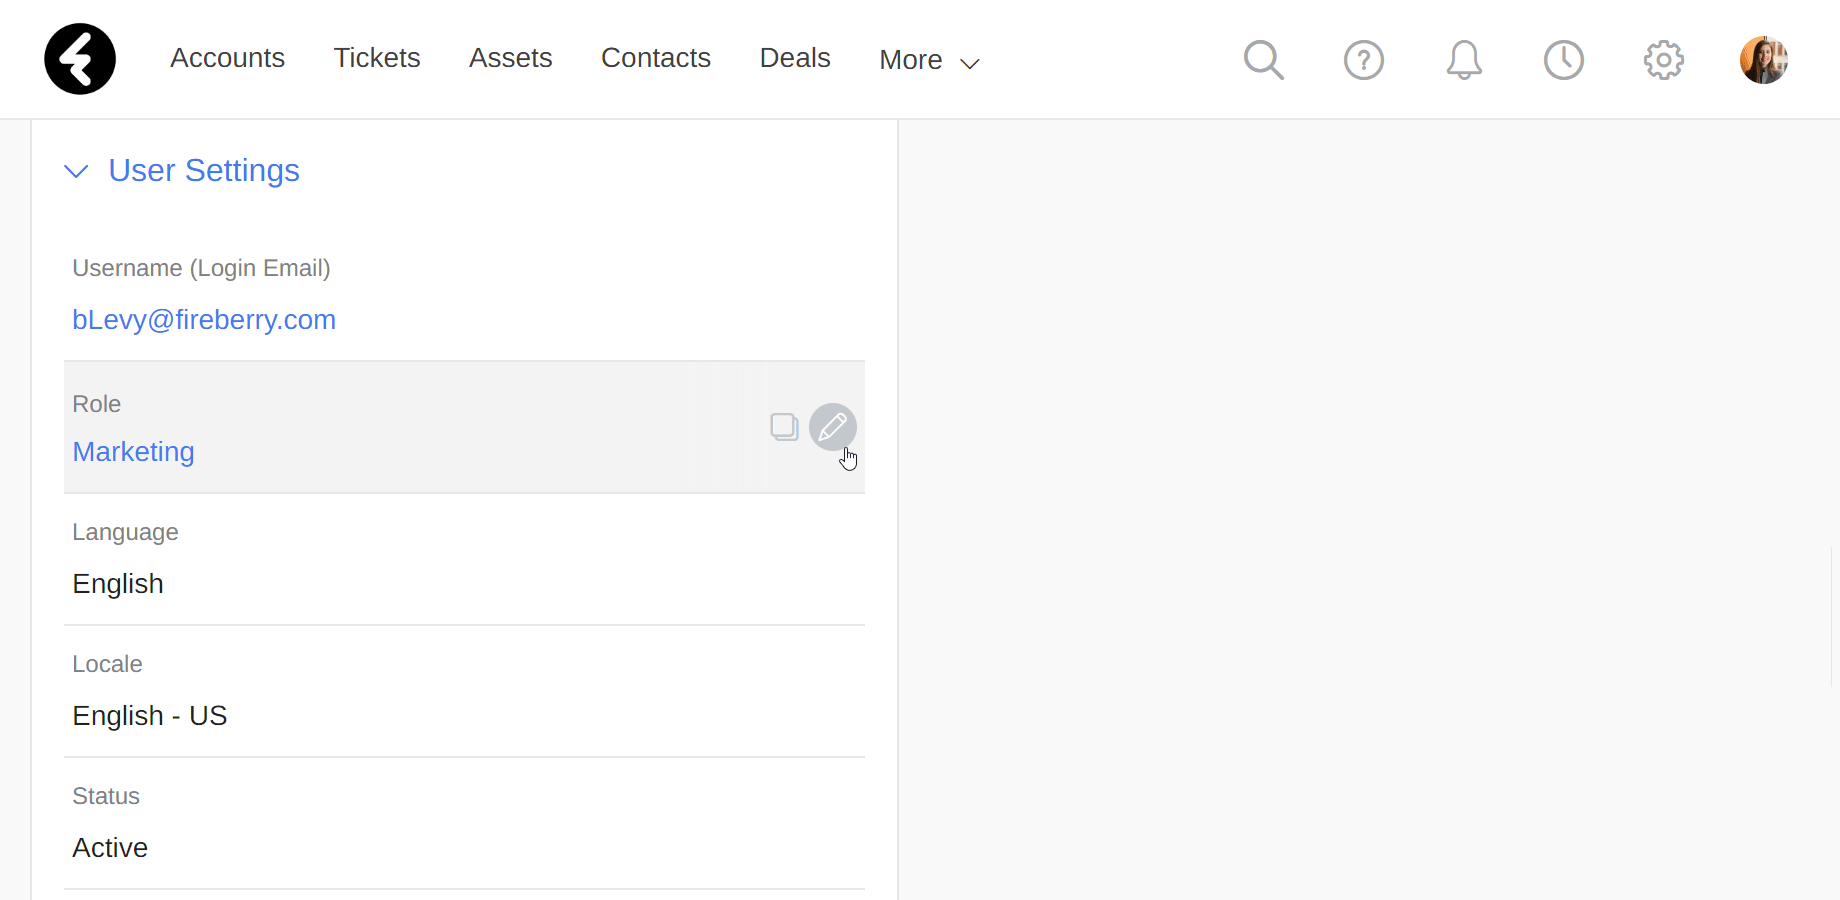
If you’d like to change a role, simply hover over the Role field, click on the pencil icon, and then click the magnifying glass. This will open a list of all the existing roles, which you can choose from to assign to the selected user. If you’d like to add a new role, see below. You can click the Cancel button on the bottom at any time if you change your mind. Once you’ve selected a role, click the green check mark to save your changes.
By clicking the X, you’ll delete the role which is currently set. However, as the Role field is a required field, you’ll need to set a new role before being able to save your changes.
You’ll only be able to change roles if you have Read and Edit permissions for the Users object. Otherwise, the Role field will be displayed as a read only field.
Accessing system roles
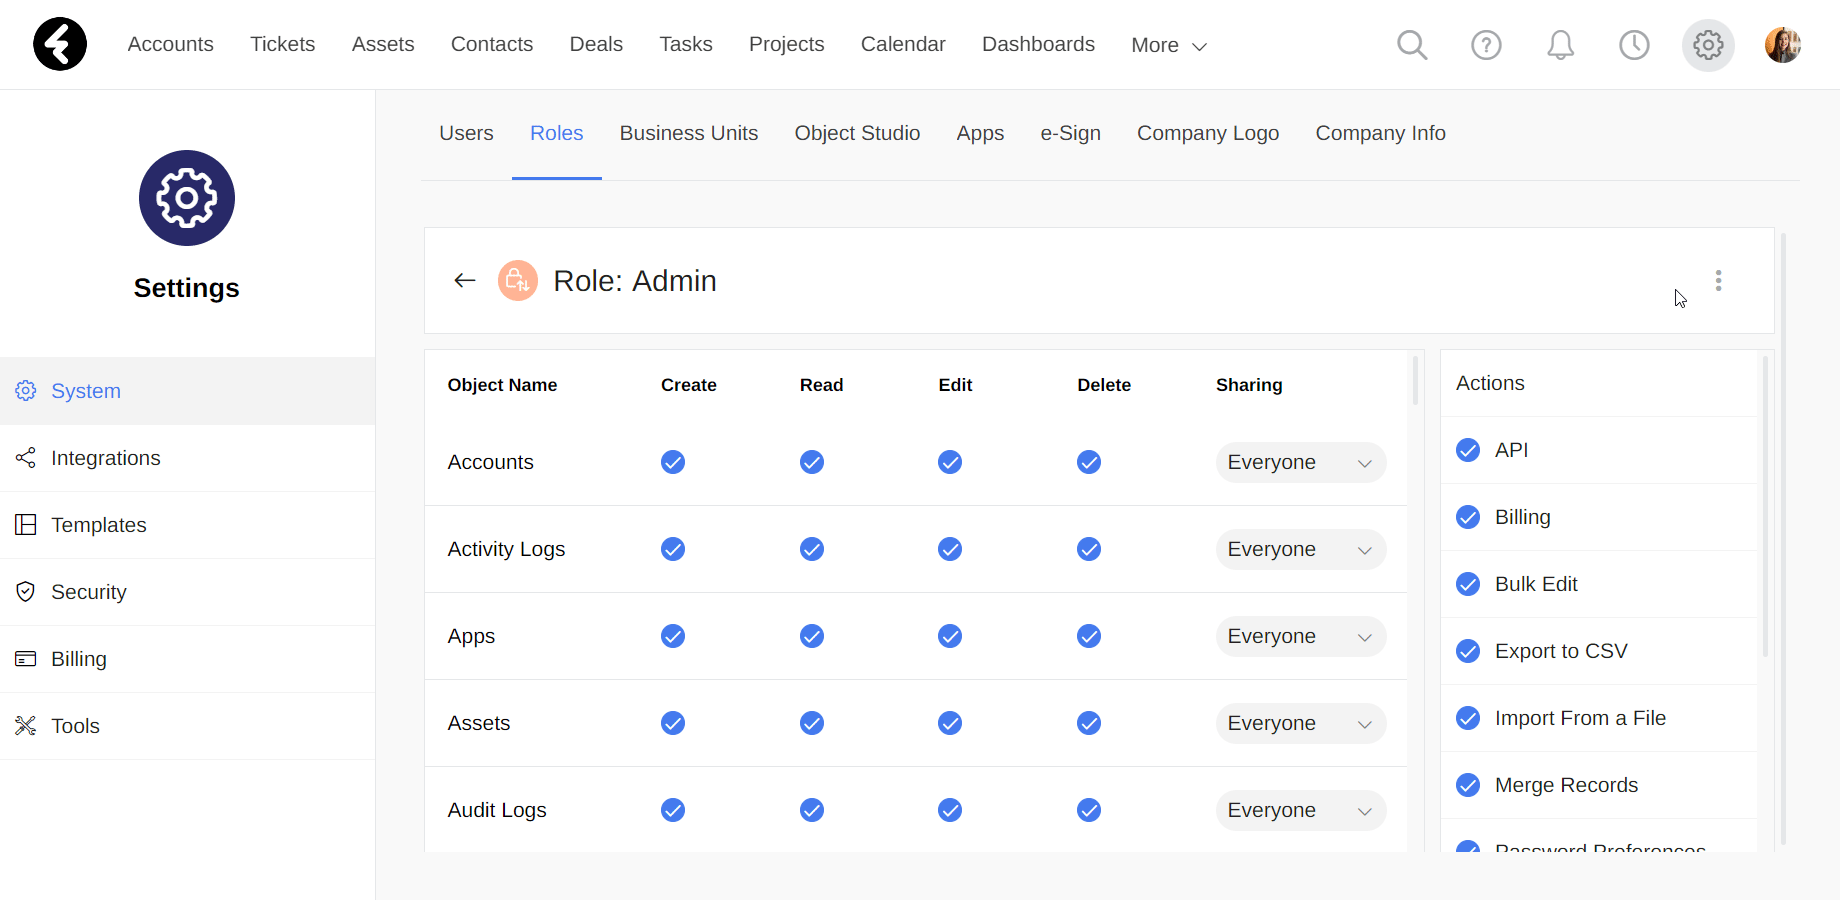
To open a list of all the roles in the system, first click the settings gear on the top right. Then, under the Systems tab, open the Roles page. Here you’ll find a list of all the roles in your system. To open a specific role’s permission settings, simply click on it. The roles page functions like any other view, and can use sorting, filters, and more. To learn how to edit views, click here.
Managing system roles
By creating different system roles, you can easily manage what each system user has access to in your system. You can create, edit, duplicate or delete roles.
Creating and editing roles
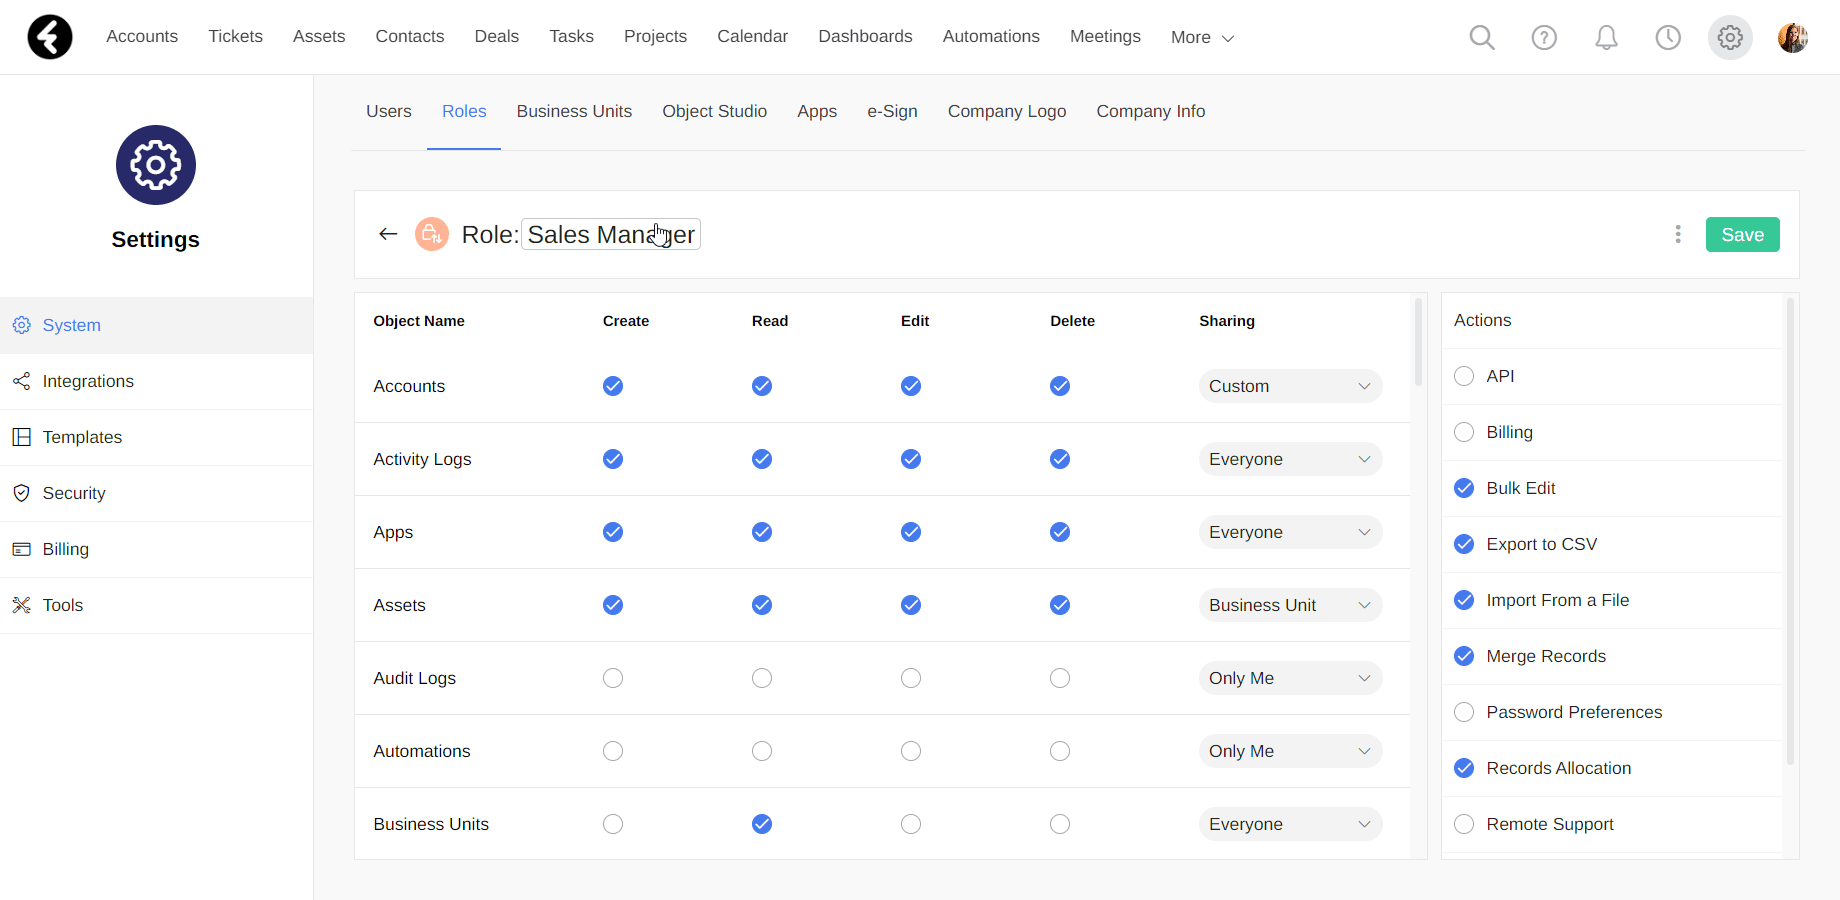
To create a custom role which doesn’t yet exist, simply click the green Add button on the top right of the Roles page. This will open a new role titled New Role. To edit an existing role, simply click on the existing role’s record in the Roles page. For example, you can click on the Sales Manager record to open its settings. Once you’ve opened a new or existing role, you can begin editing it.

To change a role's name, simply click the name of the role on its page, and then change it. Click Enter on your keyboard or click somewhere else to temporarily save your changes. You can also change any of the permission settings by clicking the blue checkboxes, which is explained in detail here.
Once you’ve finished setting up a role, be sure to click Save on the top right to permanently save your changes.
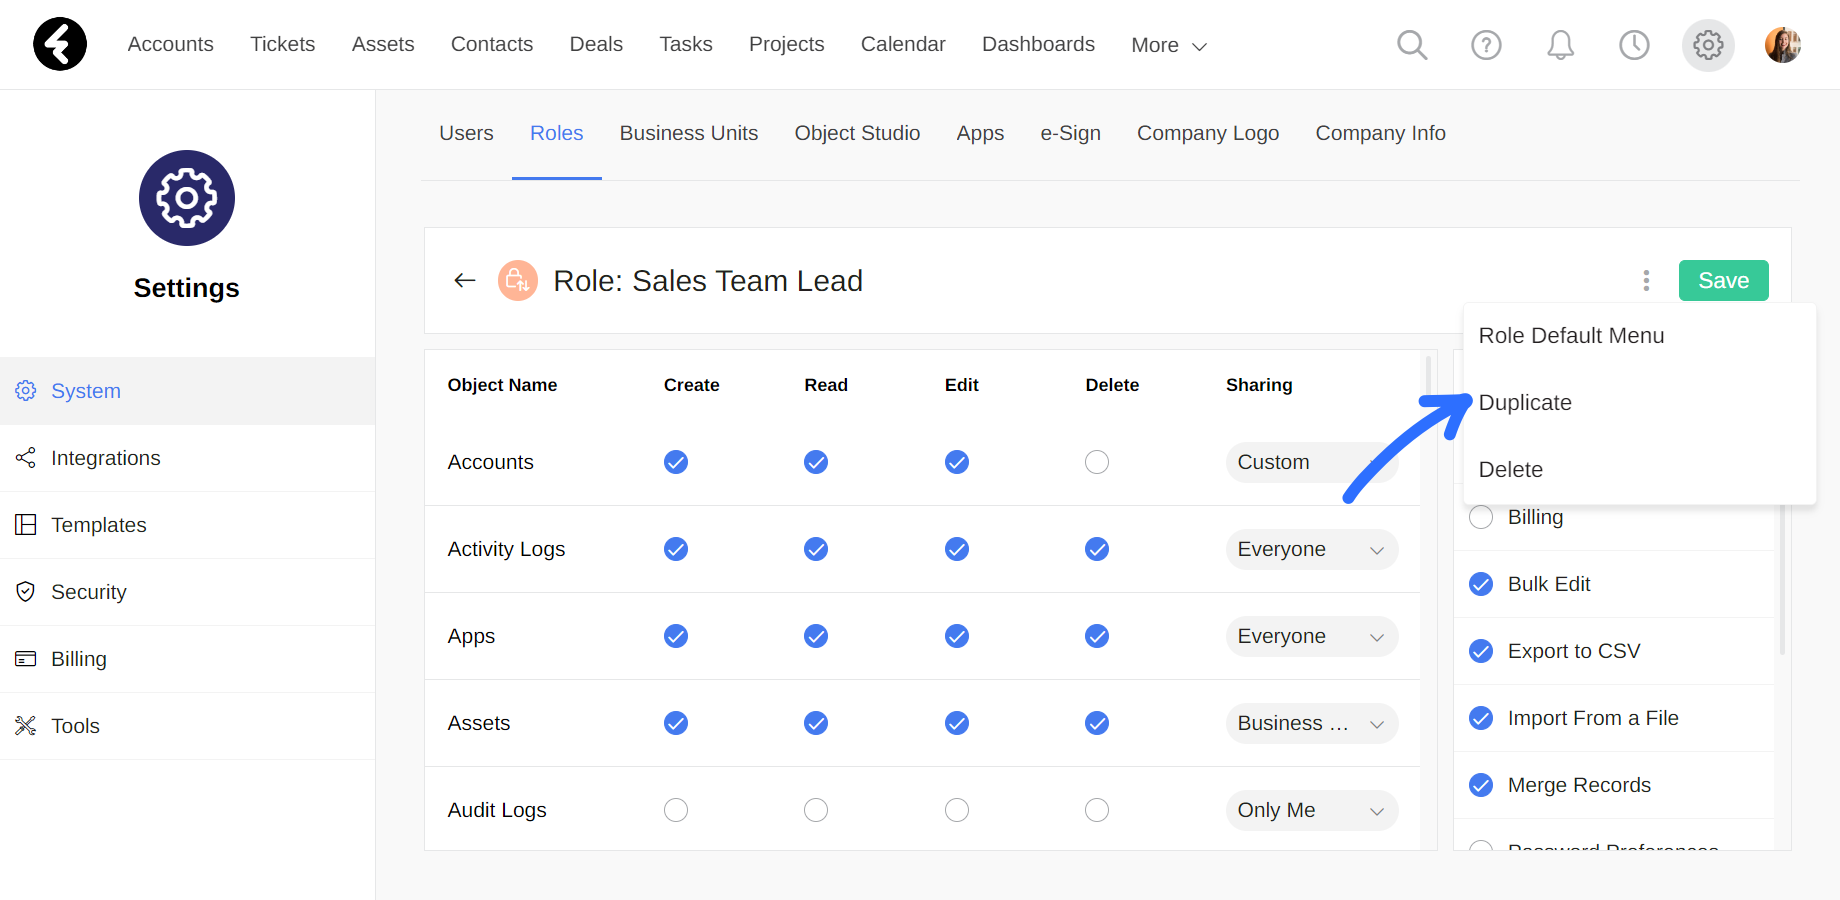
Duplicating roles
Click the three dot menu on the top right of any role’s page to access additional settings. By choosing the Duplicate option, you’ll create an identical copy of the current role which is titled as the name of the original role followed by the word Copy, for example Sales Manager Copy. All the settings of the original role will be copied, meaning the object permissions, actions, and role default menu.
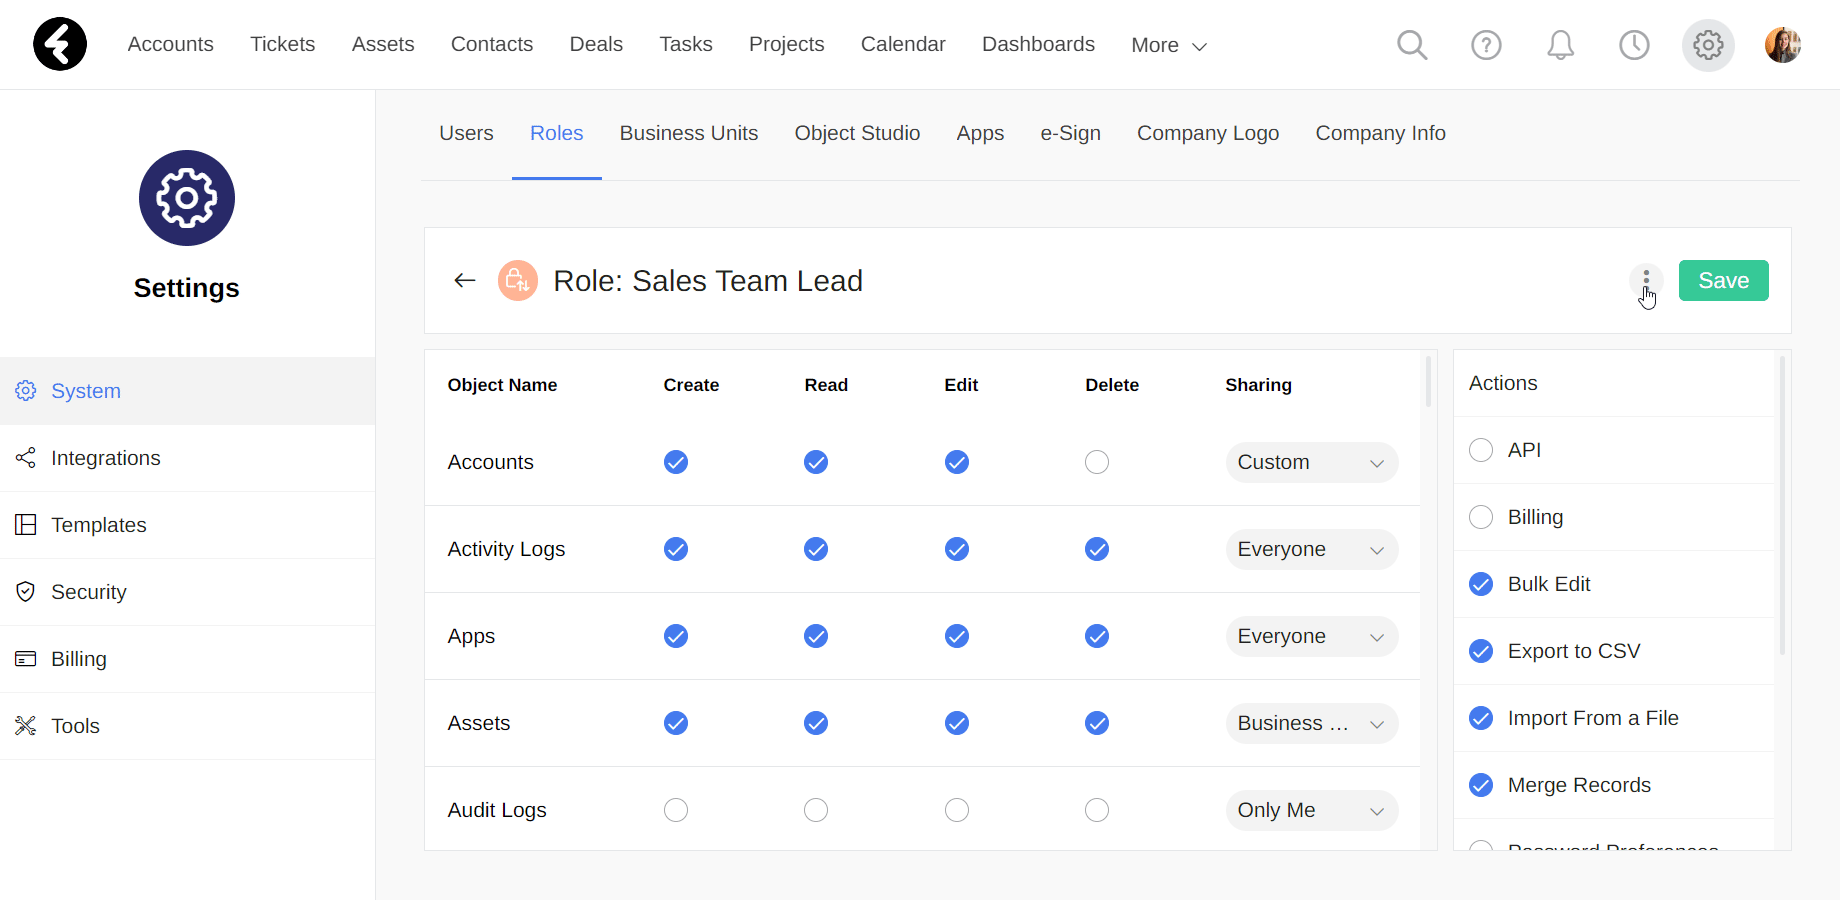
Deleting roles
If you'd like to delete a role, simply click the three dot menu and choose the Delete option. A pop up will open where you’ll need to type in DELETE and click the Delete button in order to confirm you’d like to permanently delete the role. Once you confirm your choices, a green pop up will be displayed on the bottom of the screen which confirms the role has been successfully deleted.
You will not be able to delete a role which is currently assigned to a user. If you try to do so, a red pop up will be displayed with the message Internal Server Error. To delete the role, find any users which are assigned to the role, assign them to a different role, as is explained above, and then go back and delete the role.
Role default menu
You can use the role default menu to set a default topbar menu for any new users who are assigned the current role. This creates an easier transition for new users, as you can provide them with easy access to all the objects they are most likely to use regularly.
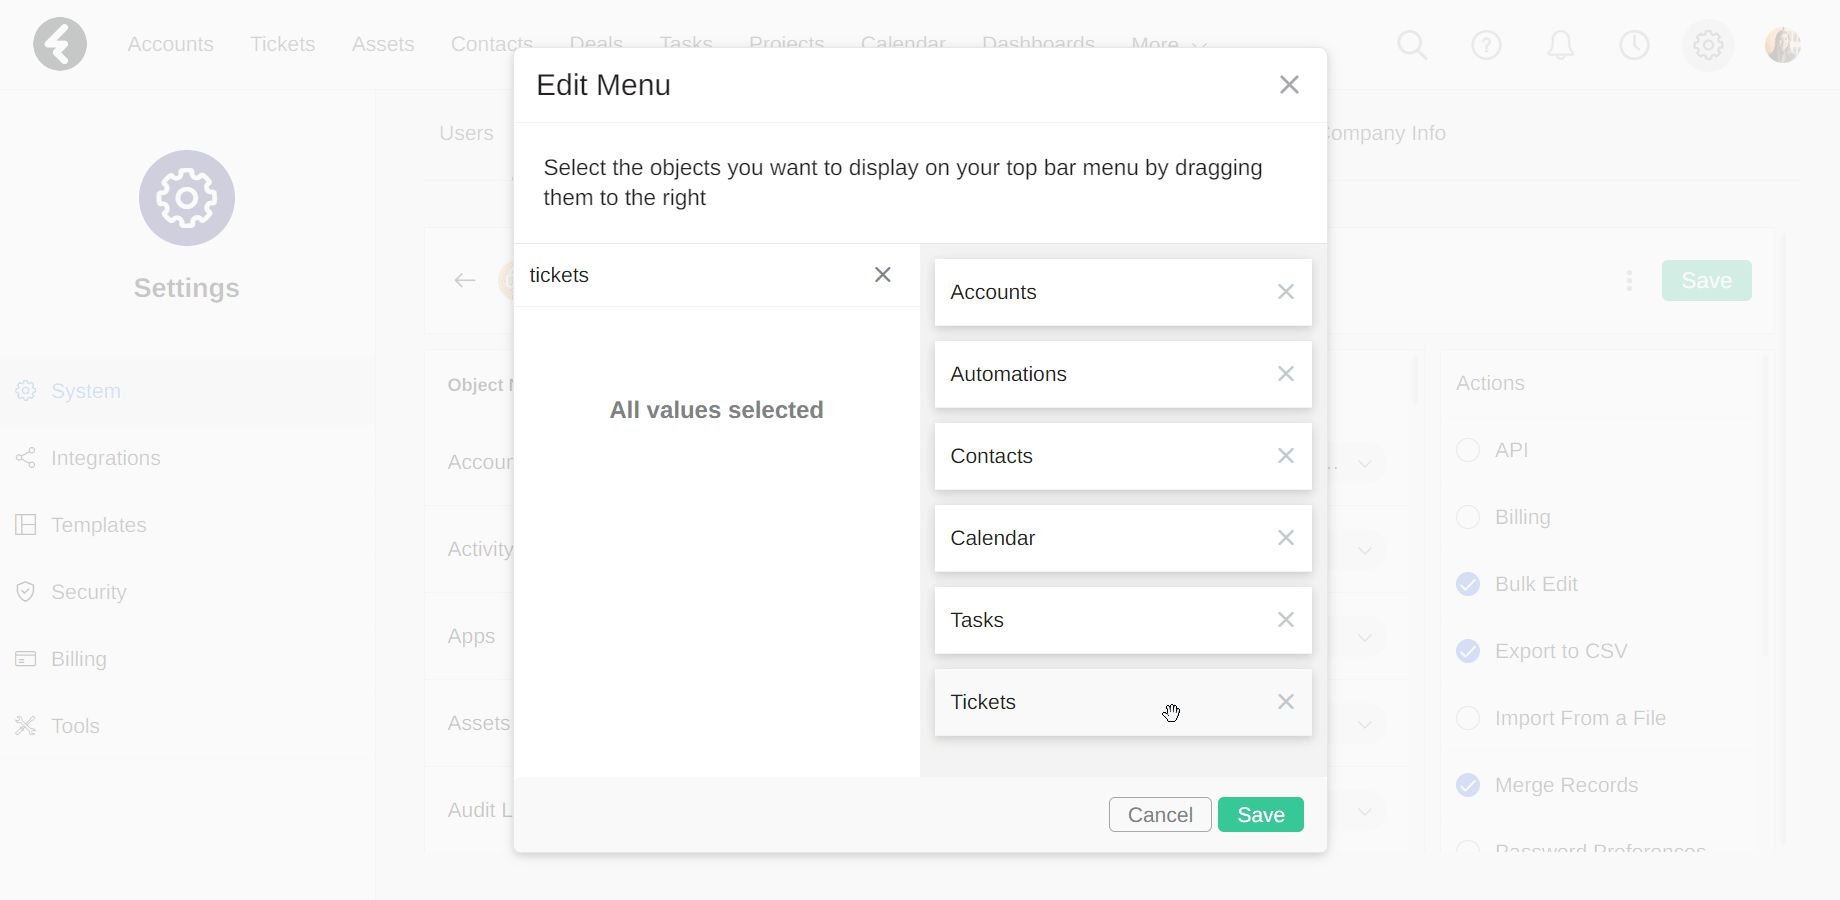
To start, click the three dot menu on the top right of any role page, and then select the Role Default Menu option. This will open the Edit Menu dialog box, where you can use the left side to search for and select any object to add it to the menu. For example, you can add the Tickets object to the Support roles default menu.
Your selected object will be added to the bottom of the editable menu on the right. You can easily reorder the menu by dragging and dropping any of the objects. They will appear in the order you choose where the top will be the leftmost object and so on. To remove an object, simply click the X on the right side of its name. Once you’ve finished setting up the default menu, be sure to click Save on the bottom right, followed by saving the main role page. If you don’t save the main role page, your newly created menu will not be saved.
Admin role and primary user
The admin role is a default role which allows total system wide permissions. It must be assigned to the primary user, who has specific permissions in the system.
Admin role
The admin role is a built in role in the system, and provides access to every option within the system. Anyone with this role can always access all data and system settings. You can assign this role to any system user. The admin role is the only role which cannot be edited or deleted. This means the green Save button and the Delete option will not exist in this role’s page editor. You can change this role’s name. If you have, you can check which role is the original system admin role by checking for the Save or Delete options.
Primary user
The primary user is automatically set as the user who initially signed up for the system. This user cannot be deactivated, and must always be assigned to the Admin role. The primary user will be the contact point between your organization and Fireberry. In addition, if you choose to export all your data from the system, it will be sent to this user’s email address.
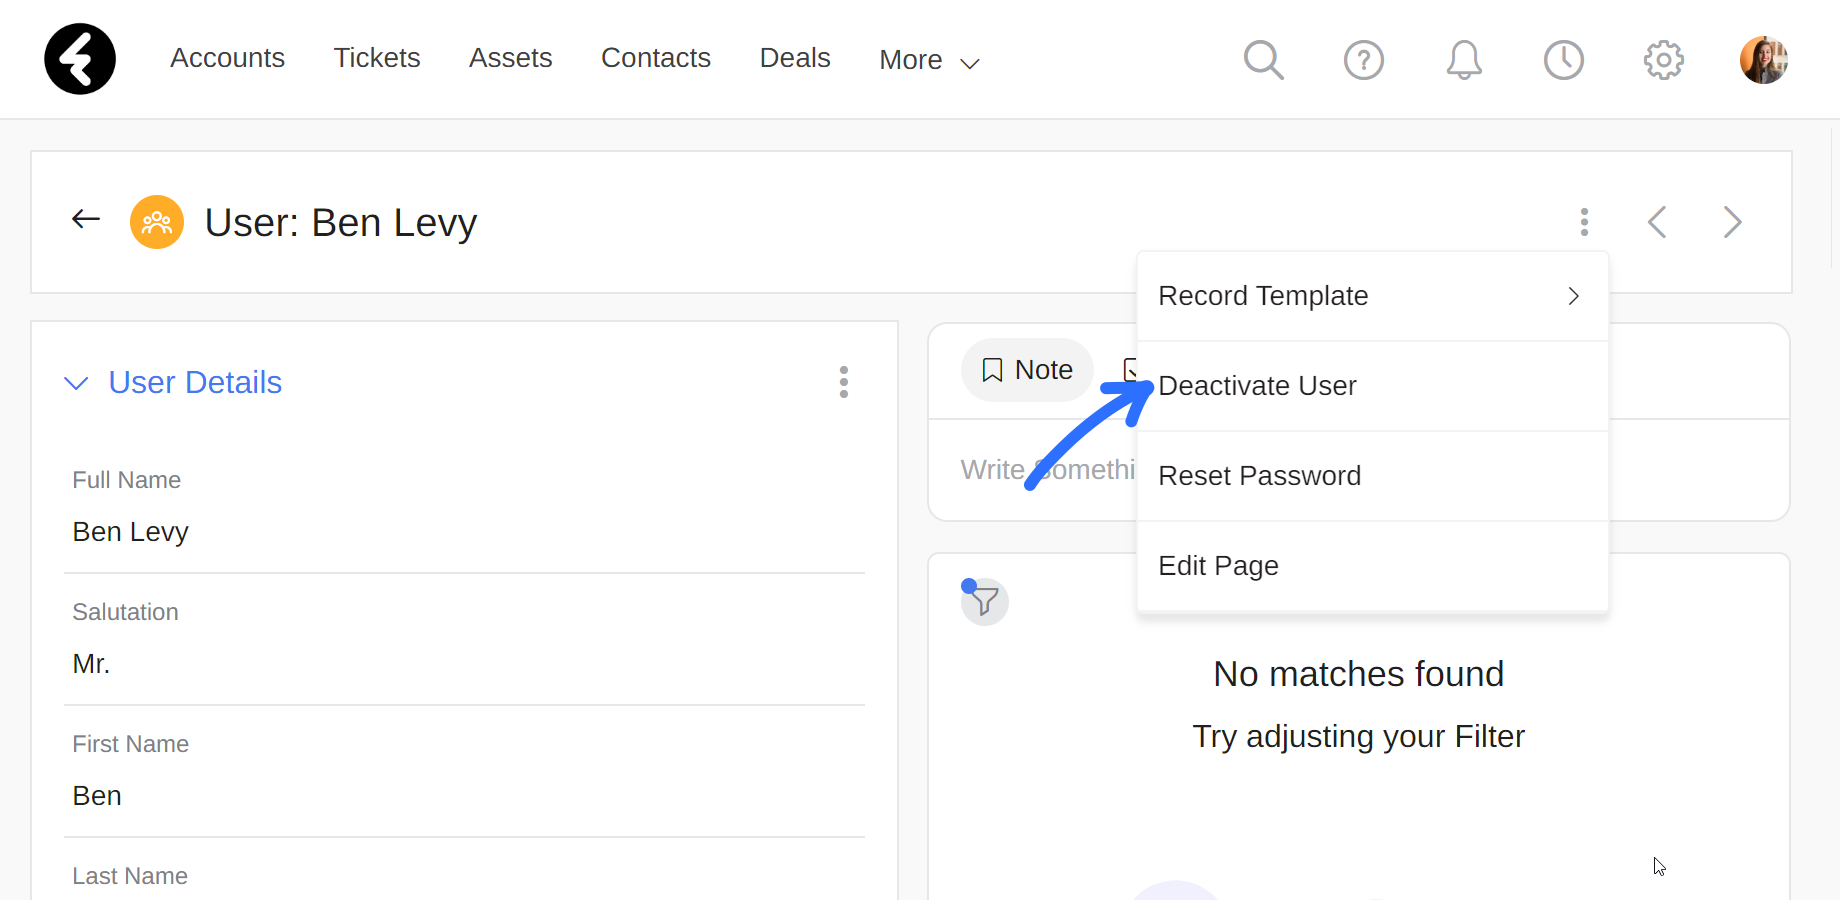
If there is only one admin user in your system, they are the primary user. If you have multiple users assigned to the admin role, you can check for the Deactivate User option in the three dot menu of all the users with the admin role. The user who does not have the deactivate option is the primary user.
To change your primary user, you can email our support team at support@fireberry.com.