Editing views
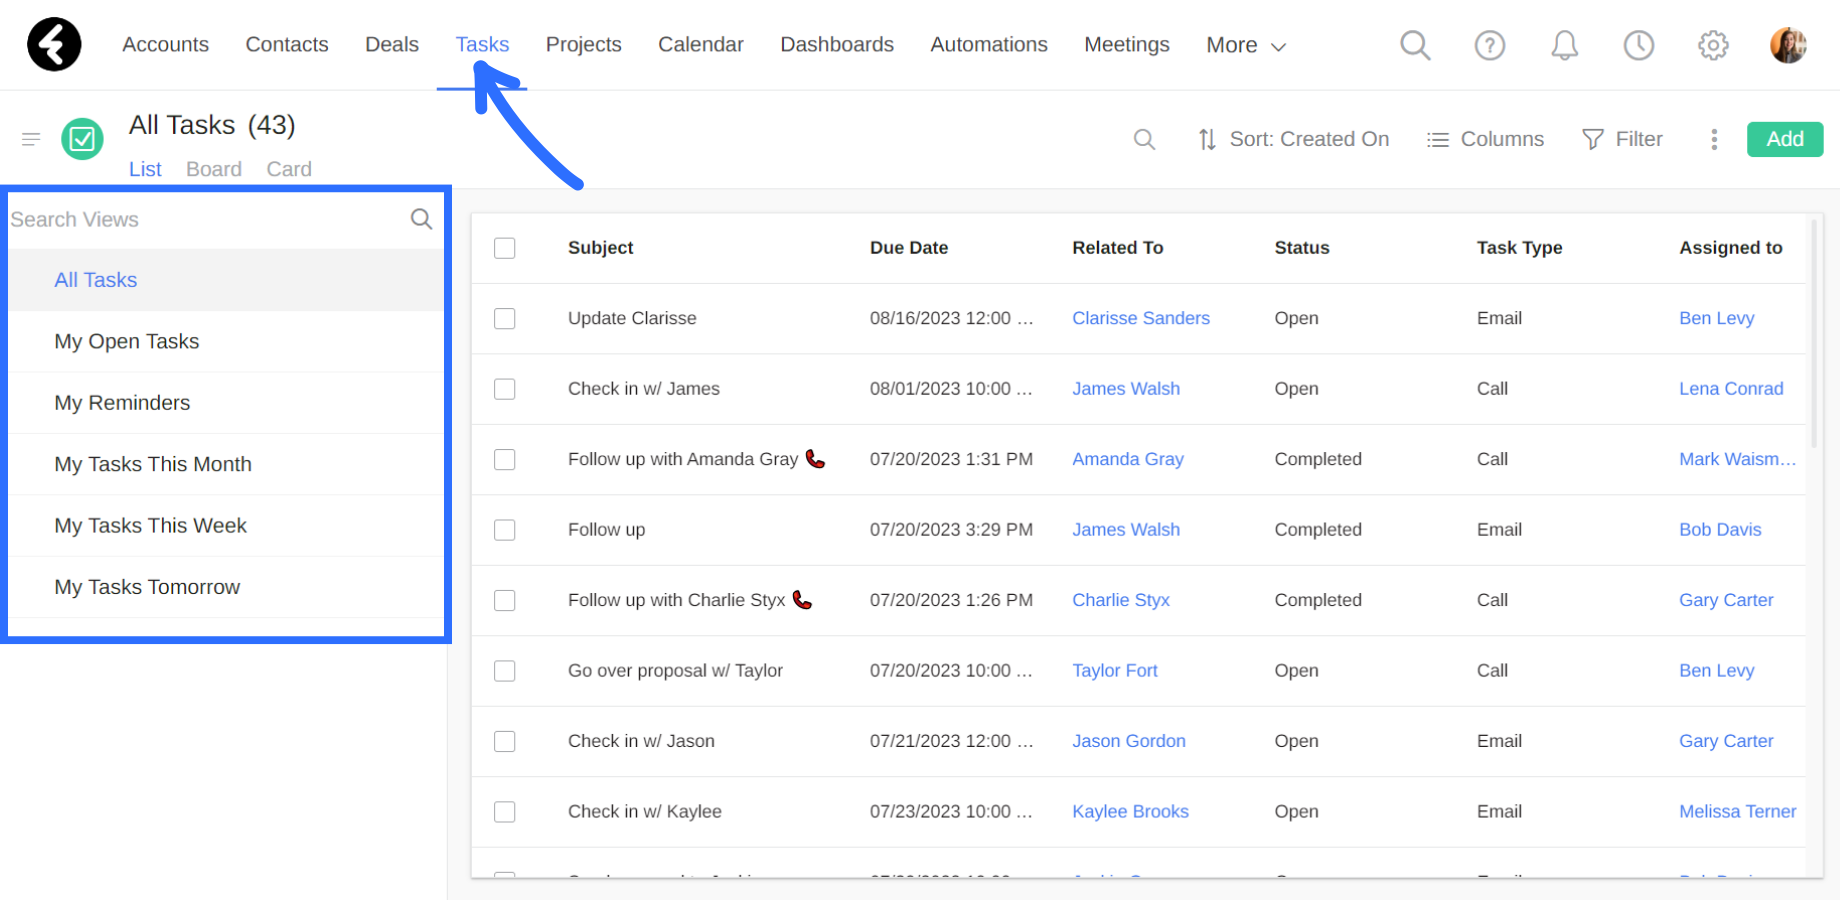
Every built-in object in Fireberry contains built-in views on the left of the screen. To open an object, simply click on the object’s name from the top bar menu, which you can learn more about here. You’ll then find a left sidebar with all of the existing views. Each view displays the records which exist in the current object, according to the settings and filters set for the specific view.
For example, under the Tasks object you’ll find the built in views All Tasks, My Open Tasks, My Reminders, My Tasks This Month, and more. The All Tasks view will display all the task records in the system, while the My Open Tasks will only display the task records which are assigned to the current user and have their status set to open. The view you are currently seeing will be colored in gray in the views list on the left.
Sorting
You can sort the records in a view according to any field in the object. This will order all the records in the view according to the chosen field. Sorting is an available option for both the list and card view types.
Permanent sorting
To start, click the Sort button on the top right of the view. Then search for and select the field you’d like to sort by. For example, you can choose to sort all the Account records by the Last Name field. This will automatically sort all the records in the current view in descending order. Descending order will display letters from Z to A, followed by numbers from nine to zero, and lastly any records which have the selected sort field set to blank. Ascending order will follow the opposite order. To switch between ascending and descending order, simply click the gray arrow to the right of the field name in the sort box. The arrow will point up to signify that the records are currently ordered in ascending order, and down for descending order.
Temporary sorting
You can also sort records by clicking the name of the field in any header column of a list view. This sort is temporary and will only sort the records until you refresh the page. For example, you can click Status to sort the records by the status field. A black arrow will appear and point up to signify the use of ascending order or down for descending. If you’d like to switch the order, simply click on the field name again. As soon as you refresh the page, the records will be sorted by whatever is set in the main sort settings.

Columns
Choosing the columns a view will display will set which object fields and related fields you’ll be able to easily see and access. Each view type has different uses for the columns chosen.
Adding and editing object fields
By clicking the Columns option on the top of the page, you’ll open a list of all the fields in the current object. You can use the search bar at the top to quickly find any field. The toggle to the left of each field name lets you set a field as a column. To add a field as a column, click the toggle next to it to set it to green. If you’d like to remove a column, simply click the green toggle. This will turn the toggle gray and remove it. To change the order of your columns, simply drag and drop the fields. The top field will be the leftmost field, and so on. For example, you can search for and add the Last Name field in an accounts view, set it as the first column by moving it to the top of the list, and then remove the Account Name field.
Related fields
Any lookup fields in the current object will have a gray arrow on the right under the Columns option. By clicking this arrow, you’ll open a searchable list of all the fields within this related object. For example, you can click the arrow next to the Account Owner lookup field, which relates the accounts object to the users object. This will open a list of all the user fields, which you can choose to add to your view using the toggle on the left. The selected field will be added to the main column list, which you can return to using the back button on the top left. The name will be displayed as the name of the selected field followed by the name of the lookup field in parenthesis, such as Phone (Account Owner). This field can be moved or removed like any other field.
View types
For each view type, a different amount of columns will be displayed. The column settings are shared between the different views, and change dynamically. This means that if you change the columns in any view, it will change which columns appear in the rest of the views. You can set the columns in either the list or card views. The board view has its own columns button, which only affects the board view.
You can add up to 20 columns to a view. In the list view, all 20 columns will be shown, and you can use the scrollbar on the bottom of the page to see any columns which don’t fit on your screen. In the board view, the first three columns will be displayed on each record’s card, and in the card view the first four will be displayed.
Filters
You can use filters to control which records will appear in your view. For example, you may wish to create a view which only displays accounts where Google is set as the lead source.
Setting a condition
To start, click the Filter option on the top right of an account view, and then click the green + Add Filter button. This will open a new condition with three sections. The Field section allows you to search for and choose any field or related field, such as the Lead Source field. To select a related field, use the gray arrow next to any lookup field, which you can learn more about here.
Next use the Operator field to choose the type of check or comparison which will be performed. The options provided in this section vary depending on the field type you’ve chosen. Each field has the options Equals, Is not equal to, Is empty, and Is not empty. Number and date fields have the Greater than and Less than options, and date fields also have the Between option. Text fields, including phone and email fields, have the options Starts with and Does not start with. For example, select Equals to check if the Lead Source field chosen above is equal to a specific value.
Next, set the value. It will need to match the field type you’ve chosen, so that number fields require number values, date fields require date values, picklist fields allow you to choose from the options in the picklist, and so on.
Once you’ve set your new condition, click Apply. This will temporarily save your new condition and activate it so that the view displayed will be filtered according to the new condition. To permanently save this condition in your filter, click the Save button on the top left.
Multiple conditions
To add another condition, simply click the green + Add Filter button and set the condition’s fields. Be sure to click Apply after setting each condition. These conditions will be under the Meet ALL of the following conditions heading, and each condition under this heading must be met in order for a record to be displayed in this view. For example, you can create a view which will only display accounts if their status is set to Active and they are at least two months old. To do so, add two conditions under the Meet ALL of the following conditions heading. The first condition should be set as Field: Status, Operator: Equals, and Value: Active, while the second should be set as Field: Account Age (Days), Operator: Greater than, and Value: 60. Now only accounts which have their status set to active and are at least two months old will be displayed.
You can also choose to create a group filter. To do this, click the down arrow on the right of the + Add Filter button and then click Add Group Filter. This will add a new blank condition under the heading Meet ANY of the following conditions. A record will only need to meet one of these conditions in order to be displayed.
For example, you can add two conditions here, one which checks if an account has more than ten employees and one that checks if an account is a business account. To do so, set your first condition to Field: Employees, Operator: Greater than, and Value: 10. Then add another condition and set it as Field: Account Type, Operator: Equals, and Value: Business Account. In this way, all the business accounts will be displayed, as well as any accounts which have more than ten employees.
If you want, you can create multiple groups by once again clicking the Add Group Filter option. Your filter will use all the conditions within it, so that any conditions under the ALL section must be met, and at least one condition under each ANY group must be met.
Sidebar
A list of all your current views can be found in the left sidebar of each object's main page. Using the sidebar you’ll be able to search for views, create folders, and more.
Order
The views in the sidebar are listed in alphabetical order so you can find them easily. This order follows the following hierarchy:
- Favorite views: These views will be marked by a yellow star to the left of their name and will always appear at the top of the view sidebar. If you have multiple favorite views, they will be ordered alphabetically as is explained below. To learn more about favorite views, click here.
- Blank spaces: These will appear at the top of the hierarchy, so that placing a space bar before a view will display it immediately after any favorite views. Additionally, the text “a a” will appear before the text “aa”.
- Symbols and punctuation: Any symbols or punctuation will come immediately after blank spaces, so that “1.1” will appear before “11”.
- Numbers: Numbers will be displayed from least to greatest, so that 0 will appear before 9. Because the sorting works on a character by character basis, the text “10” will appear before the text “9”.
- Letters: These will appear last and go in A to Z order.
- Folders: The list of folders will always appear after the list of all the views. The arrow on the left of a name will signify that it is a folder, by clicking the arrow you can choose whether you’d like to display the views inside the folder. The folders themselves will be listed according to the hierarchy listed above, as will the list of views within each folder.
Search
You can use the Search Views section at the top of the views sidebar to search for a view. The search bar will search and show any views which contain your search query in the name of the view. It will not show folders themselves, but will show any views which are inside of folders.
Additionally, you can click on the three lines on the top left of the page at any time to hide or show the sidebar.

Folders
You can use folders to organize your views according to topic. This may help you keep a clean and organized system. To create a folder, simply click on a view, drag it on top of another view, and unclick. This will put both the views in a new folder, and open an editor where you can set the name of your new folder. Once you add a name, press enter or click the green checkmark to save your new folder. You can click the X to cancel and delete the folder.
Folders will be signified by a gray arrow on the left of their name, which will point right when the folder is closed. Click on the folder to display the views within it, which will be signified by the arrows pointing down. To add or remove views from a folder, simply drag and drop them in or out. You can change the name of a folder at any time by double clicking its name. Type in a new name and click the checkmark to save it. You can also click the X to revert the name to whatever it was before you started editing. To delete a folder simply drag all the views out of the folder and it will disappear on its own. Folders will always appear at the end of the view sidebar.

Working with records
You can search for records by clicking the magnifying glass on the top of any view. This will search for records throughout the entire object, not just in the view you’re currently in. Each search must include at least two characters in order to search for records.
To add new records to an object from a view, first open any view in the desired object.
Then click the green Add button on the top right. This will open the default form, where you add any details you want to your new record. To learn more about the default form, click here. Once you finish adding all your new record’s information, click the green Save button on the bottom right. This will open the new record you just created. If you’d like to create multiple new records in a row, click the arrow on the right of the Save button and then click Save & New. A green pop up will appear in the bottom right corner to confirm that your new record was saved, and a blank form will be displayed.