Default and favorite views
Views display specific lists of records from a single object. The records included in the view, as well as the way they are displayed, is determined by the view settings. You can learn how to set up a view here. Each object must have one default view, and can have multiple favorite views. The default view is used in multiple places throughout the system, as is explained below. Favorite views allow for easy access to views you frequently use, and are not required.
Favorite views
Your top favorite view will be the view which opens automatically after you click on an object in the topbar menu. In the left sidebar you’ll find a list of views, where each favorite view will be marked with a yellow star. In this way, you’ll be able to easily find and open the views you use most often.
Setting a favorite view
You can set a favorite view in two ways. The first is from the view sidebar. Here you can hover to the left of a view name, where the outline of a star will appear. By clicking this outline, the star will turn yellow and your view will be set as a favorite view. This option will not be available for the card view type, as the sidebar is not displayed in card view.
You can also set a favorite view using the name of the view at the top of the view page. Simply hover to the right of the view name and then click the star outline. You can remove a view from favorite views by unmarking the yellow star in either location
By setting a view as a favorite view, it’ll jump to the top of the view list and be displayed when an object is opened. If you select multiple favorite views, they will be arranged at the top of the sidebar and in alphabetical order, as is detailed here. The view which appears at the top of the list will be the one displayed when opening an object.
Quick access to favorite views
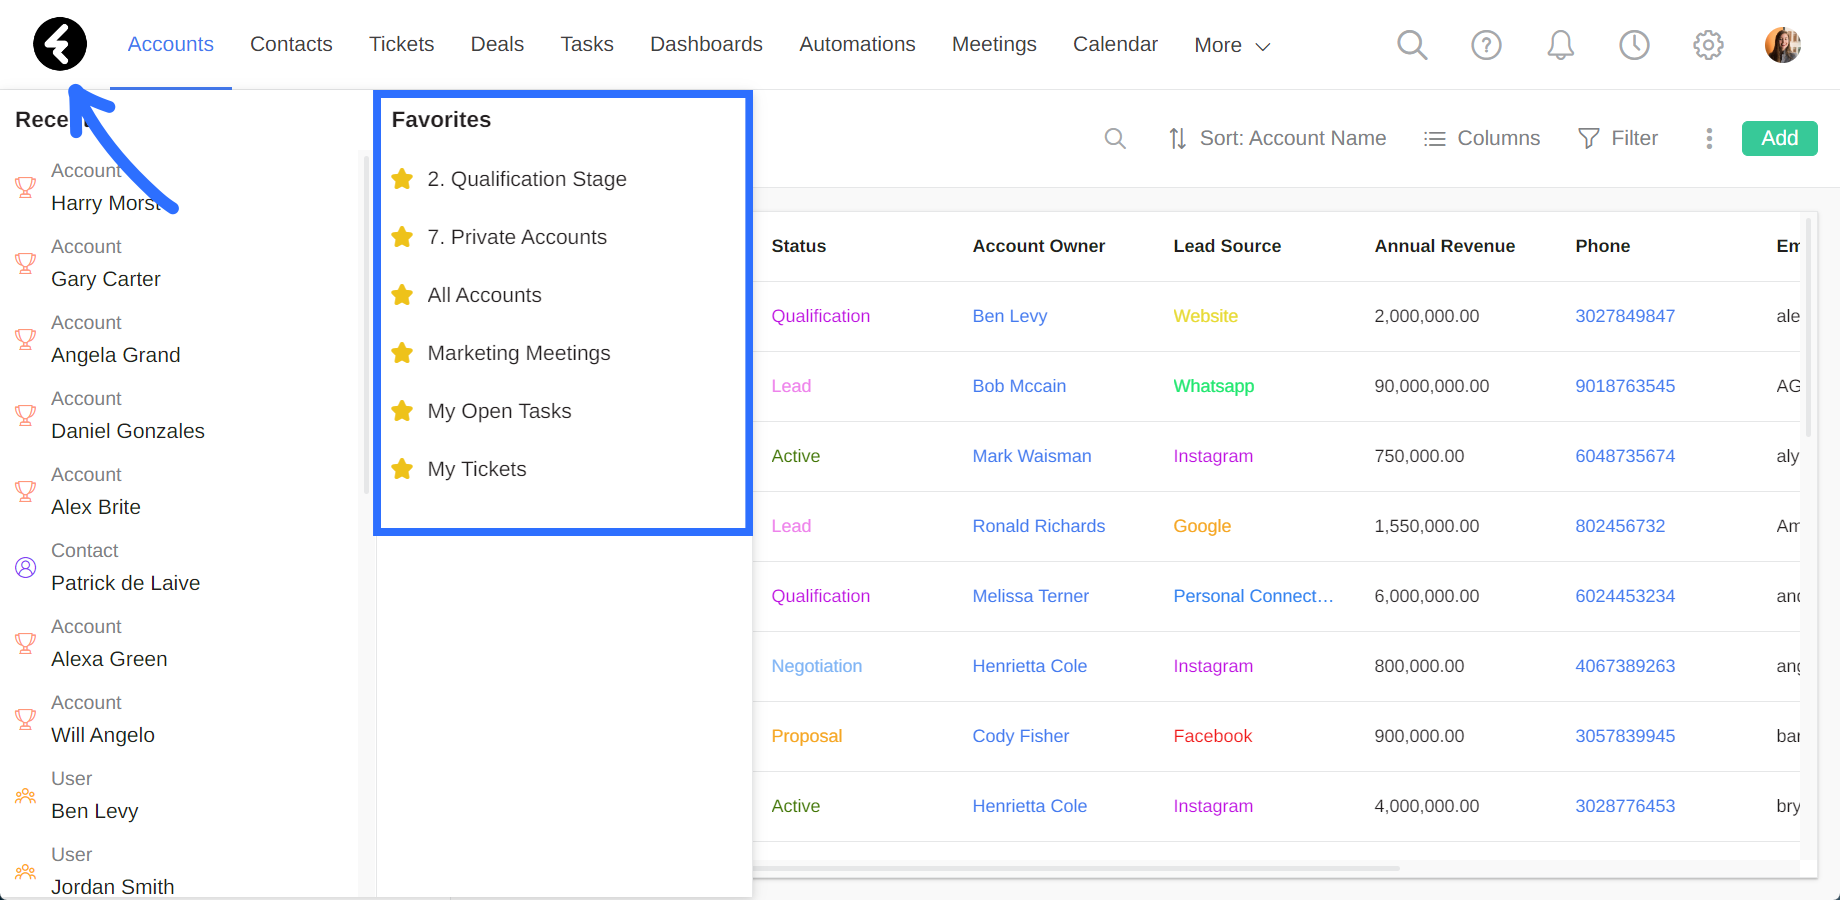
You can easily access your favorite views using the view sidebar, as you can see above. In addition, you can quickly open views from any page in the system. To do so, simply click the logo on the top left of the page. To the right of the history log, you’ll find a list of all your favorite views under the heading Favorites. You can click on any of these views to open them. This centralizes your favorite views from all system objects into one place so you can work efficiently.
Default views
Each object has one default view, which will be used in many places throughout the system. In the next section, you can learn how to switch the default view. Here you’ll find a detailed list of places in the system where the default view is used.
First view in an object
If there are no favorite views in an object, the default view will be the first view which is displayed. This means that when you click on an object from the top bar menu, the default view will be displayed. Learn about favorite views above.
Search results
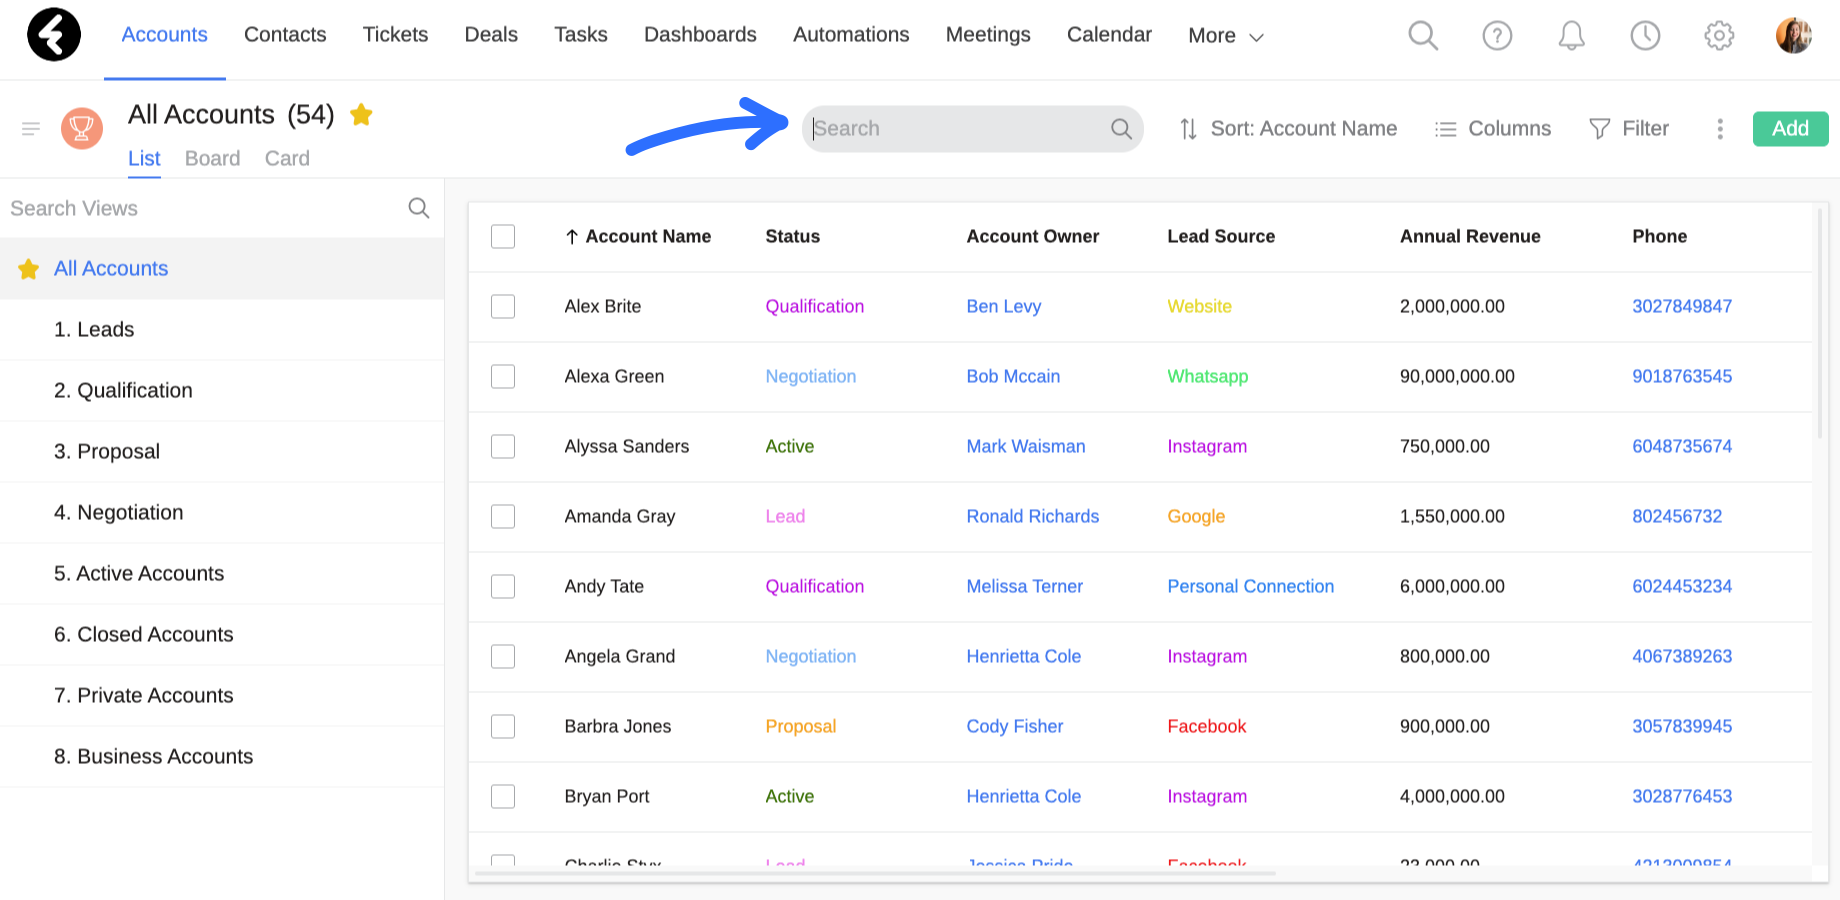
The search results which appear after searching within an object will use both the columns and sorting settings of the default view. This search option can be found in the same line as the rest of the view settings, and by clicking the magnifying glass you’ll open the object search bar.
Non deletable view
Each object must have at least one view at all times. For this reason, the default view cannot be deleted, and the Delete View option will not appear in its three dot menu. If you’d like to delete the default view, you’ll need to first set a different view as the default view, which you can learn how to do below. This will set the current view as a regular view, which you can now delete.
Sharing settings
The default view can always be viewed by all system users who have access to the object. For this reason, the Share Permissions option will not appear in the default view’s three dot menu. This ensures that users will always be able to see at least one view in any object accessible to them.
Lookup fields
When selecting a value for a lookup field, the display which opens in the pop up will be the default view. This will use all the default view’s settings, such as the columns, filters, and sorting. You can still access any record in the object, whether or not it's displayed in the default view, by using the search option on the top. If you’d like to switch the display here, you’ll need to either edit the default view, which you can learn about here, or switch the default view as is explained below.
A built-in example of this is the Account lookup field found in the Contacts object. By clicking the magnifying glass on the right of the Account field, you’ll open the default view for the Accounts object. Presuming you haven’t switched the default view, this will be the All Accounts view. The columns, order, and records displayed here are all identical to those in the All Accounts view.
Dashboards
By clicking on a specific widget in a dashboard, you can open a list of the records which are represented by this widget. The records which are displayed here will use the columns which are set in the default view for the relevant object.
For example, the pie chart widget Leads by source belongs to the Accounts object. By clicking on one of the sections in the chart, you’ll open a list of the accounts which belong to the selected source, such as all the accounts with the Personal Connection status. The columns which appear in this view will be the same columns which are set in the default Accounts view. If you’d like to switch the columns displayed here, you’ll need to either edit the default view’s columns, as is detailed here, or switch the default view as is explained below.

To learn more about dashboard widgets, click here.
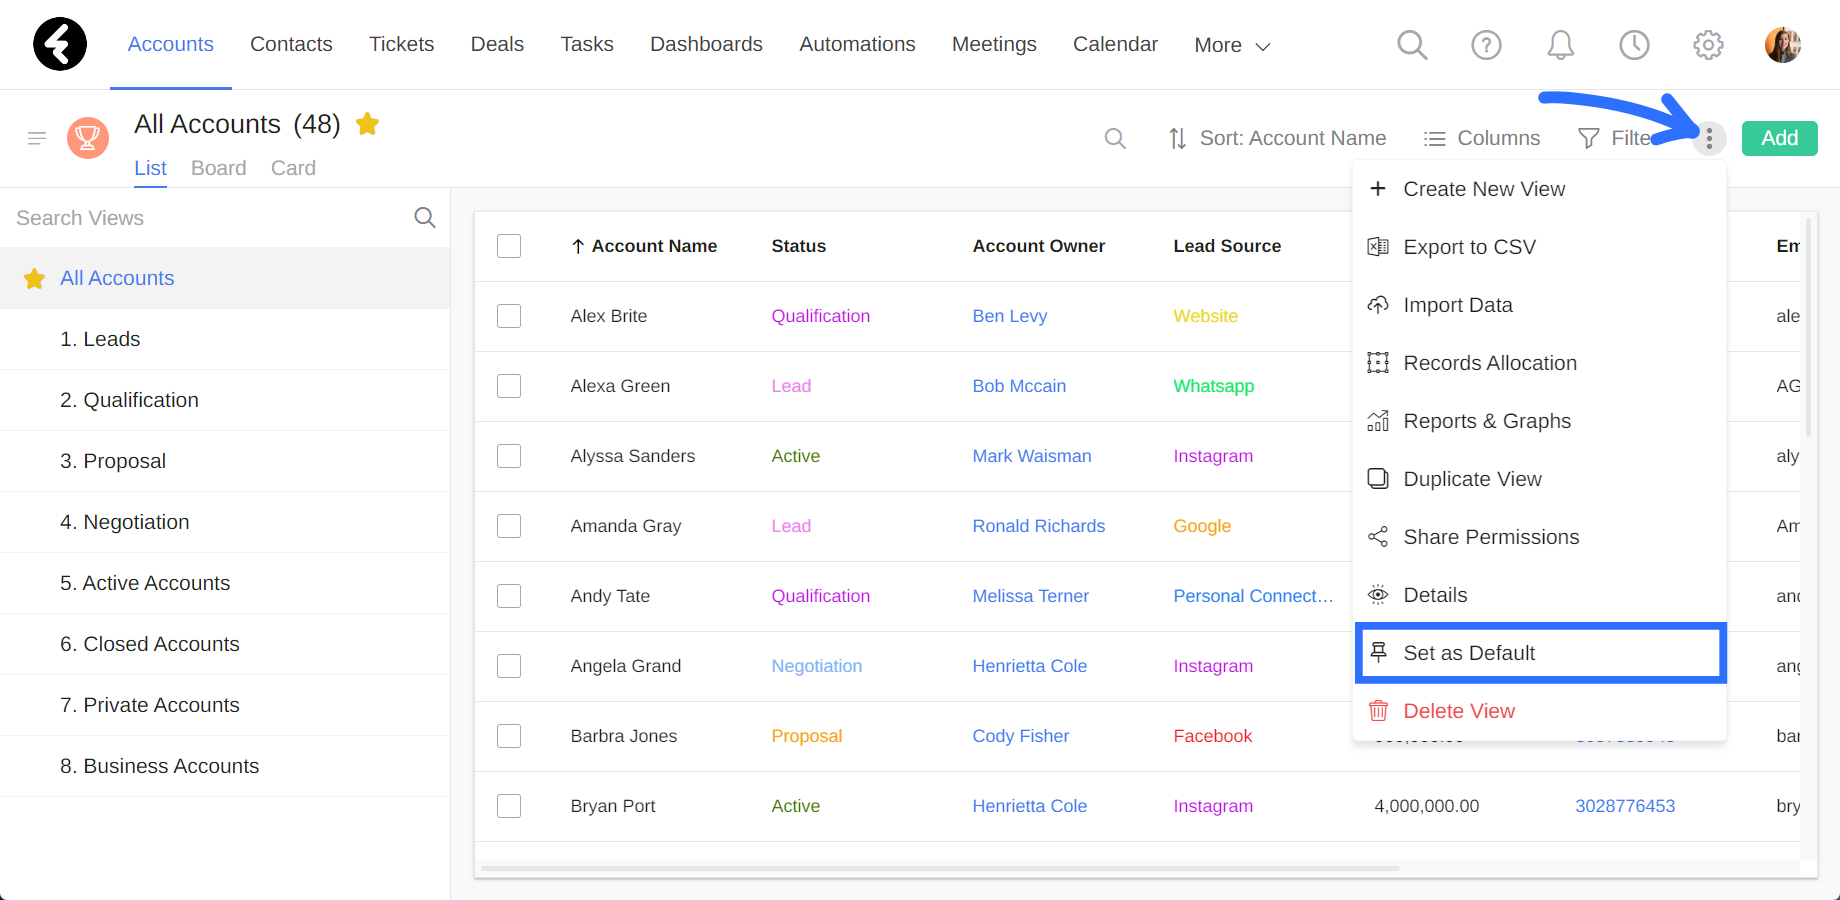
Switching the default view
Every object is automatically assigned a default view. This is typically the view which displays all the records in the object, such as the All Projects view in the Projects object. You can easily switch the default view. To start, open the view you’d like to set as the default view. Next, click the three dot menu and then select the Set View as Default option. This will replace the old default view with the view you currently selected. A green message will appear on the bottom of the screen confirming the default view has been switched successfully. The message will include the name of the view, for example “All Accounts view is set as default”.