System structure
The different parts of your system all work together to create a cohesive and intuitive workspace. Below you’ll learn how to build and work with each part throughout the whole system.
Objects and fields
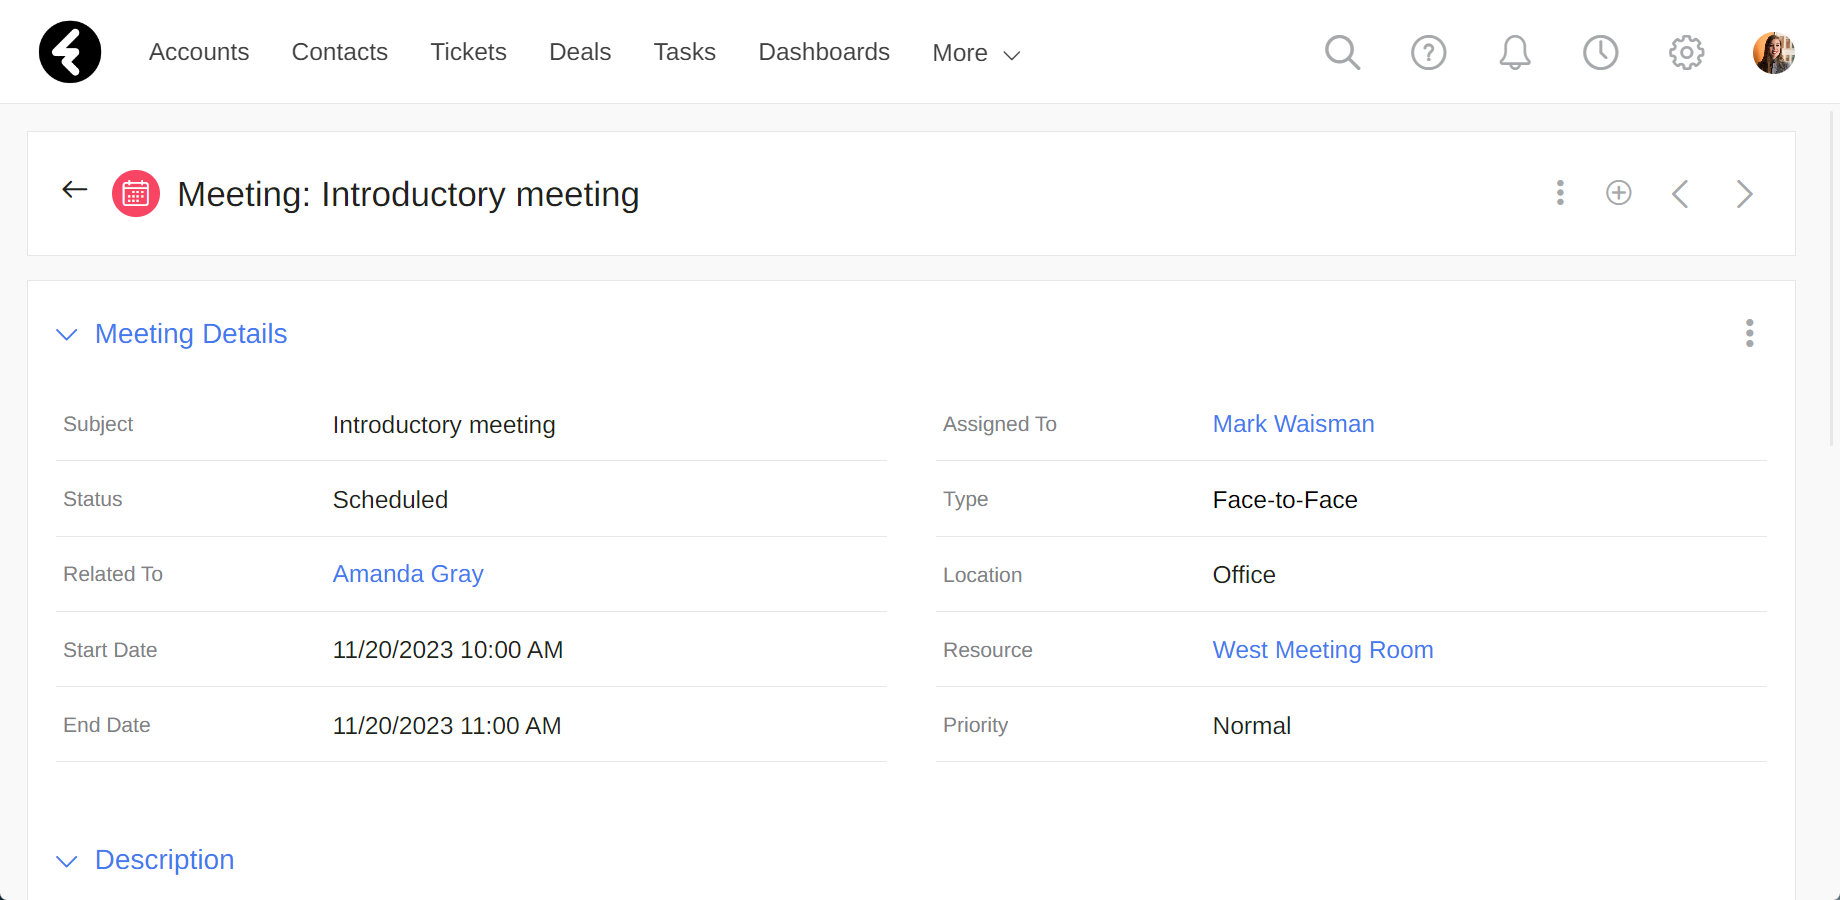
Objects are used throughout the system to hold information. For example, the Accounts object holds clients, the Tasks object holds tasks for system users, and the Meetings object holds meetings. As you can see, each object holds a specific type of information. Objects do this using their fields. Fields hold one individual piece of data, like a name or a date. Each field will be relevant to the specific object. For example, the Meetings object has fields like the Start Date, Status, Location, and Type. Using these fields you can set all of a meeting’s details and continuously keep track of it. Set the date and location so you know when and where your meeting will take place, use the type to know whether your meeting will be online or in person, and update the status as your meeting is scheduled, taken place, or been canceled.
The Meetings object is a built in object which comes with your system. Some other built in objects are Accounts, Tickets, Deals, Projects, Tasks, Contacts, and many more. You can customize each of these objects by adding fields to them or editing their existing built in fields. To learn how to do this, click here.
You can also choose to build your own custom object. This is useful for things which are specific to your organization, such as properties for a real estate agency, policies for an insurance agency, or classes for an educational institute. For detailed instructions on how to build your own object, click here.
If you’d like to edit one of the existing objects, such as switching the name, you can learn how to do so here.
Records and views
The objects are used to categorize and hold system information based on its type. Within each object there are individual records. Each record is a single instance of this object, such as a single meeting. By using the Meetings object, you can access all the individual meeting records. Another example is the Accounts object, where each individual account is a record in the Accounts object.
Each object uses views in order to organize all the records within it. In this way you can easily access the specific list of or individual records you’re trying to find. For example, you may have a Meetings view which displays a list of all the meetings you have in the next week, and a different view which displays only meetings which belong to the HR department. In this way, each employee can open up a view of all the meetings they need to access.
To open an object’s views, use the topbar menu to click on the relevant object. This will open all the object’s views, where the records are displayed. On the left you’ll find a list of all the views in the object, and on the right you’ll find a list of records. Each individual record is represented as a row in the list. By clicking on any individual record, you’ll open its page where you can change its details, add any related information like notes or tasks, and more. Below you’ll find a detailed explanation of each record’s page.
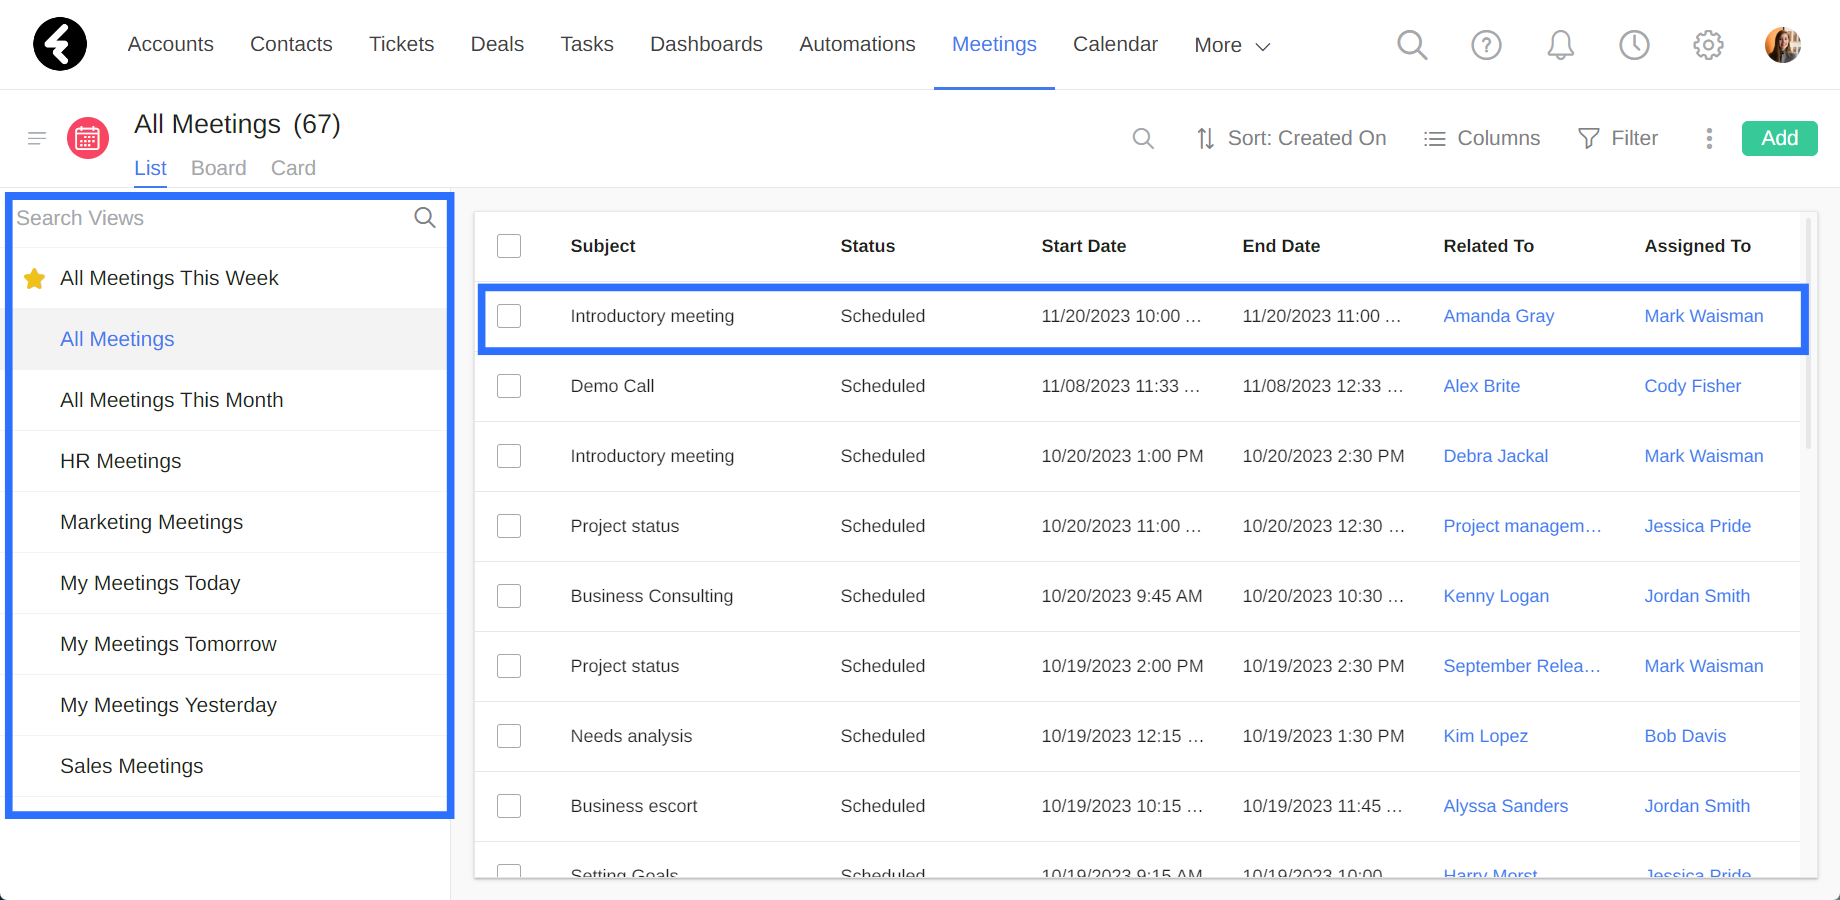
Each view can be customized so you can build lists of records according to your individual needs. For example, you can create a view which displays all the Accounts where the status is set to Lead. In this way, you’ll be able to only see the accounts which are relevant to you. To learn how to set up views, click here. There are also different types of views, which you can use to display the records in different ways. This helps you work most efficiently for different types of work. For example, the list view, which is the default, is great for displaying large amounts of records at once. The board view can be used to visualize where your records are throughout a process. For more information on view types, click here.
Pages
By clicking on any record you’ll open its individual page. Pages allow you to add and edit information within or attached to any record. For example, you can open a specific contact in order to change its name, add a birthday, attach a file, or schedule a meeting.
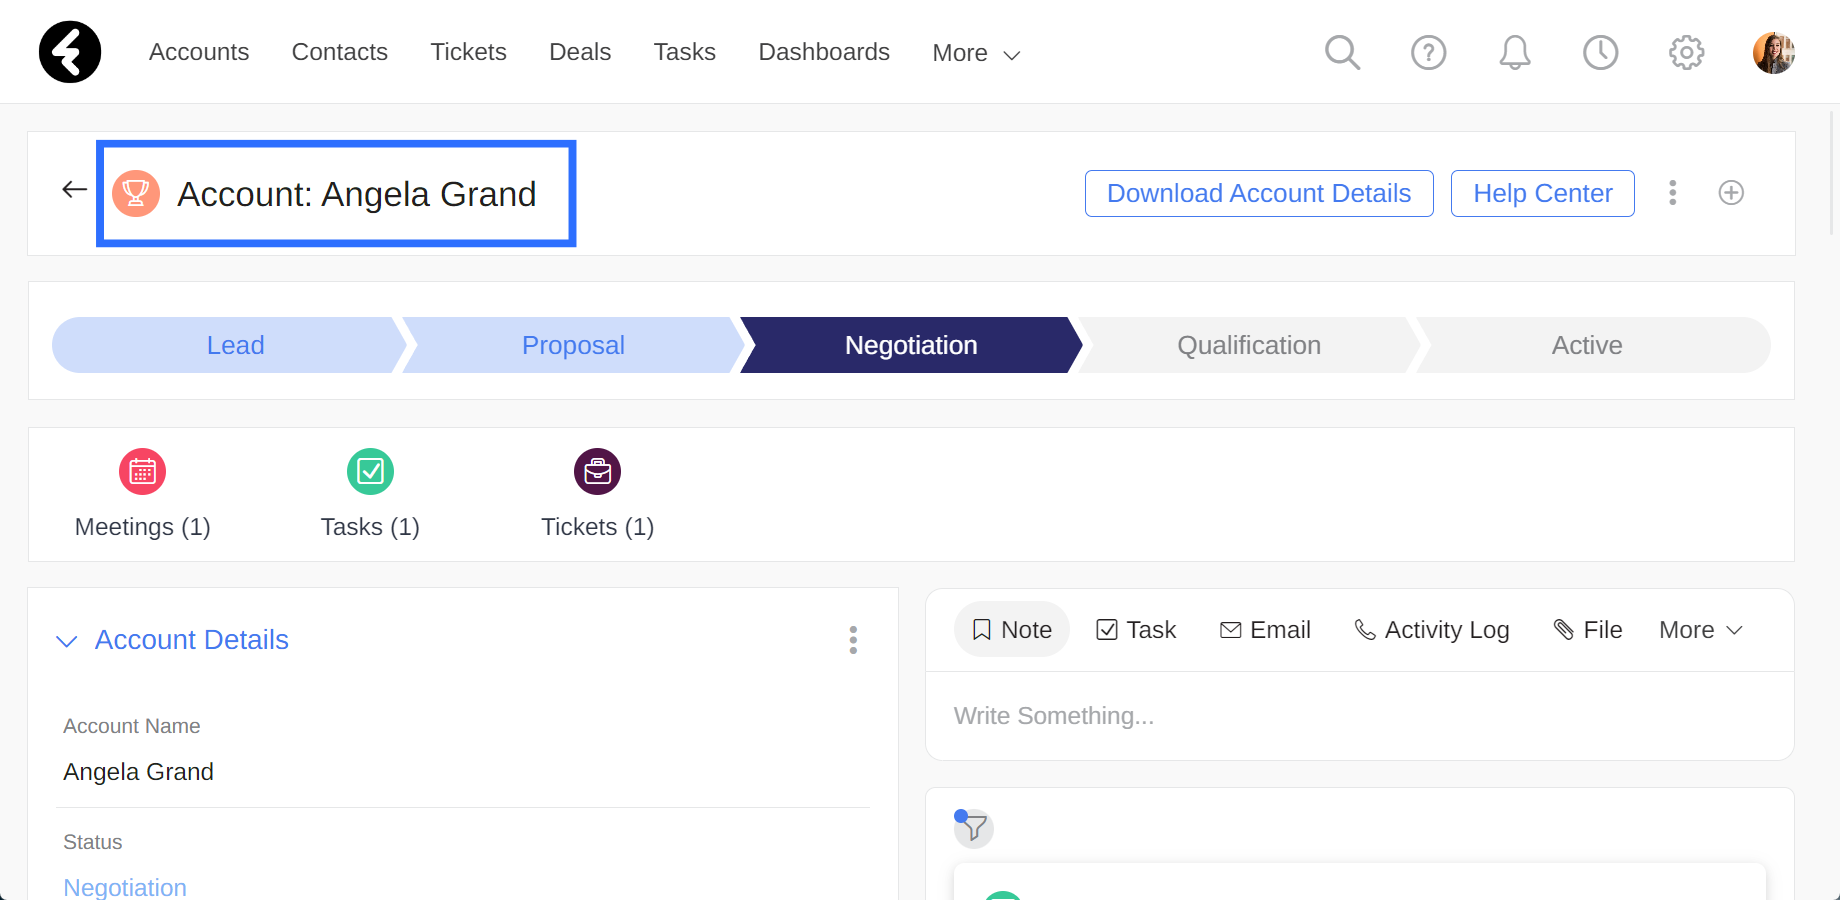
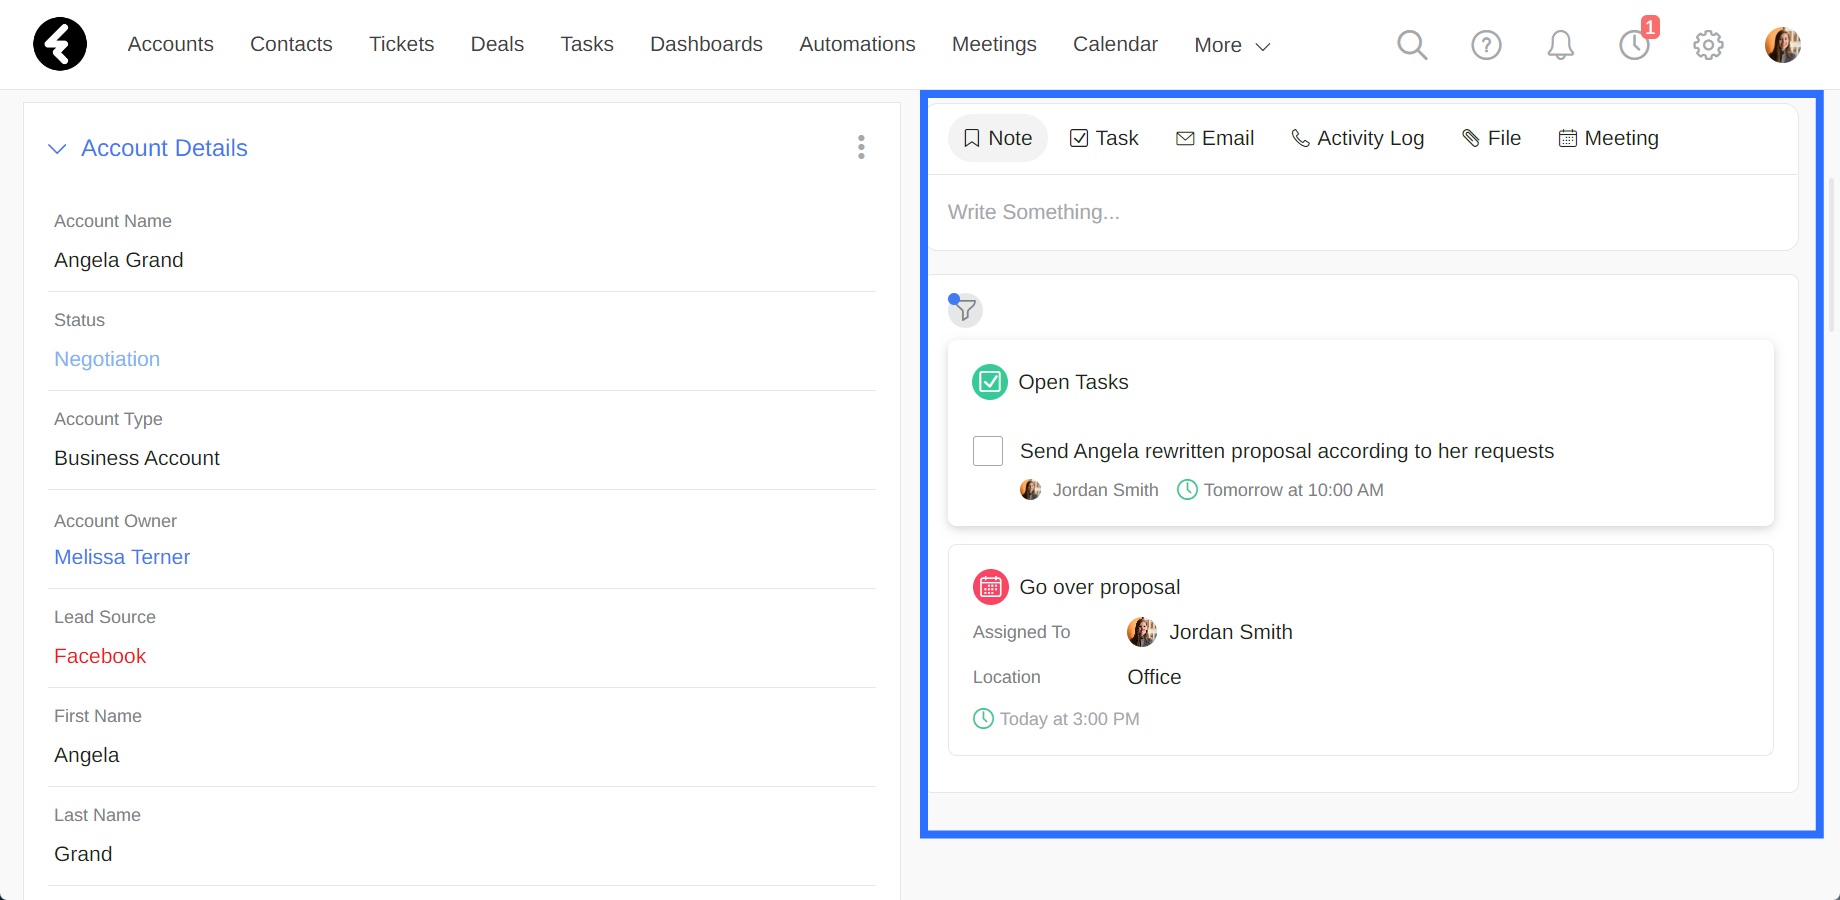
At the top of each record page, you’ll find a title which contains the name of the object the record belongs to followed by the name of the record. For example, the top of the account record for Angela Grand will display the text Account: Angela Grand.
Navigation arrows
To the left of the name, you’ll find a back button which allows you to return to the system page you were on before opening the current record page. On the right, you’ll find arrows which allow you to navigate to the record before or after the current record. The records accessible via these arrows will use the view you opened the records from. For example, if you opened a record from the My Accounts view, clicking the arrows will navigate you through all the records which belong to you. The records will be accessible in the same order they were displayed in on the view page.
Adding related records
You can use the + plus icon to the left of the back and forth arrows to add a related record. This is any record which is attached to the record you currently have open. For example, you can add a related contact to an account. If you need to add multiple contacts in a row, click the arrow next to the Save button and then select Save & New. For a detailed explanation on related records and how to add them, click here.
More options
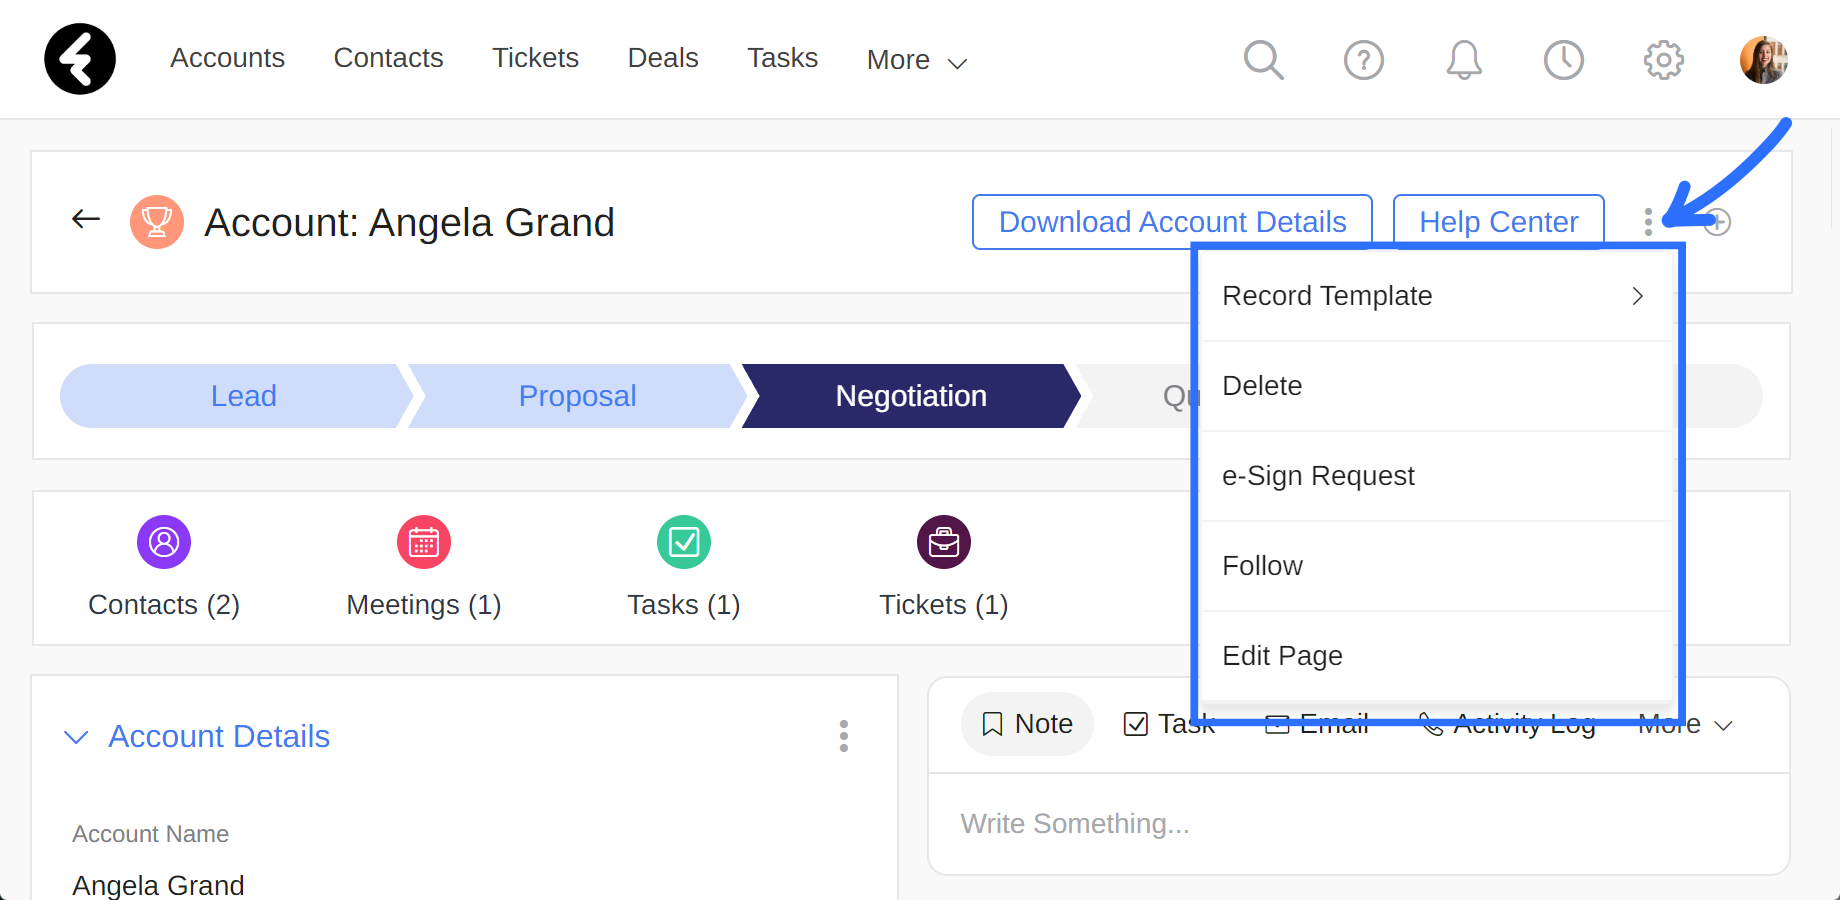
To the left of the + plus icon, you’ll find a three dot menu. This allows for multiple different options within the record, which are each explained below.
- Record Template: You can download a predefined template directly from any record’s page.
- Delete: Use the delete option to permanently delete a record from the system. This action cannot be undone. After clicking Delete, you’ll need to type DELETE into the popup and then click the red Delete button to confirm you want to delete this record.
- Duplicate: Selecting this option will create a copy of your current record. The duplicate record will open immediately and add the word Copy to the beginning of the record’s name. Duplicating a record will copy its fields, but not any of the stream activities. Additionally, the built in Created On, Created By, Modified On, and Modified By fields will use their own values. The Owner field will fill in with the system user who created the duplicate. You cannot duplicate records which belong to the accounts object.
- e-Sign Request: Use this option to send an e-Sign request directly to your client using a template. Learn more here.
- Follow/Unfollow: Click on this option to receive a notification every time a field is changed in this record. The notification will include the old and new values. If you’re already following a field, this option will be Unfollow, which you can click to stop receiving notifications.
- Edit Page: This option lets you customize your page, which you can learn about here.
Related multi
Under the record header, you may find a component with object names and corresponding icons. This is called the Related Multi component, and lets you access and work with any records which are related to the current record. Each object name will be displayed, followed by the number of related records there are of the object type.
Above you learned how to add a related contact to your account. This contact will now be displayed under the Contacts name and icon. For example, you may see Contacts (2) and Meetings (1). This means that the current account record has three contacts related to it and one meeting. By clicking on the object name, you’ll display a list of all the related records. This component will not be displayed if there are no records related to the current record.
Form
On the left of the page, as long as the default layout has not been changed, you’ll find a record’s form, which holds its fields. As was explained above, these fields contain individual values for each record. You’ll find the field’s name displayed in a light gray, and the field’s value displayed in black. To edit any field’s value, simply click on it, select a new value, and then click the green arrow on the right to save your changes. Once you change a value, the old value will be erased permanently. You can learn how to organize your form using sections and fields here.
Stream
The right of the record page, as long as the default layout has not been changed, displays a records stream. Here you can both add stream objects, such as notes, tasks, and meetings, and view any existing ones. Use the stream to keep in touch with relevant parties, make internal notes, schedule meetings, and more. You can learn how to manage a stream here.
By using all the different parts of the system effectively, you can create an easy to use and efficient work space.