Object studio
Each Fireberry object stores records of a particular type. For example, the Accounts object contains information about every account, while the Projects object contains easy-to-track, valuable information about projects.
Accessing the object studio
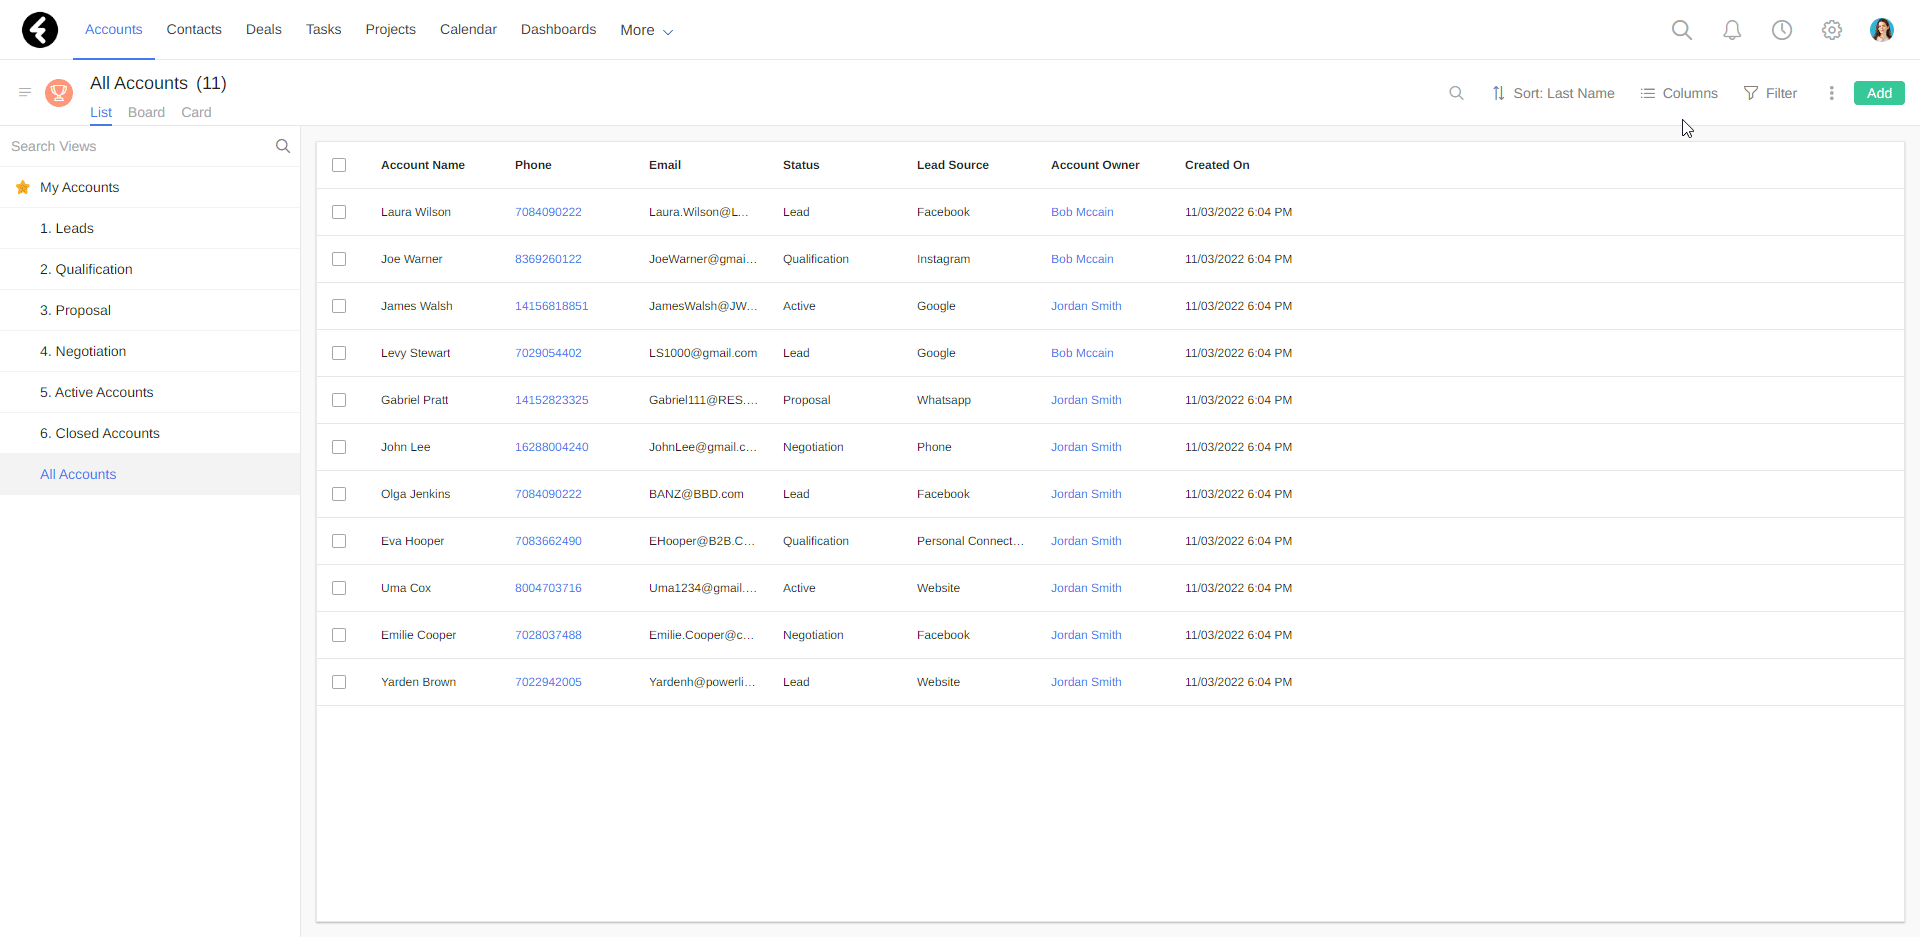
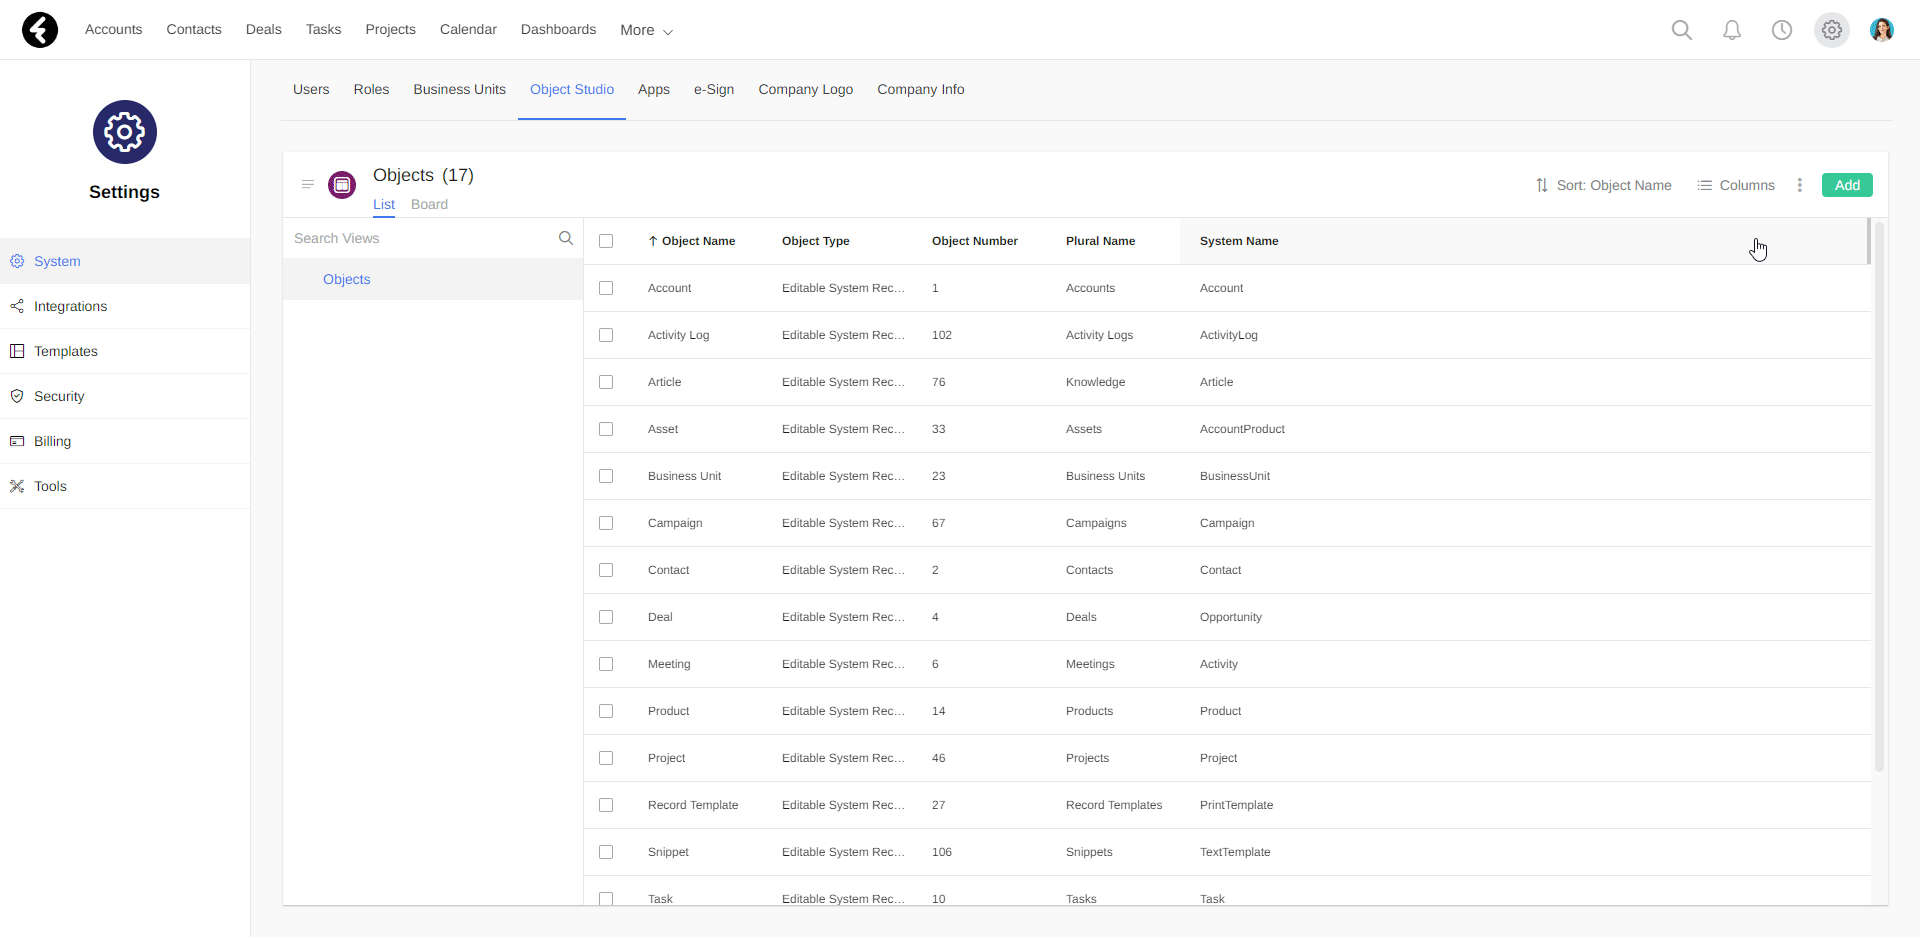
In the object studio you can view, track, and update data for all of your default and custom system objects.
To open the object studio, first click the settings gear icon in the top right corner of any Fireberry page. Next, select the System tab from the settings sidebar, and click on the Object Studio section from the top menu. This will open the object studio, which contains a list view of all the objects in your system.
To access a specific object, simply click on it. This will open the object’s individual page, and will give you access to the object’s details, pages, and fields.
Adding and editing objects
Using the object studio you can easily create new objects or edit existing objects.
Creating a new object
Fireberry contains many built-in customizable objects, such as the Accounts, Contacts, and Projects objects. However, you may wish to create a new object which is unique to your business needs.
For example, you can create a custom object which stores specific information about your suppliers. To start, click the Add button in the top right of the object studio. Then set the Object Name and Plural Name fields to “Supplier” and “Suppliers” respectively.
To save your new object, click Save.
Editing an existing object
You can edit an object’s names at any time. To change an object’s name, click on the desired object’s name from the object studio, and then update the Object Name and Plural Name fields.
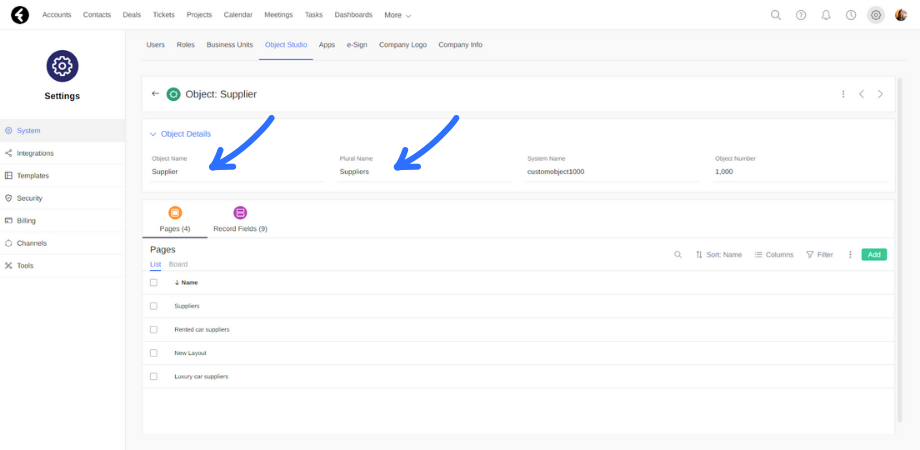
You can also edit an object’s pages and record fields; Further explanations can be found below.
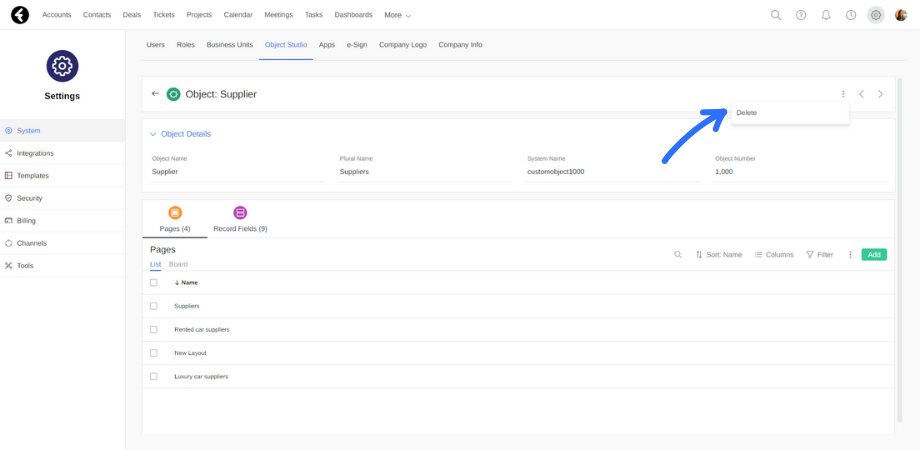
Deleting custom objects
To delete a custom object, select the object you want to remove from the system, click Delete in the three-dot menu, type DELETE, and finally click Delete. This will permanently delete the object from your system, and all data stored within it will be lost.
Objects can only be deleted if they are not currently in use within the system. If an object you would like to delete is in use, a pop up will notify you of any places where the system relies on this object. There are three places where the object might be in use within the system:
- Fields: The object may be found in either the summary field or the lookup field of another object. In this case, the pop up will display the field name followed by the object in which this field exists.
- Widgets: One of the dashboard widgets may display the object. In this case, the pop up will display the widget name followed by the dashboard the widget is in.
- Automations: One of the automations may include a Create record action of the object type you would like to delete. In this case, the pop up will display the name of the automation.
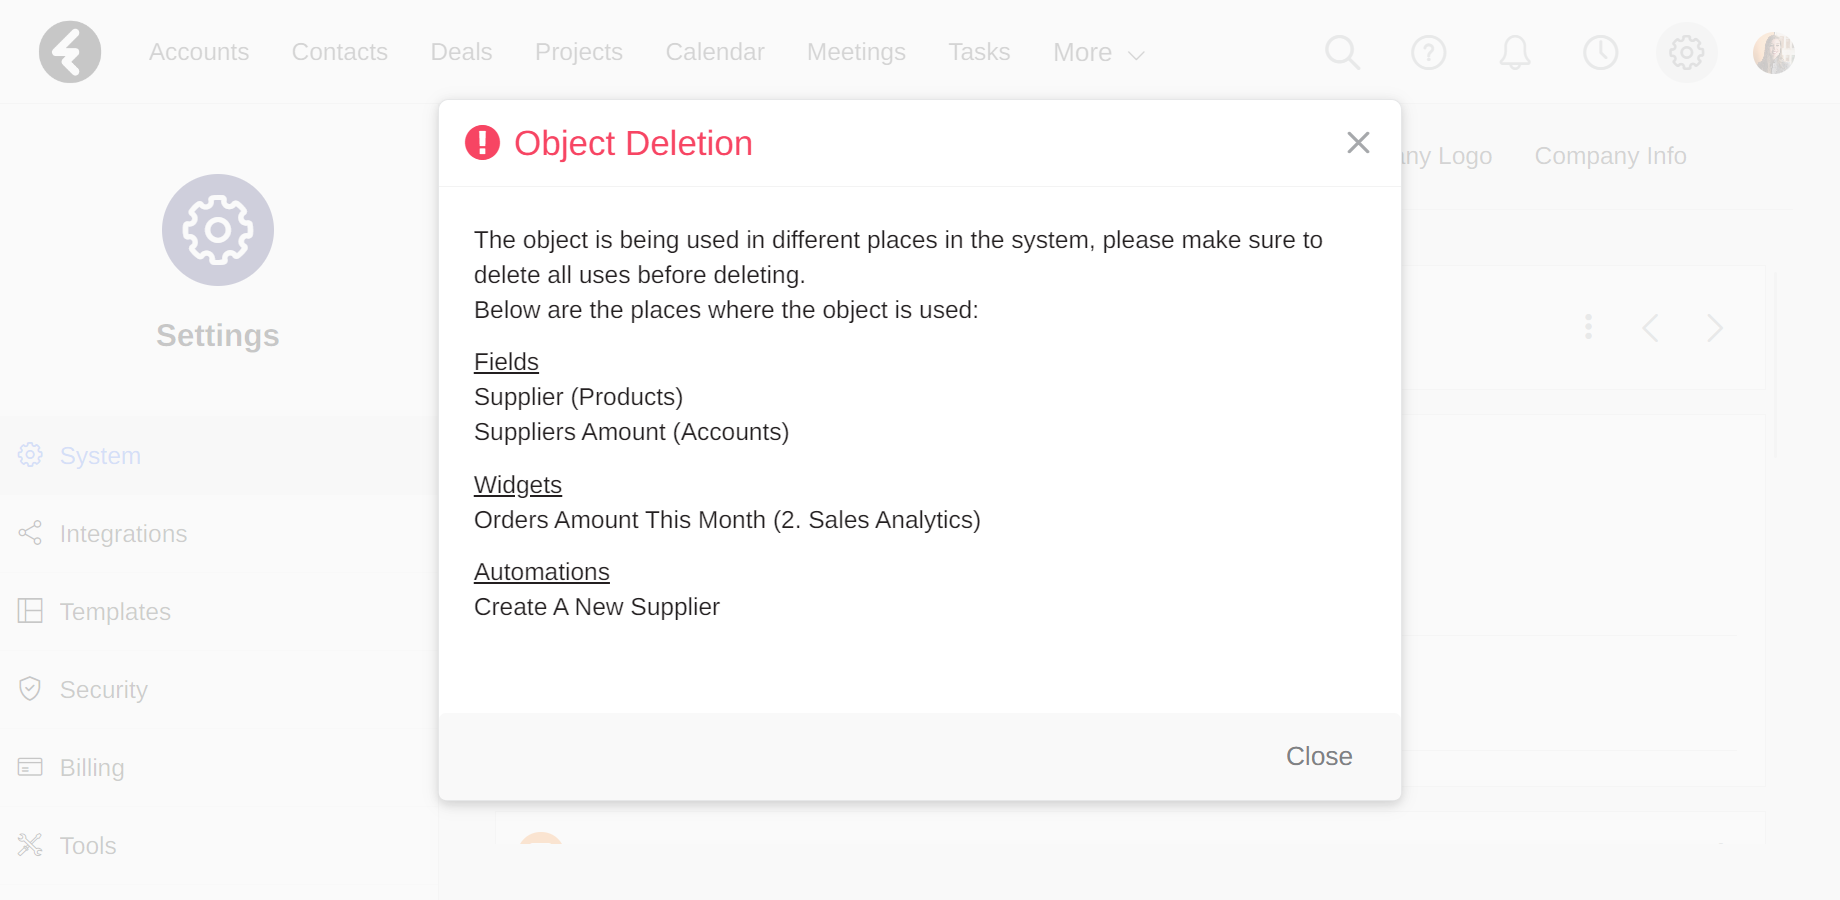
In order to delete an object, first make sure to remove all the places listed in the object deletion pop up. Once every dependent location has been deleted, you can finish the deletion process.
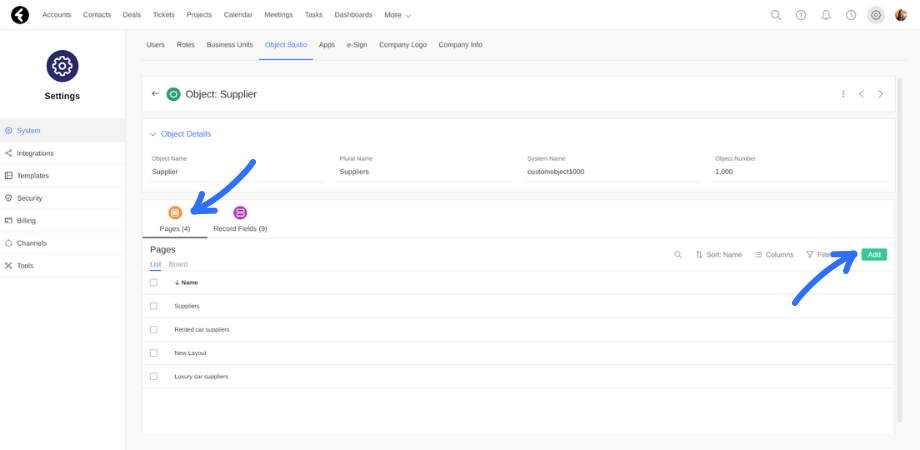
Pages
The Pages option can be found at the bottom of each individual object’s page. Under Pages you’ll find a list view of all the pages which belong to this object. Click on any page to edit it, or click the Add button to create a new page. Use multiple page layouts to customize data according to the user roles in the company. To learn more, see our page layouts article.
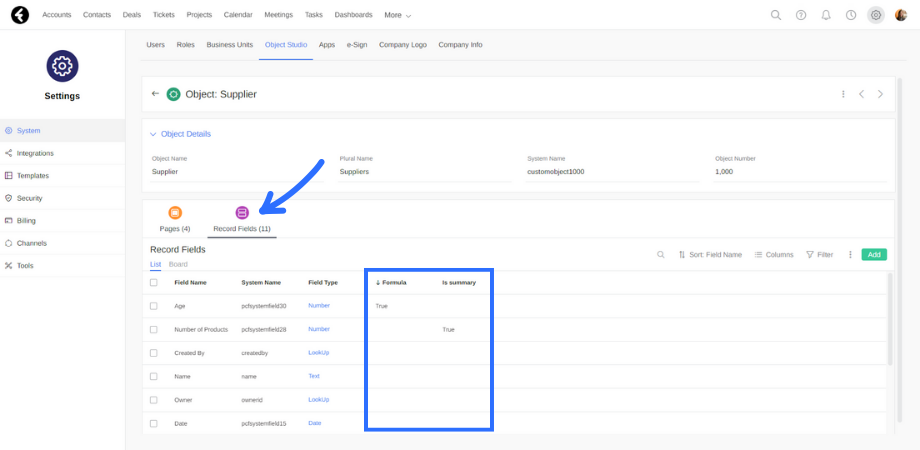
Record fields
You’ll find the Record Fields option to the right of the Pages section on the bottom of each object’s individual page. By clicking this option, you’ll display a list view of all the current object’s fields. You can easily add new fields or view field details, such as the name and type. See our adding and editing fields article to learn more. The Formula and Summary columns will display the word “True” next to fields of their respective types. For more information about field types, see this article.
Top bar menu customization
You may find it useful to add frequently used custom objects to your top bar menu. By doing so, you will be able to work more efficiently.
For example, if you want to add the Suppliers object to the top bar, click More in the top menu, and then click Edit Menu, found at the bottom of the dropdown.
In the window that opens, search for Suppliers and drag it to the right. You can use the search box to find it quickly. Objects can also be removed by clicking on the X next to them.
It is possible to change the order in which they are displayed; Simply drag them up or down to change their order. The highest object in the list will be displayed on the left of the top bar, while the lowest will be on the right.
To update your top bar, click Save. Suppliers will now appear in your top bar menu based on your chosen preferences.
