Update record automations
Automation set up
By using automations to update records, you can automatically set fields based on predefined triggers. The first step is to set the object type of the automation, which you can learn more about here, to the object the records you’d like to update belong to.
For example, you can automatically update the close date of a deal whenever the deal stage is changed to closed. You’ll need to set up your automation first. To start, set the Type to Deal and the When to Deal is updated. Then set the If filter where the field is Deal Stage, the operator is Equals, the value is both Closed - Won and Closed - Lost, and click Apply. Now click the + Add Action button under Then and select Update Record.
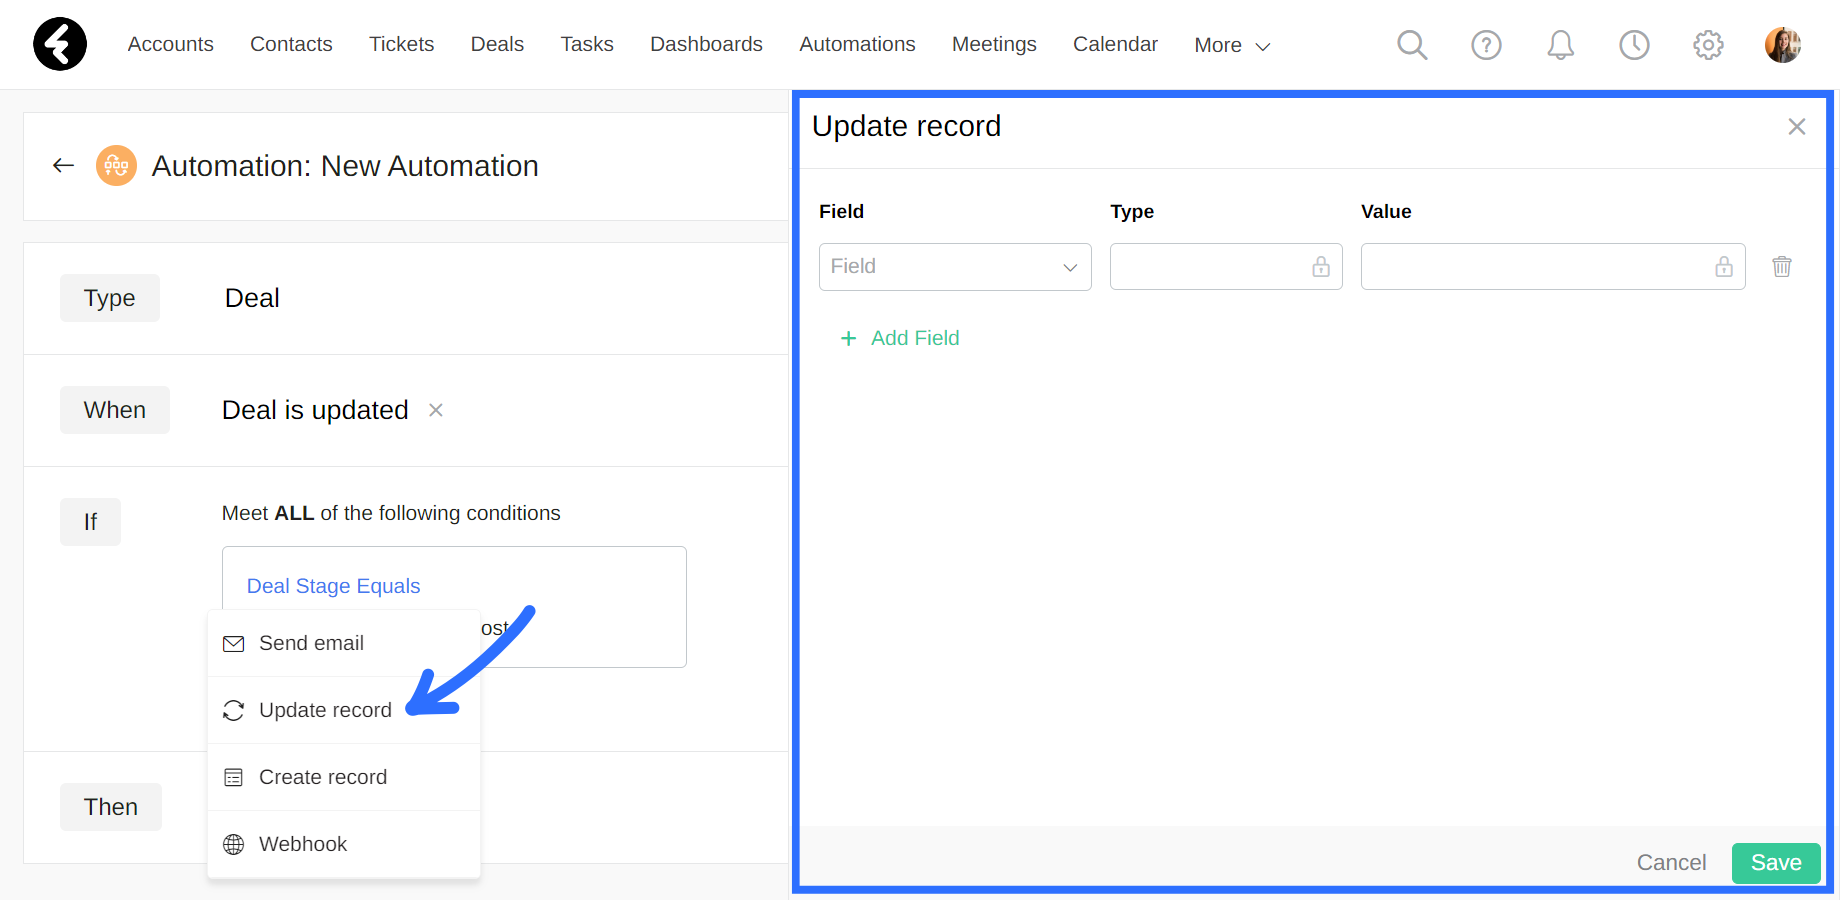
This will open a pop up on the right where you can set all the fields you’d like to update in the record. Each row represents a single field which will be updated to the value you set. You can use the + Add Field button to add more rows and update multiple fields at once. Each row has three columns to set: Field, Type, and Value. By clicking on the box under the relevant column, you can set its contents. You must fill out all three columns for each row added. Each column is explained in detail below.
Choosing a field
After clicking + Add Field, a row will open with three blank boxes. The leftmost is the Field column, which you can click to open a searchable list of all the fields and related fields. These fields belong to the object set in the Type section of the automation in the top left. For details on how to select and update related fields, see below. By clicking on a field, you’ll select that field as the field to be updated. For example, you can select the Close Date field to update it. If you’d like to remove a field you’ve already added, simply click the trash icon on the right.

Type and value
The Type sets which options can be used in the Value column. The Value will set the new value of the selected field, and will change dynamically based on which type you select. Both the type and the value options will be locked in each row until the field column is filled out. The options provided in the type are based on the type of the field selected in the Field column. For almost every field type, three options are available which are each explained below.
Field type
The first option will always exist, and displays the field type of the field selected in Field. By selecting this option, the Value box will let you manually set the value as any value which matches the field type requirements. For example, if you select the Close Date field, the type option here will be Date & Time, and by selecting it the value box will let you input a date and time. For details on all the field types, click here.

Reference
The reference option lets you choose a different field in the system to set as the value of the field selected under Field. By selecting this option, the Value box will contain a list similar to the one displayed in the Field column, including related fields. However, this list will only contain fields which match the type of the field selected. For example, by selecting a Date & Time field, only other date & time fields will be displayed. Picklist fields will not have this option, as their value must be selected from the prebuilt options.
Formula
By selecting the formula option, the Formula Editor will appear below the row where you’ll be able to build a formula. This formula will calculate the value of the selected field, such as setting a date to the current day, a week from now, and more. At the bottom of the formula editor you’ll find a field dropdown box, a function dropdown box, and operators. Use the field box to search for and select fields to use as part of your formula. By clicking on a field, its API name will be added to the formula editor and can be used as a variable. Use the function box to click on and add functions such as NOW, TRIM, IF, and many more. The operators at the bottom of the editor are also a helpful tool for calculations. To learn more about setting up formulas, click here. Lookup and picklist fields will not have this option, as they cannot be calculated.

Updating related fields
You can use the Field column to select related fields in order to update fields from related records. For example, you can create an automation which will change the Status field of the related account’s record to Proposal whenever the stage of a deal is changed to Proposal. This is a great way to keep related records from different objects updated whenever important details are changed.
To start, follow the instructions above to create a deal automation, but change the filter so that the value is set to Proposal. Open the Update Record action, and then search for the Account lookup field in the Field list. Next click on the gray arrow to the right of Account; This will open a list of all the account object’s fields. Choose Status from the searchable dropdown list. It will be added as Status (Account) to indicate that the field is a related field from the accounts object. You can then set the Value box to Proposal and click Save to save the update record action. Once you activate and save your automation, whenever a deal is set to proposal, the related account’s status will be automatically updated to proposal. This helps you easily keep track of your accounts without having to manually update each field.
Once you’ve finished setting all your fields, be sure to click Save on the bottom right. Then activate and save your automation to put it into action. For details on activating automations, click here.