Field references
What are Field References?
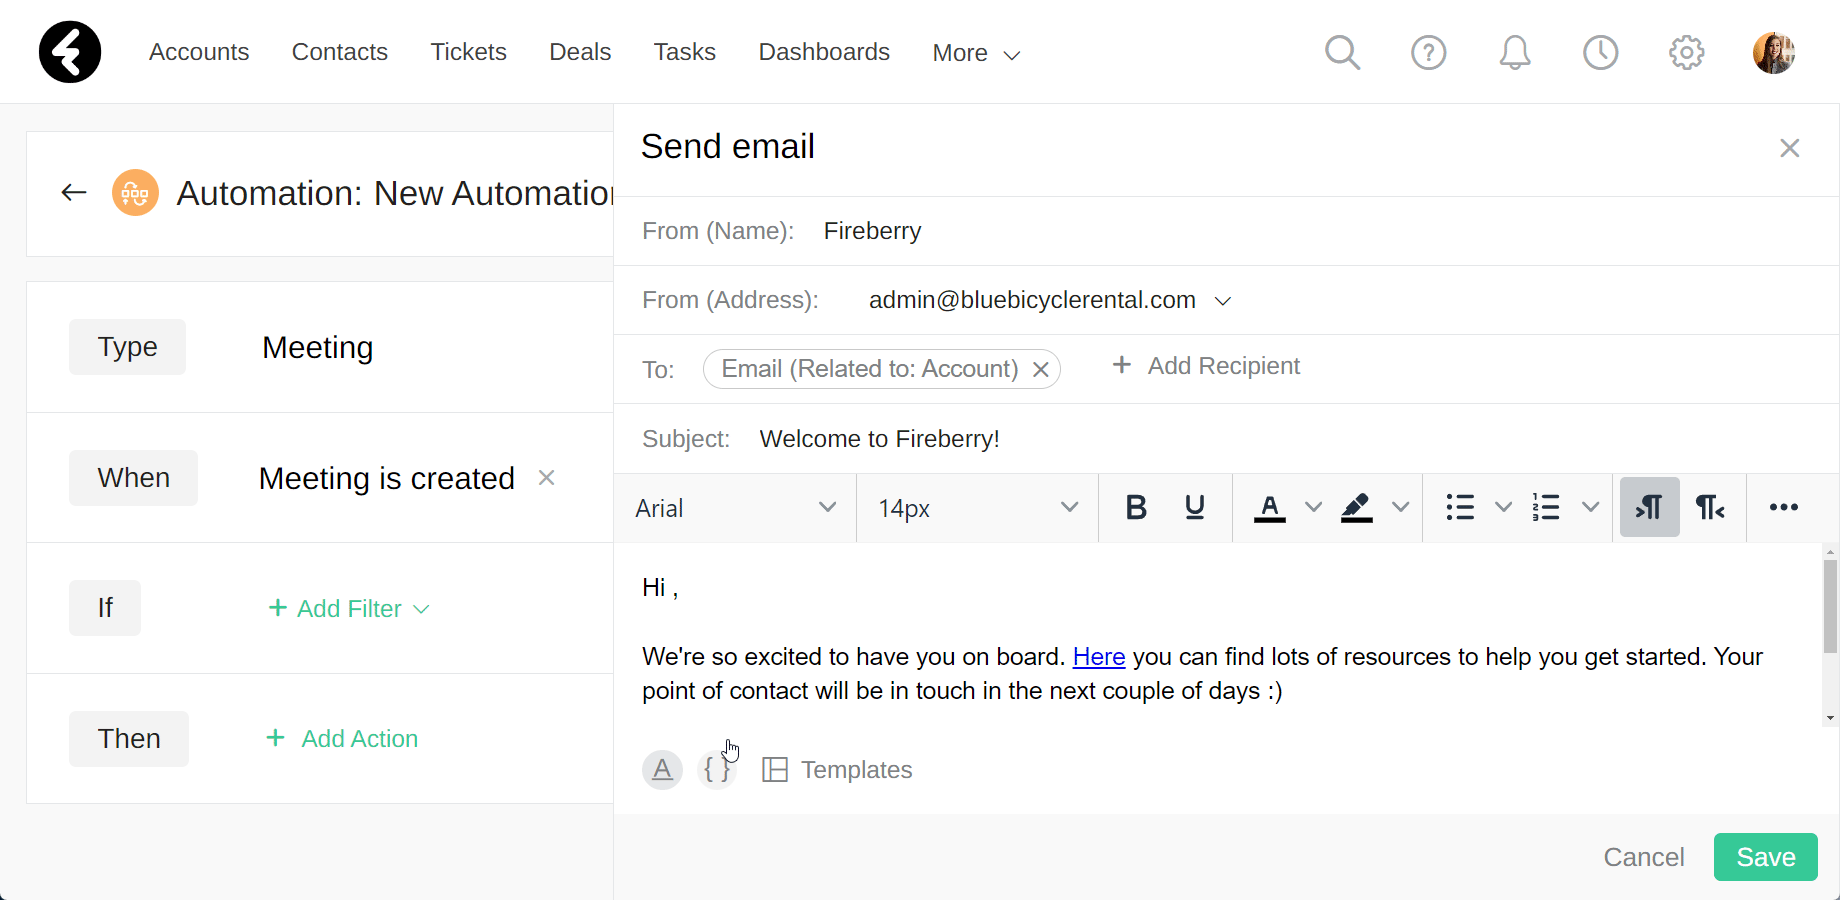
Field references take the value of a specified field and display or use it somewhere else in the system. For example, you can take the value of a name field and display it in an email, so that the email can be personally addressed to the relevant person. In this way, you can send a welcome email where the first line reads “Hi {[!accountname]}”. When this email is sent out, the {[!accountname]} field reference will be replaced by the actual value of the field, so that the email pictured below may read “Hi John”.

Each reference refers to a field in a specific object, so that if you’d like to access the name field of an account, you’ll need to retrieve the name field from the accounts object. However, if you’d like to access the name of a contact, you’ll need to retrieve the name field reference from the contact object.
Field references are most useful when creating personalized automations and record templates, as they allow you to extract values from fields and insert them elsewhere. In this way you can create one general automation or record template, and then automatically customize it for each record individually using field references.
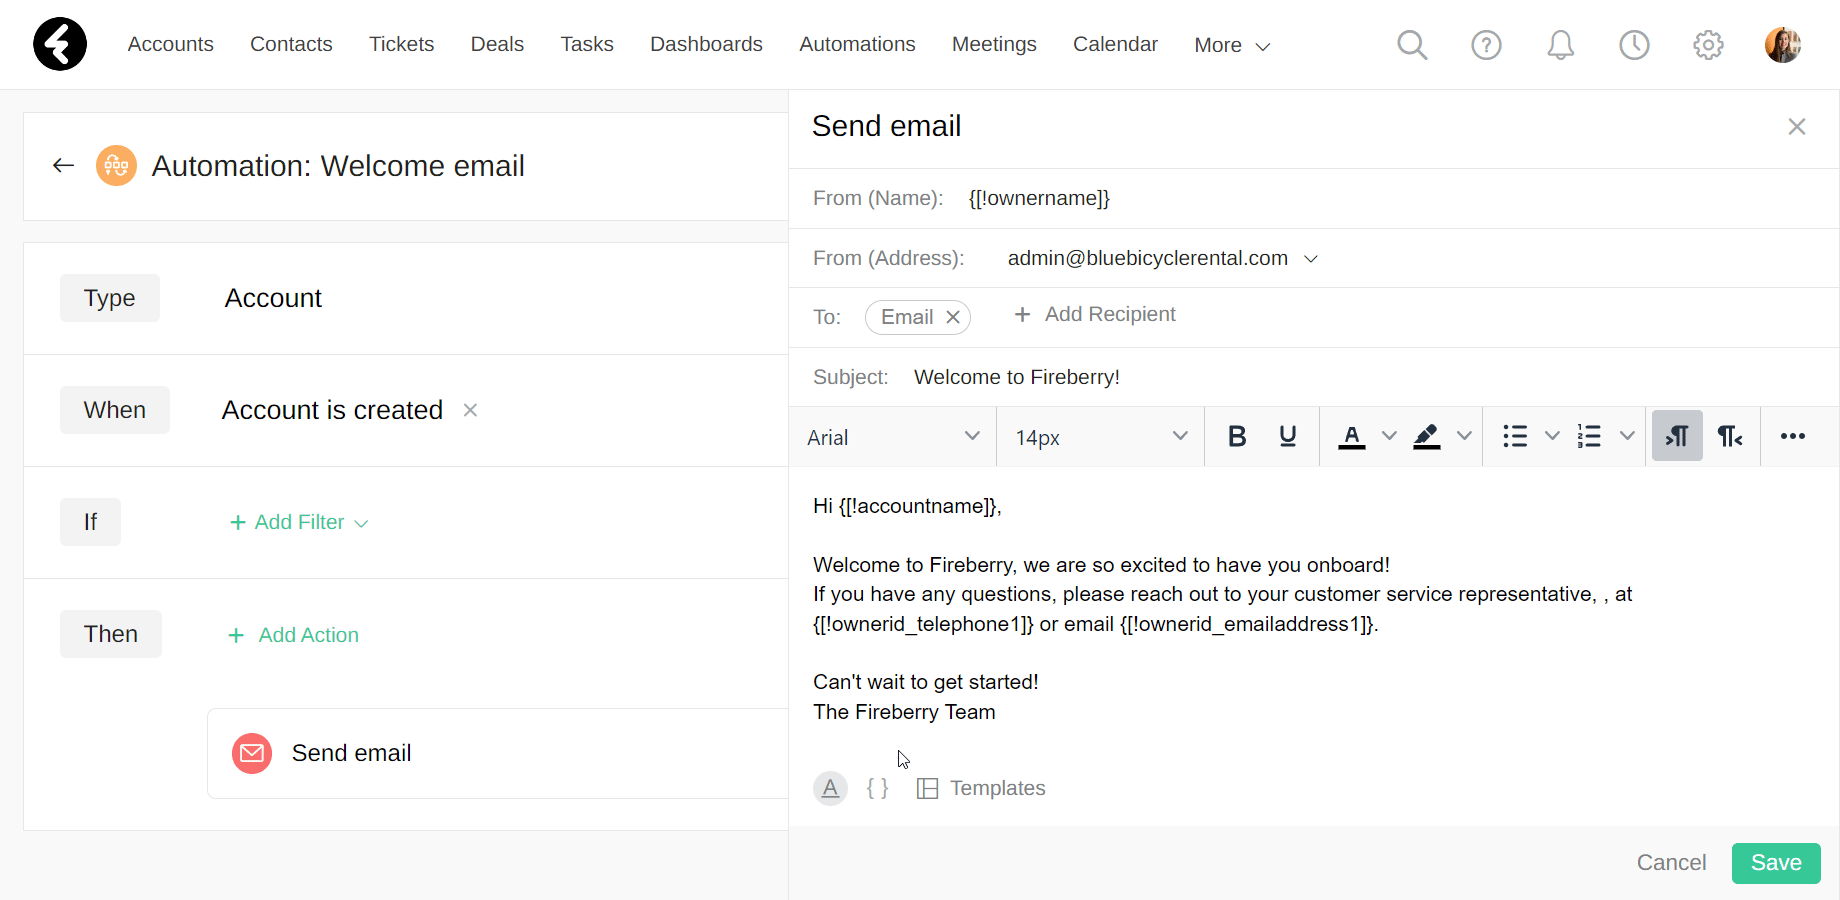
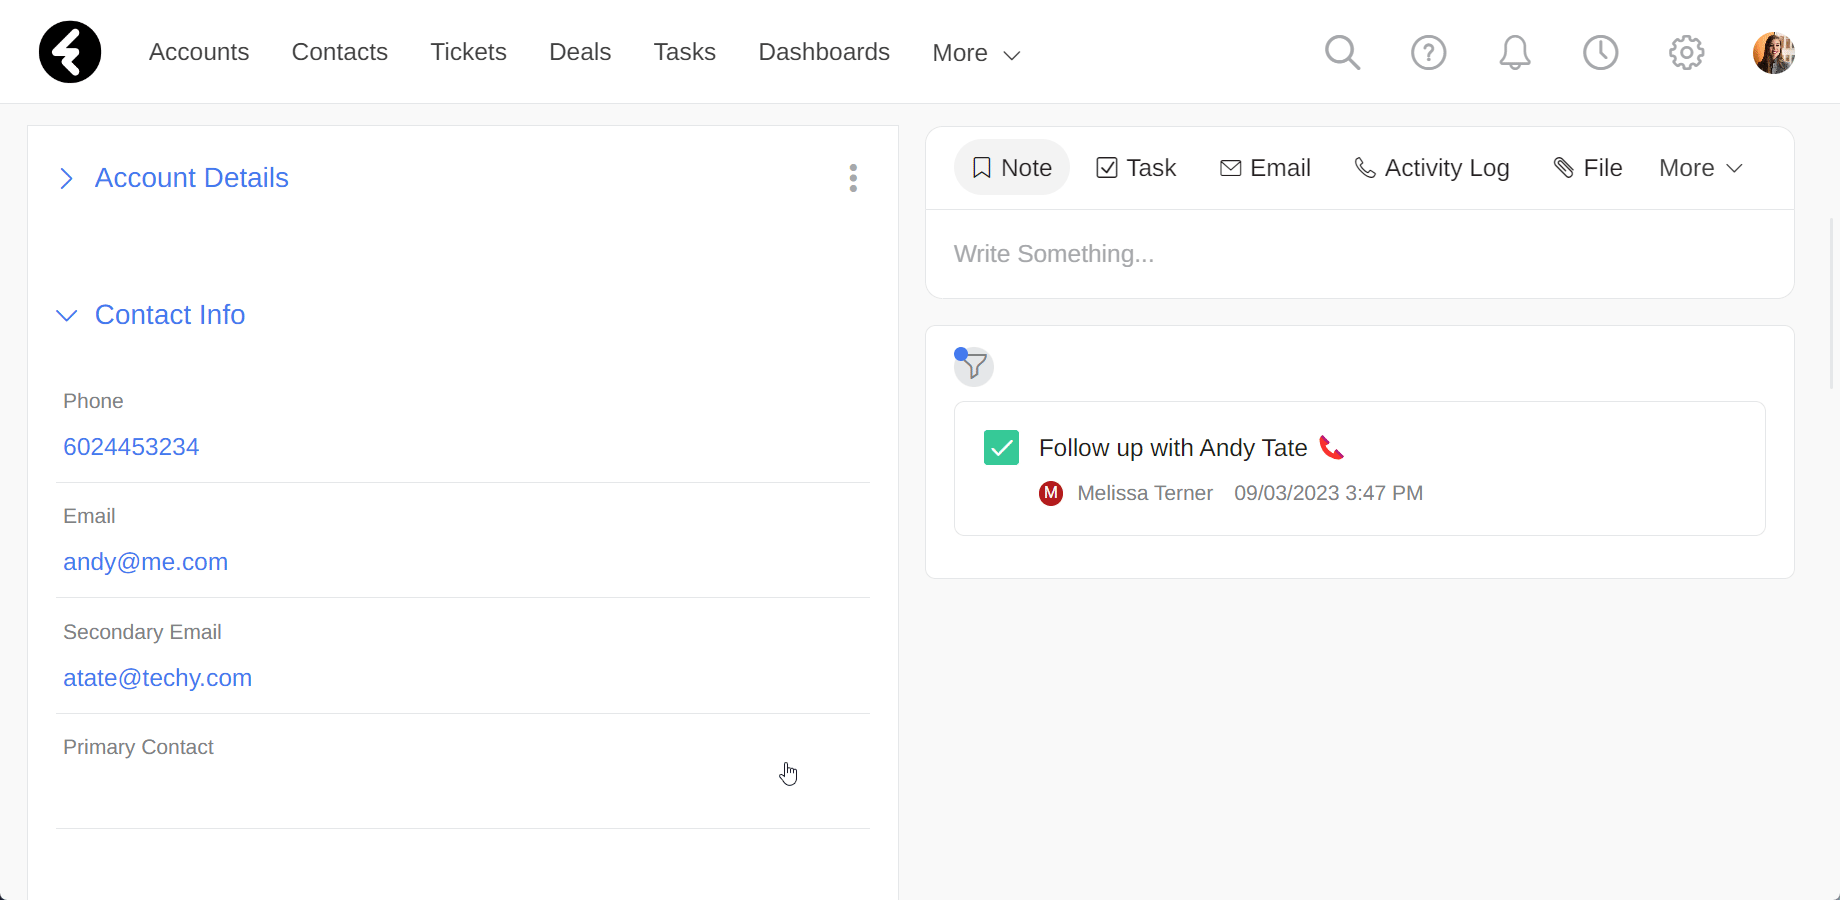
Continuing the welcome email example, you can include more personalized details in each email. For example, you can let customers know who their account manager is, and even provide them with contact details for their manager. Your email may read as follows:
Retrieving field references
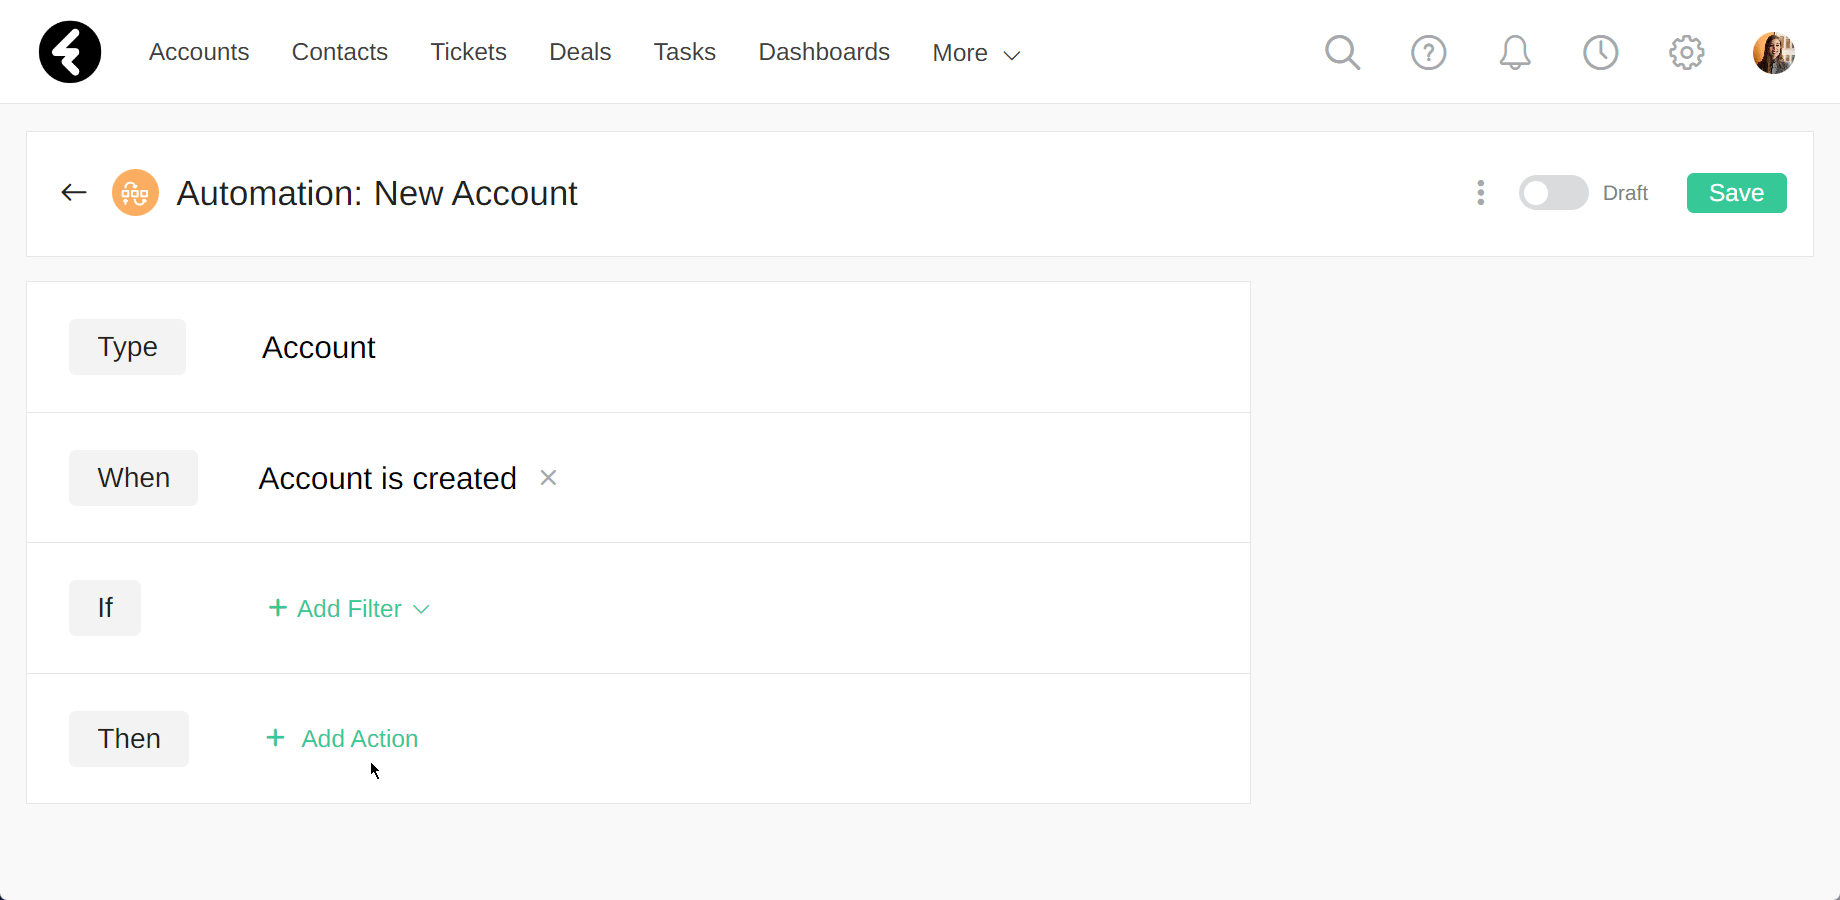
To retrieve a field reference, you’ll need to use the automations object. First, click Automations from the top bar menu, or search for it under More if you don’t see it. Next, click Add on the top right to create a new automation, or open an existing one. If you’re using an existing object, be sure to select one with the relevant object type, as is explained below.
Selecting your object
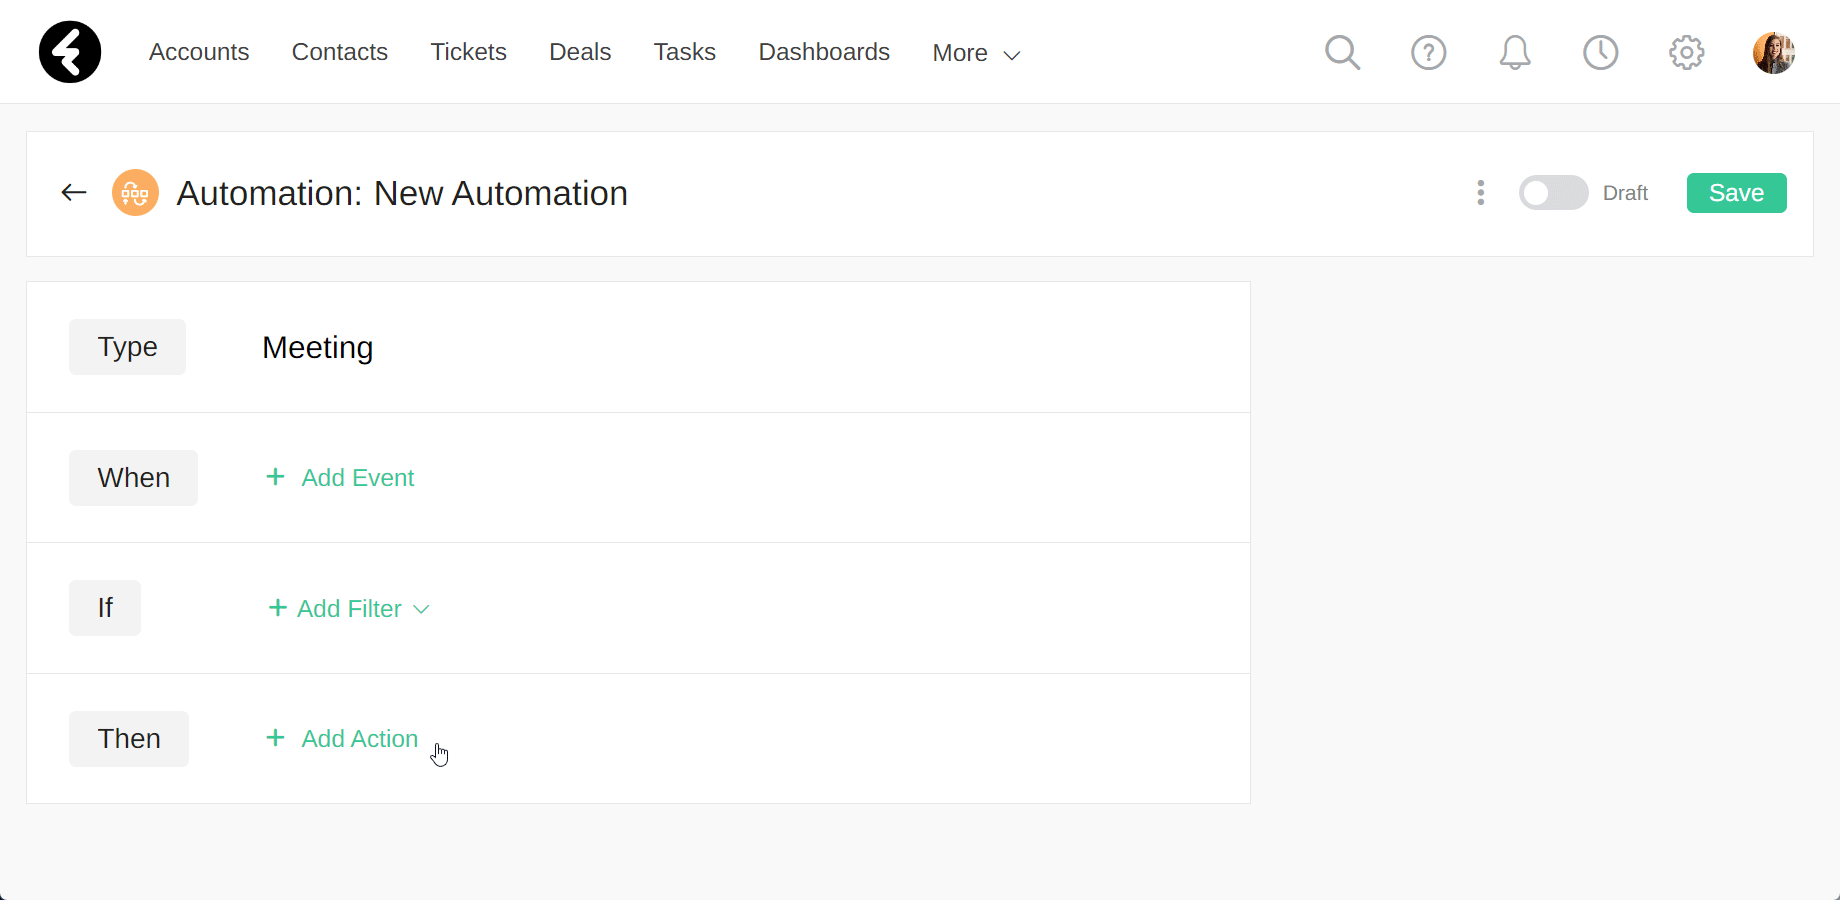
Immediately after clicking the Add button, a pop up will open with a searchable dropdown list of all the editable system objects. The object you choose here will set which field references you can access. Only the fields which belong to or are related to the selected object will be displayed. For example, if you select the Meetings object, only fields which belong to the meetings object will be accessible, such as the Start Date and Location fields. You’ll also be able to access any fields related to the meetings object, as is detailed below. After selecting an object, click the Next button and follow the steps below.
Accessing field references
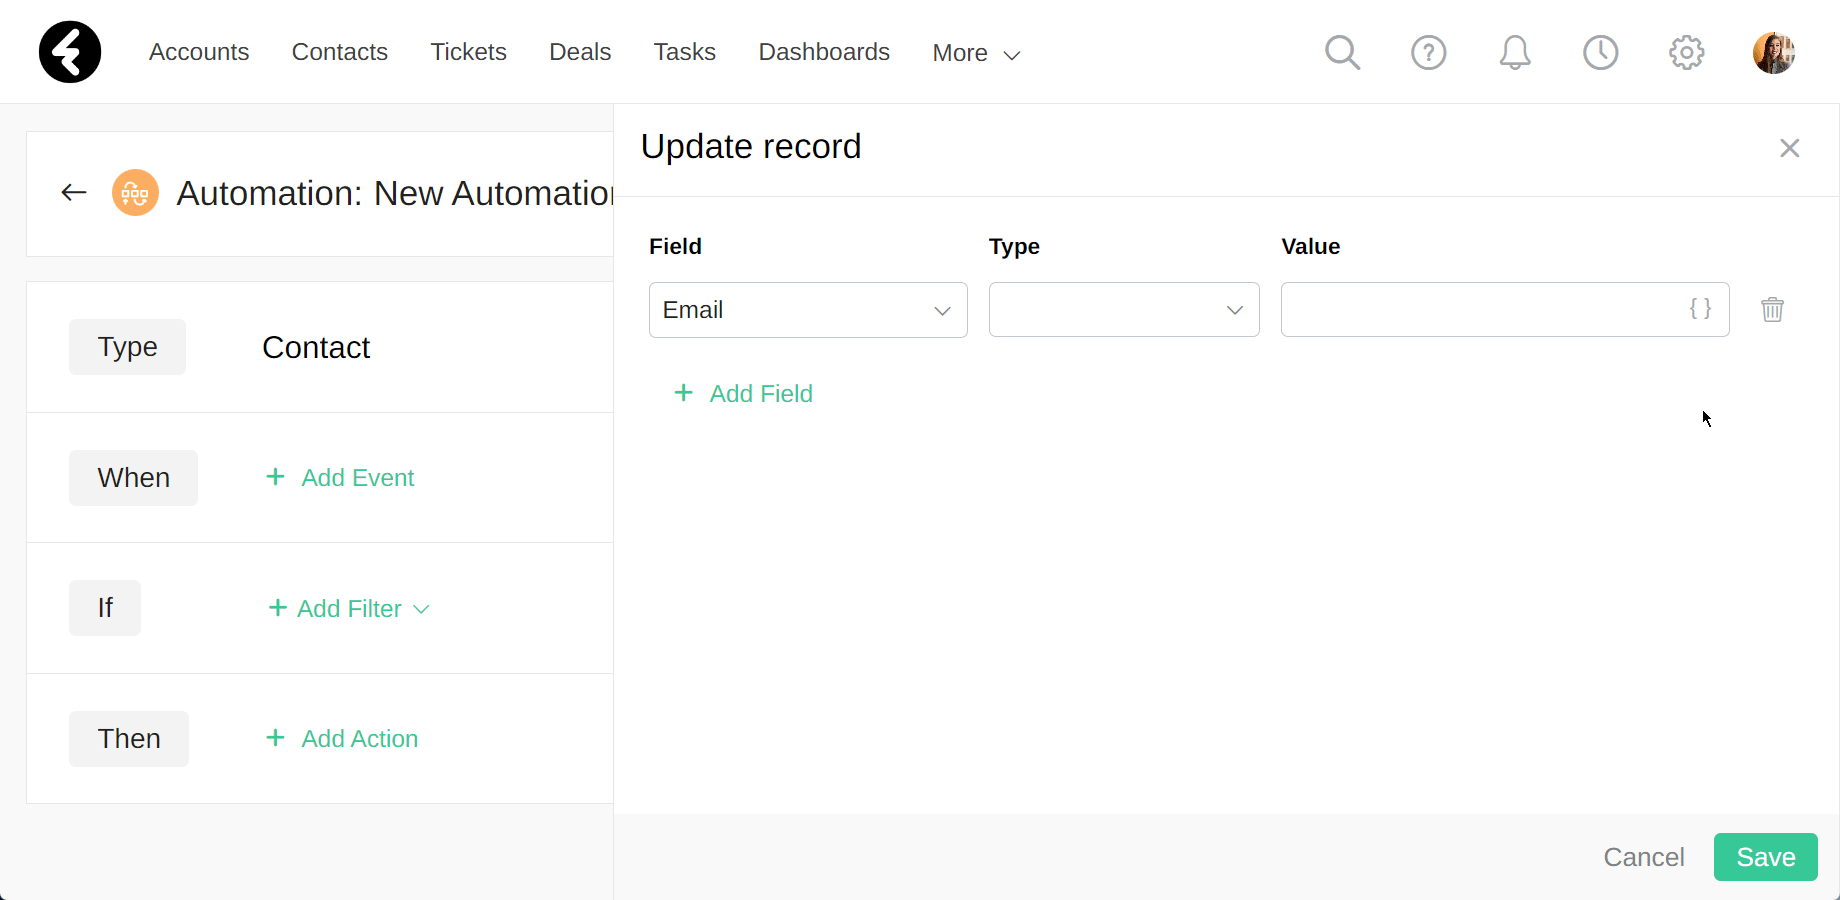
After opening or creating an automation, skip the first few steps and go to the Then section. Click Add Action and select the Update record option. This will open a window on the right of the page, which you can learn more about here, but for field references simply select any random field under the Field column. It will need to be a text, text area, number, URL, email address, or phone number field in order to access field references. You can easily check this by selecting a field and looking for the { } curly brackets icon on the far right of the corresponding box in the Value column. Once you see the curly brackets, click on them. This will open a searchable list of all the fields which belong to the selected object. By clicking on a field, you’ll add its field reference to the Value box. For example, you can search for and select the Location or Scheduled Start fields of the Meetings object to use their field references. You can then either use the field references where they are, or copy them to use them in other places.
The { } curly brackets option for inserting field references can be found in each type of automation action. Details on where to find them and examples for each type can be found below.
Related field references
In addition to adding references to fields which belong to the current object, you can also add references to related fields, which you can learn about here. You can add references to any related object’s fields, whether it's related using a built in lookup field, a custom field, or even the Related To lookup field. You can find an explanation on the Related To field here.
Related field references
To the right of each lookup field in the { } curly brackets field list, you’ll find an arrow. By clicking on this arrow, you’ll open a list of all the fields which belong to the object of the field you selected. For example, if you selected the Contacts object in the Type section on the left of the page, and then you clicked the arrow to the right of the Account lookup field, you’ll open a list of all the fields within the accounts object.
You can click on any of the listed related account fields to add them into the contact automation. One frequent use for this is setting the email of the contact as the email of the account using the Email related field. In this way, the email of a contact will automatically fill in with the related account’s email. You can use this process to set any fields in an object using data from related objects.
Related To field references
The built in Related To lookup field can be found in the Tasks, Meetings, Activity Logs, and Inbox objects. When retrieving a related field reference from the Related To field, there is an extra step. After clicking the arrow to the right of Related To, a searchable list will open with all the system objects. You’ll need to select one of these objects, and click the arrow on the right. You can then select related fields from the selected object. For example, you may wish to use the name of the related account when sending an email in a Meetings automation. You can use the Related To field to access the name of the related account. First, click on the { } curly brackets to open the fields list, find the Related To field, and then click the arrow to its right. This will open the list of objects, where you can select the arrow to the right of the Account object. You can now select the Account Name field to insert the field name of the related account’s name. If your meetings are related to contacts and not accounts, simply select the Contacts object and then select the relevant field. Follow these steps to access any related fields using the Related To field.
Email automation example
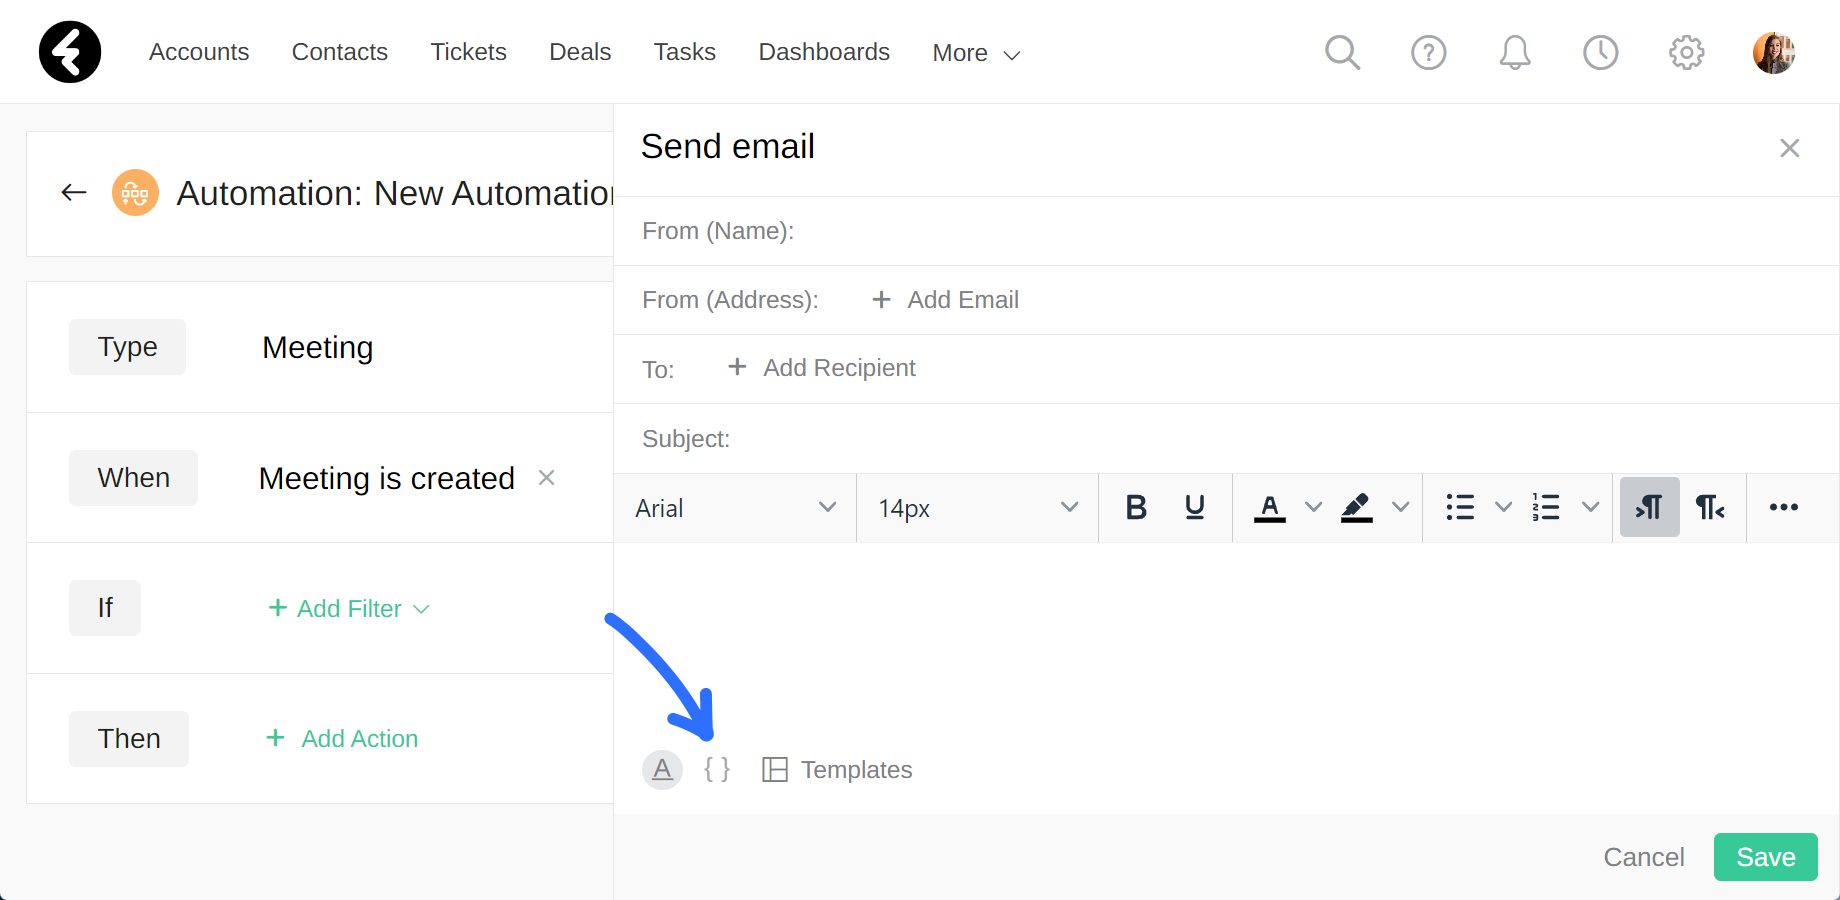
The send email action in automations, which you can learn about here, frequently uses field references to personalize automated emails which are sent out. For example, you can send out emails which include the receiver's name, their account manager’s contact details, the details of their upcoming meeting, and so much more. To use field references within a send email action, click the { } curly brackets found in the bottom left of the email.
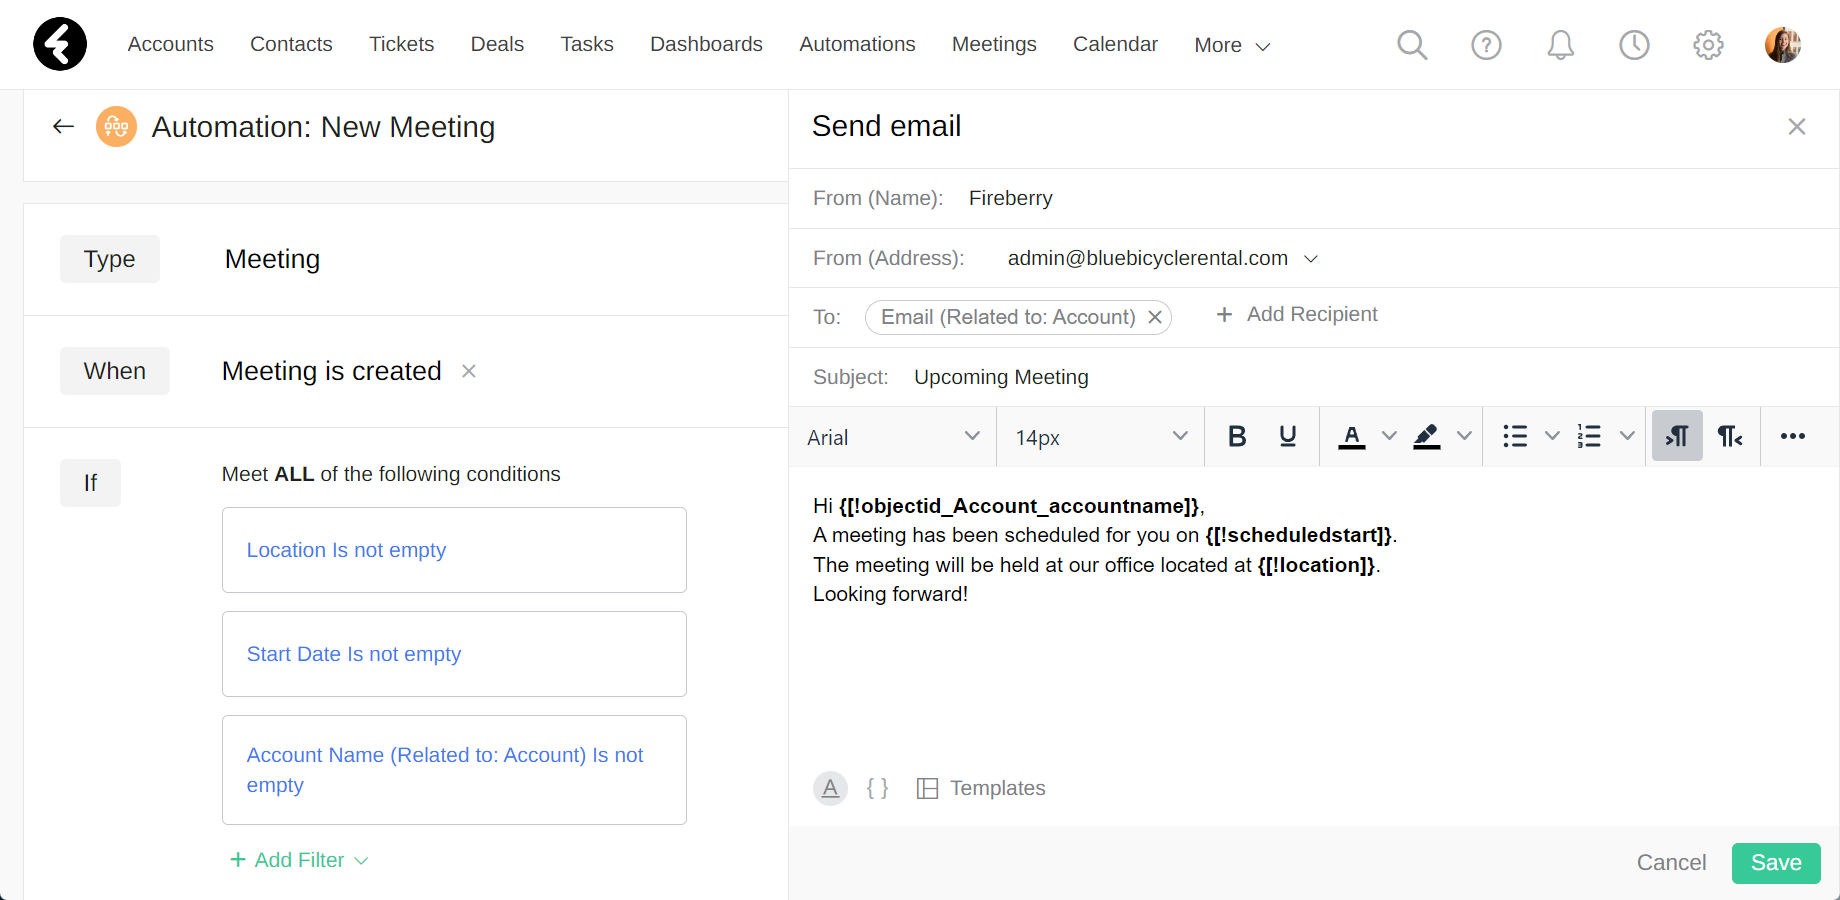
One common use is creating an email automation which sends personal meeting details, such as the subject, start date, or location fields, to your accounts as soon as a Meeting record is created. In this way, each account will receive an automated but personalized email with all the details they need easy access to.
To start, type out the text for your email. Then simply move your cursor to the place you’d like to insert a field reference, click the { } curly brackets icon at the bottom of the email, and select the field reference you’d like to add, such as the Start Date or Location field. Add any other fields you’d like using this process.
By using field references, the email automation in the picture below could send the following text:
Including field references in emails is a great way to efficiently build good relationships with your clients, as you can send automated but customized emails.
Update record automation example
By using field references in the update record action of automations, which you can learn about here, you can easily update field values relatively based on other fields. To access field references within the update record action, simply click the { } curly brackets found on the right of the Value box.

One example of a useful update record automation is in the contact information of the Accounts object. You may want this information to automatically update based on the fields in the related Primary Contact record. To start, first create an Accounts automation, and set it to run whenever an account is Created or Updated. Then create a filter which checks if the Primary Contact lookup field was changed, as well as if the related Email or Phone fields of the primary contact field have been changed. Use the group filter option, explained here, to check if at least one of these fields were changed.
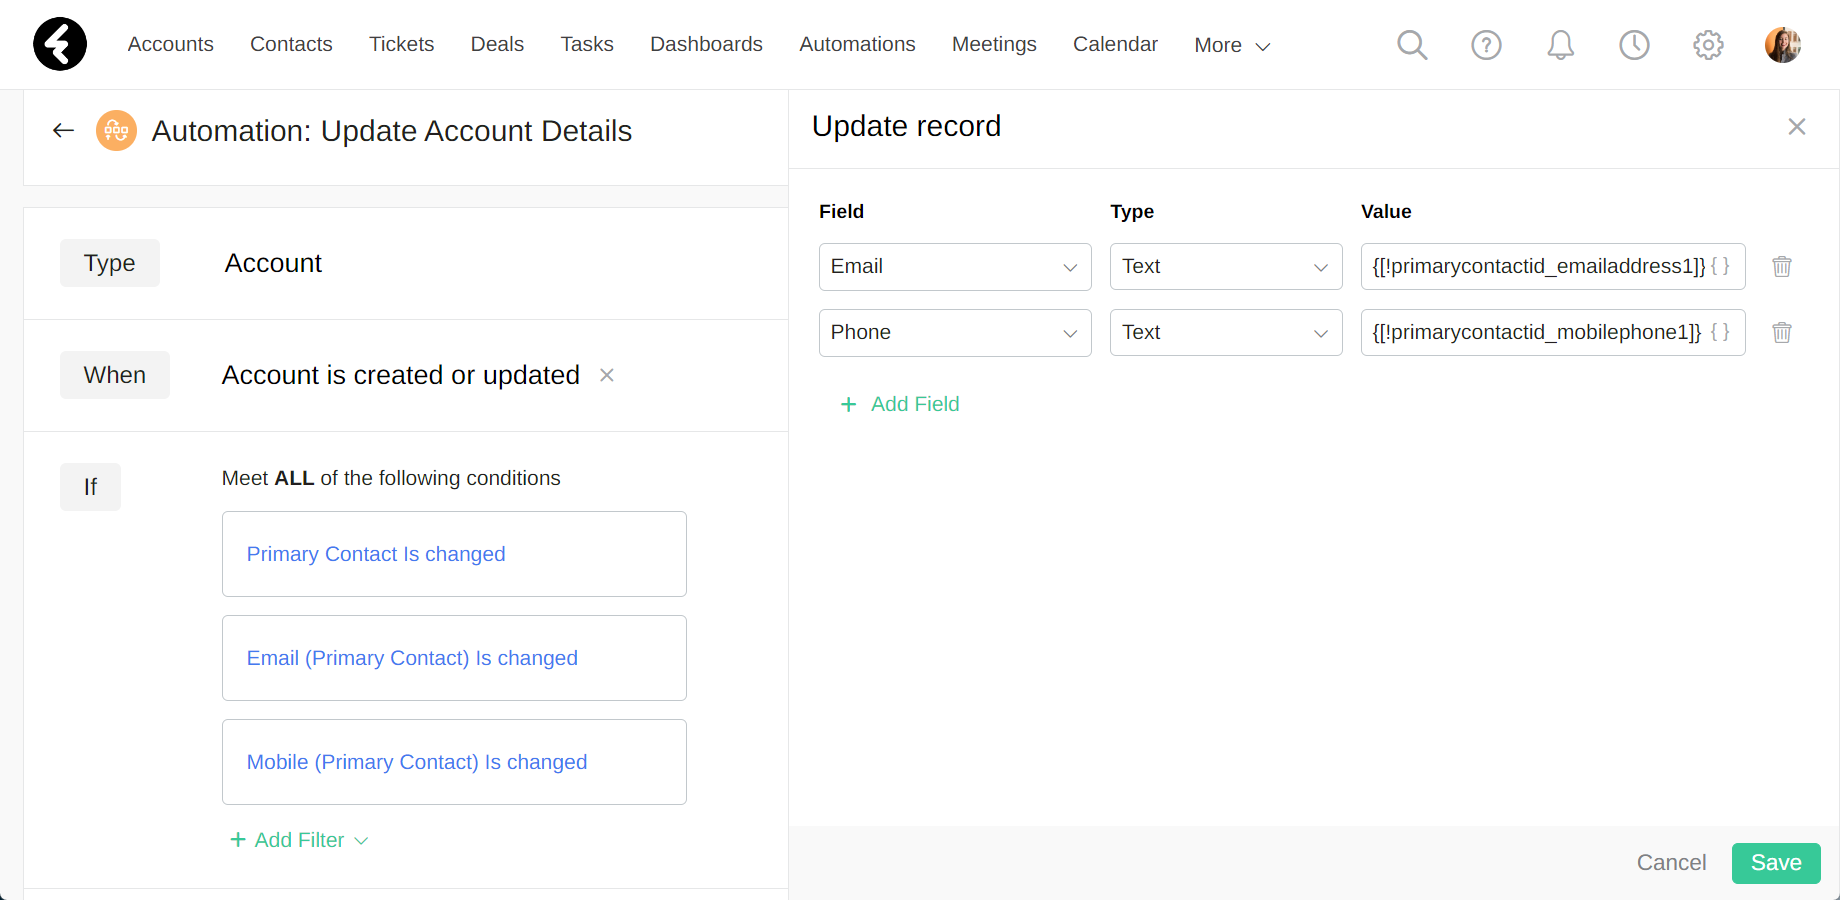
Next, add the Update record action. Set the first field column to Phone, and its value to the field reference for the related primary contact’s Phone field. Then do the same thing with the Email field. Now, the communication details of each account will automatically update with the details of their primary contact whenever the primary contact is set, or the email or phone number of the primary contact are set.
Create record automation example
The create record action in an automation, which you can learn about here, frequently uses field references in order to fill in the new record’s fields with relative data. To use field references within the create record action, simply click the { } curly brackets found on the right of the Value box. They will only appear if the field selected in the corresponding Field column is a text, text area, number, URL, email address, or phone number field.

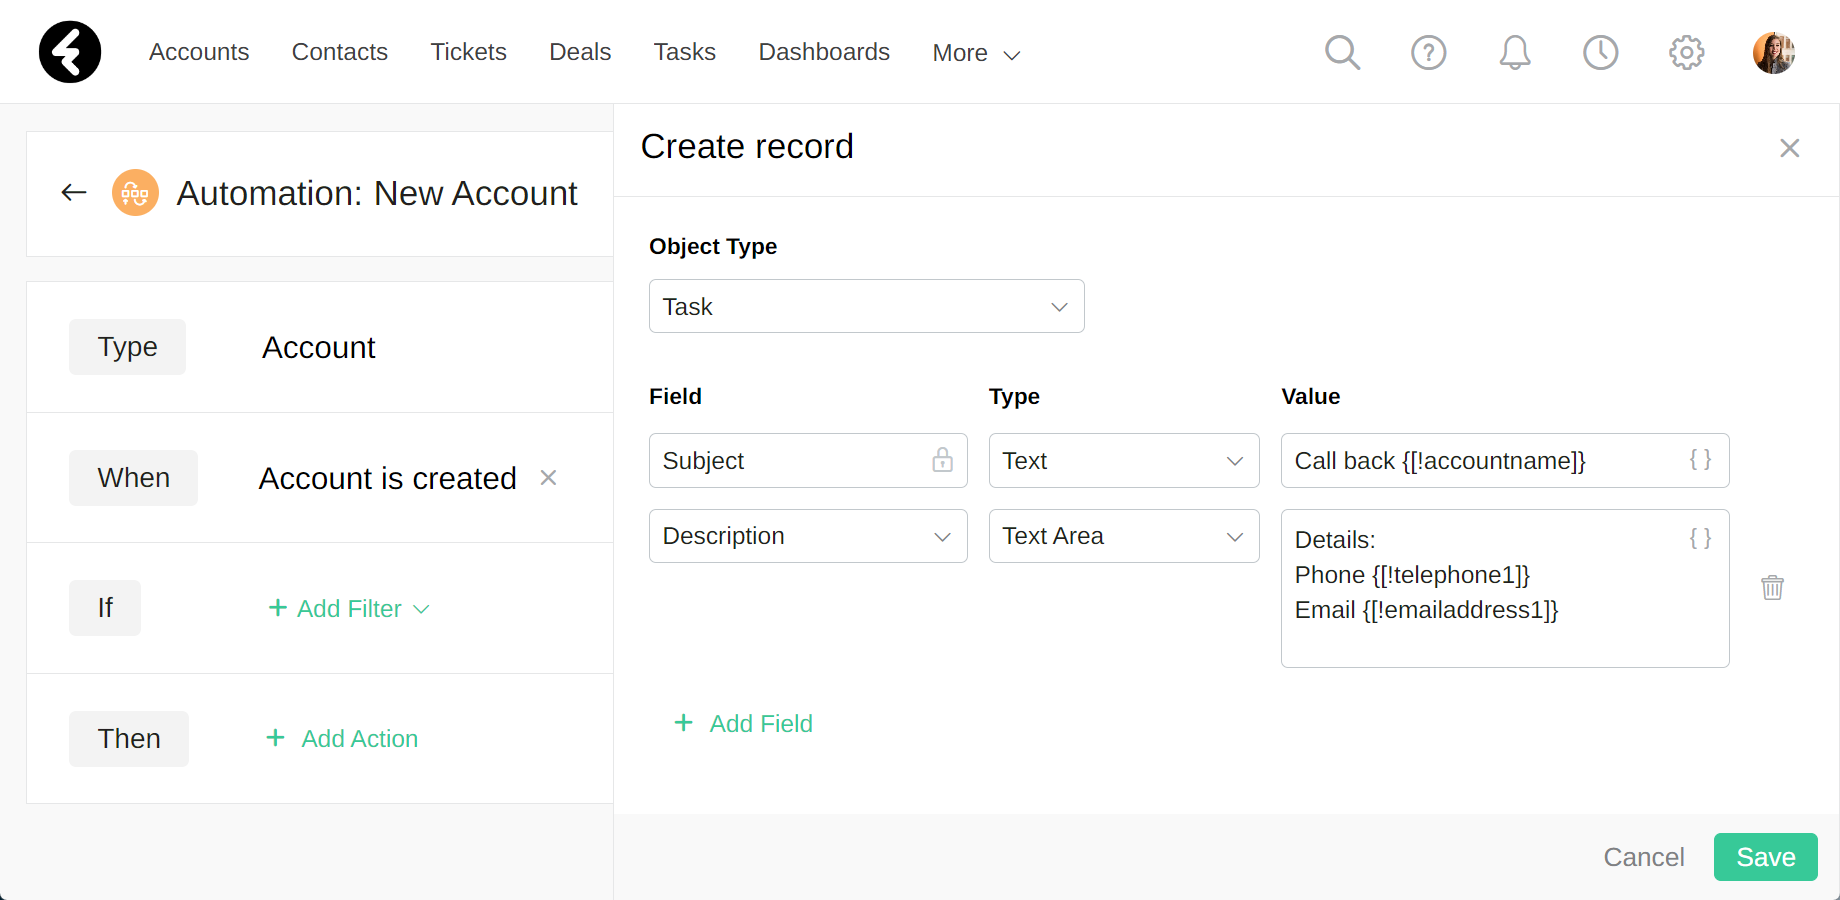
For example, you may want to create a new task every time an account record is created, and use field references to set the name of the task, contact details, and any other relevant information. Start by creating a new automation for the Account object where the When is set to Account is created, and then use the Add Action option to add a Create Record action. Next, use the create record editor on the right to set the Object Type field to Task, so that a new task record will be created.
You can now add fields for your new task record. For example, you can set the Subject with the text “Call back ‘account’s name’”. Simply type in “Call back ” and then insert the Account Name field reference. Alternatively, you can use the related Full Name field from the Primary Contact lookup field if you’d like the task to refer to the related contact instead of the account. In the exact same way you can add any other fields and field references you’d like, such as including the account’s phone number in the task description.
Field references help you personalize all your newly created records and ensure that all the fields will be automatically set with the relevant information, such as names and contact details. You can also use field references in webhook automations, which are explained here.
Record template example
By using field references within record templates you can easily generate personalized documents using one pre-built template. To learn about record templates, click here. In order to insert field references into a template, you’ll first need to copy the relevant field reference from the automations object, as is explained above.
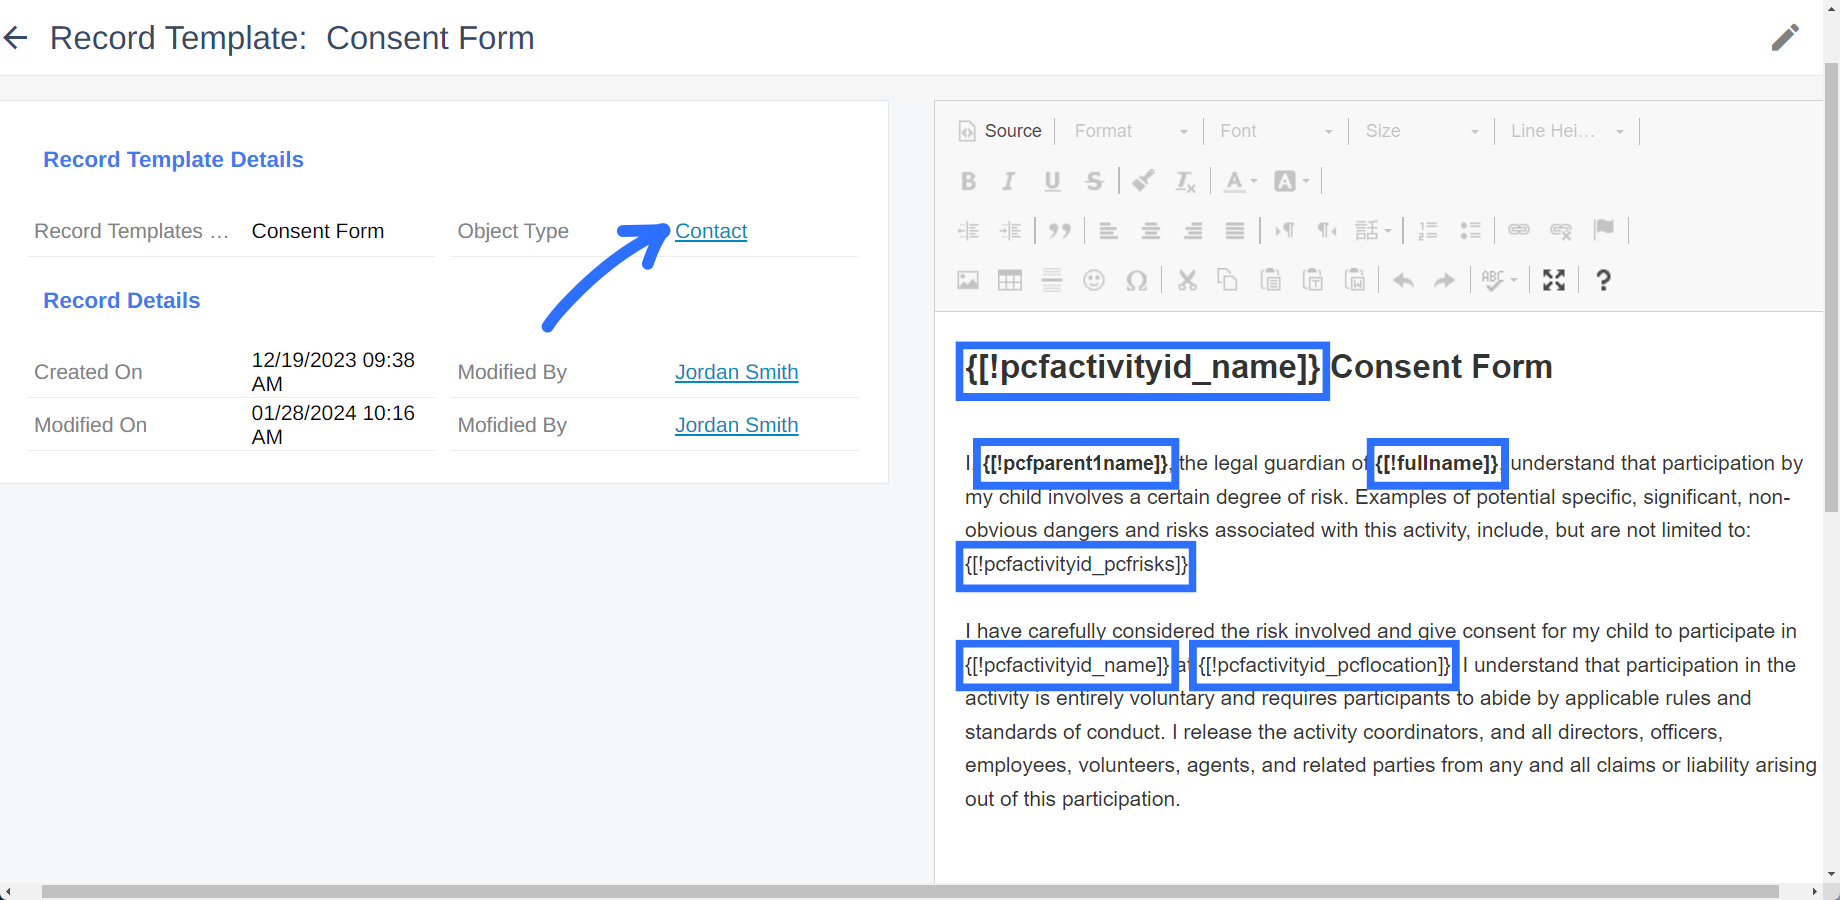
One common use is a consent form for school activities, where you can insert the details of both the contact and the activity throughout the form. You’ll then be able to easily send out the consent form to legal guardians to sign, and all the details will automatically fill in for each contact.
To start, open up your record template and make sure the object type is set to Contact. Next, type up your consent form and insert all the Contact field references anywhere where you’d like to insert dynamic contact details. You can then use the Activity related field references to include information about the related activity. The final result may look something like the picture below.
Using field references helps you easily and efficiently personalize automated actions, such as tasks and emails, without having to manually add in case based details. This also prevents typos and other unintentional human errors.