Setting and adding automations
Automations are automatic actions which will be performed by the system whenever specific criteria is met. For example, you can set up an automation which will send welcome emails to each new lead as soon as their account is created. This can provide new leads with information they may need and encourage them to continue with their sign up, without requiring any work on your side past the initial automation set up. Automations streamline your workflow and allow you to work efficiently by creating a self operating system.
Adding a new automation
To add a new automation, first select the Automations object in the top bar menu. If you don’t see it there, find it in the dropdown menu under the More option. By clicking the Automations object, you’ll open a list of all the existing automations in the system. Click the green Add button on the right side of the screen to start creating a new automation.

The first step will be to choose the object where the automation will take place. Then you’ll be able to set the time frame, filters, and results. Each section of the automation is explained in detail below.
Editing existing automations
If you’d like to edit an existing automation, first open the complete list of automations, as is explained above. Then simply click on the automation you’d like to edit to open its page. You can change any of an automation’s settings or activities except for its type. To rename an automation, first click on the current name of the automation on the top left. Then simply type in the new name and click Enter or click anywhere on the screen other than the automation's name; the new name will be saved automatically. Make sure to click Save on the top right once you’ve finished making changes. If your automation is not activated, which you can learn about below, a pop up will appear where you can choose to save your automation with or without activating it.
Duplicating automations
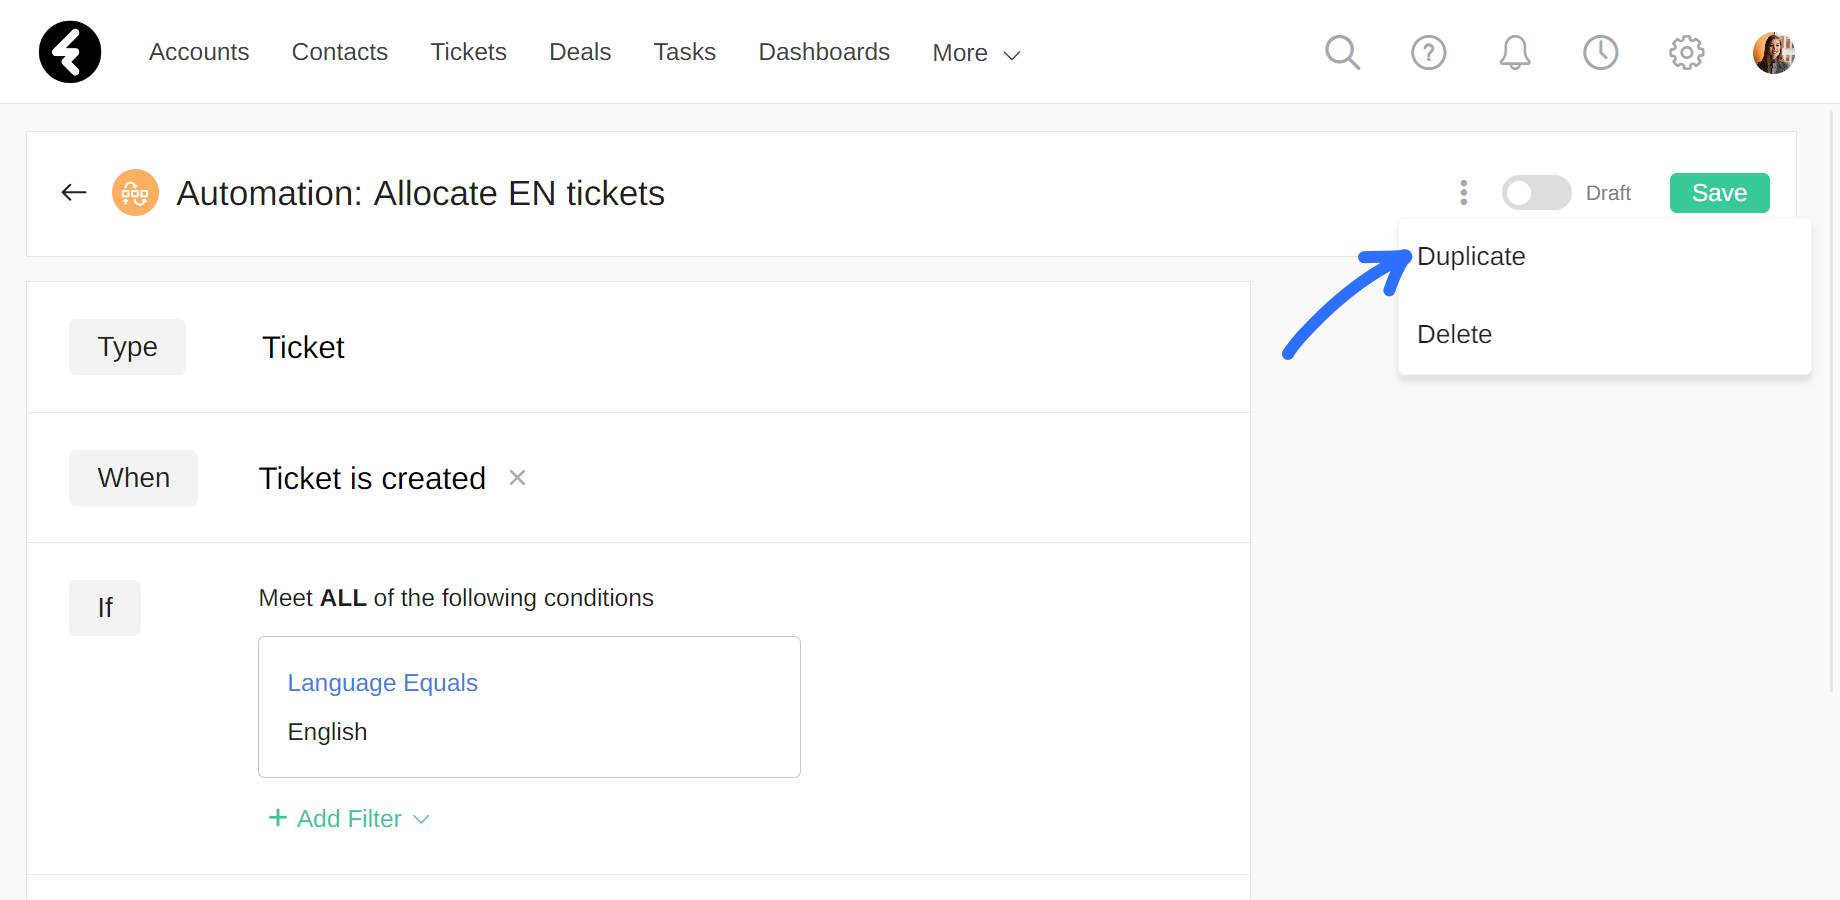
You may wish to duplicate an automation in order to easily create a similar automation without having to recreate it from scratch. To duplicate an automation, simply open the three dot menu in the top right corner of an automation’s page and then click Duplicate. A notification will appear confirming that the automation was successfully duplicated, and the new automation will open.
Every part of the automation will be duplicated, including the activation status, and the name will have the word Copy added to the end of it. As with any automation, you will not be able to change a duplicated automation’s type, which you can learn more about below.
Deleting automations
To delete an unused automation, first open the specific automation’s page. Then click the three dot menu on the top right and click Delete. A pop up will appear where you will have to confirm you’d like to delete the automation by typing in DELETE. Once you click the red Delete button, the automation will be permanently deleted. You can also bulk delete automations in the list view of all the automations. Simply select the automations you’d like to delete by checking them, and then press Bulk Delete on the top of the list. To learn more about bulk delete, click here. Remember that instead of deleting an automation, you can simply deactivate as is explained below.

Choosing an object (Type)
When you create a new automation, you will be immediately prompted by a pop up where you’ll select the object type from a searchable dropdown list of system objects. The type of an automation sets the object the automation will be applied to. For example, if you select the Task type, the timeframe for the automation may be based on when a task record is created or updated, and the filters used can include any of the task object’s fields and related fields. The create and update record options under Then will create or update task records.
Once you select the automation type, click the Next button to start building your automation. The type will be displayed at the top of the automation, and cannot be changed after it is set.

Setting a time (When)
The When options sets the timeframe of when the automation will be applied. There are five different options. The first three are based on when a record of the selected object type is created or updated. You can also choose to activate the record based on either a fixed or relative time. Each option is explained in detail below.
To set the time frame, simply click the green + Add Event button and select one of the five options. If you’d like to change an existing timeframe, first click the X to the right of the current timeframe, and then select a new one.
Record is created and updated
You can choose to activate an automation whenever a record is created, updated, or both. In this way, automations can be activated as soon as you add or change system records. You can choose from the following three options:
- Record is created: Activates an automation whenever a new record is created in the system, such as assigning an account manager whenever a new account is created.
- Record is updated: Activates an automation whenever specific existing fields in the object, which are specified in the If section, are updated. For example, you can create a task whenever a ticket’s owner is changed.
- Record is created or updated: Combines both the previous options, so that the animation will activate if a new record is created or an existing record is updated. For example, you can send out an email with a meeting’s details every time a meeting is created or the time is updated.
Relative time
The relative time uses a time which is relative to a date field in the record, such as an hour after the record was created or an hour before the next meeting date. By clicking Relative time, the when field will fill in with the default 1 Hour After Created On. You can change each of these four sections by clicking on them and selecting from the opened dropdown lists, which contain the following options:
- 1: This allows you to choose a number between 1 and 100 and will set the length of time.
- Hour: This allows you to choose between Hours, Days, Weeks, Months, and Years and will set the measurement of time. It will be combined with the number chosen before it to set when the automation will be activated.
- After: Here you can choose between Before and After. The Before option will not be displayed for fields where this isn’t relevant, such as Created On and Modified On.
- Created On: This will let you choose from a list of all the Date and Date & Time field types in the system, which you can learn about here. The date value in the selected field will be used for the relative time.
Fixed time
By selecting Fixed time, an automation will activate based on a specified time, such as Every Day At 10:00 AM or Every Month On The 1st at 9:00 PM. Like relative time, fixed time uses underlined changeable settings. The first lets you choose between every day/week/month, and then you can set the rest of the timeframe accordingly as follows:
- Every Day: Select a time from the dropdown list. The automation will occur daily at the specified time.
- Every Week: Set both which days of the week and at which time the automation will occur weekly. To select multiple days, simply move the gray toggle to green; You can deselect days by turning the toggle back to gray. This will allow you to set an automation to occur every Monday and Thursday, for example.
- Every Month: Set both which dates in the month and at which time the automation will occur monthly. Like every week, you can select multiple dates using the toggle. In this way, an automation can be activated every ten days, bimonthly, or any other date combination you’d like.
Setting a filter (If)
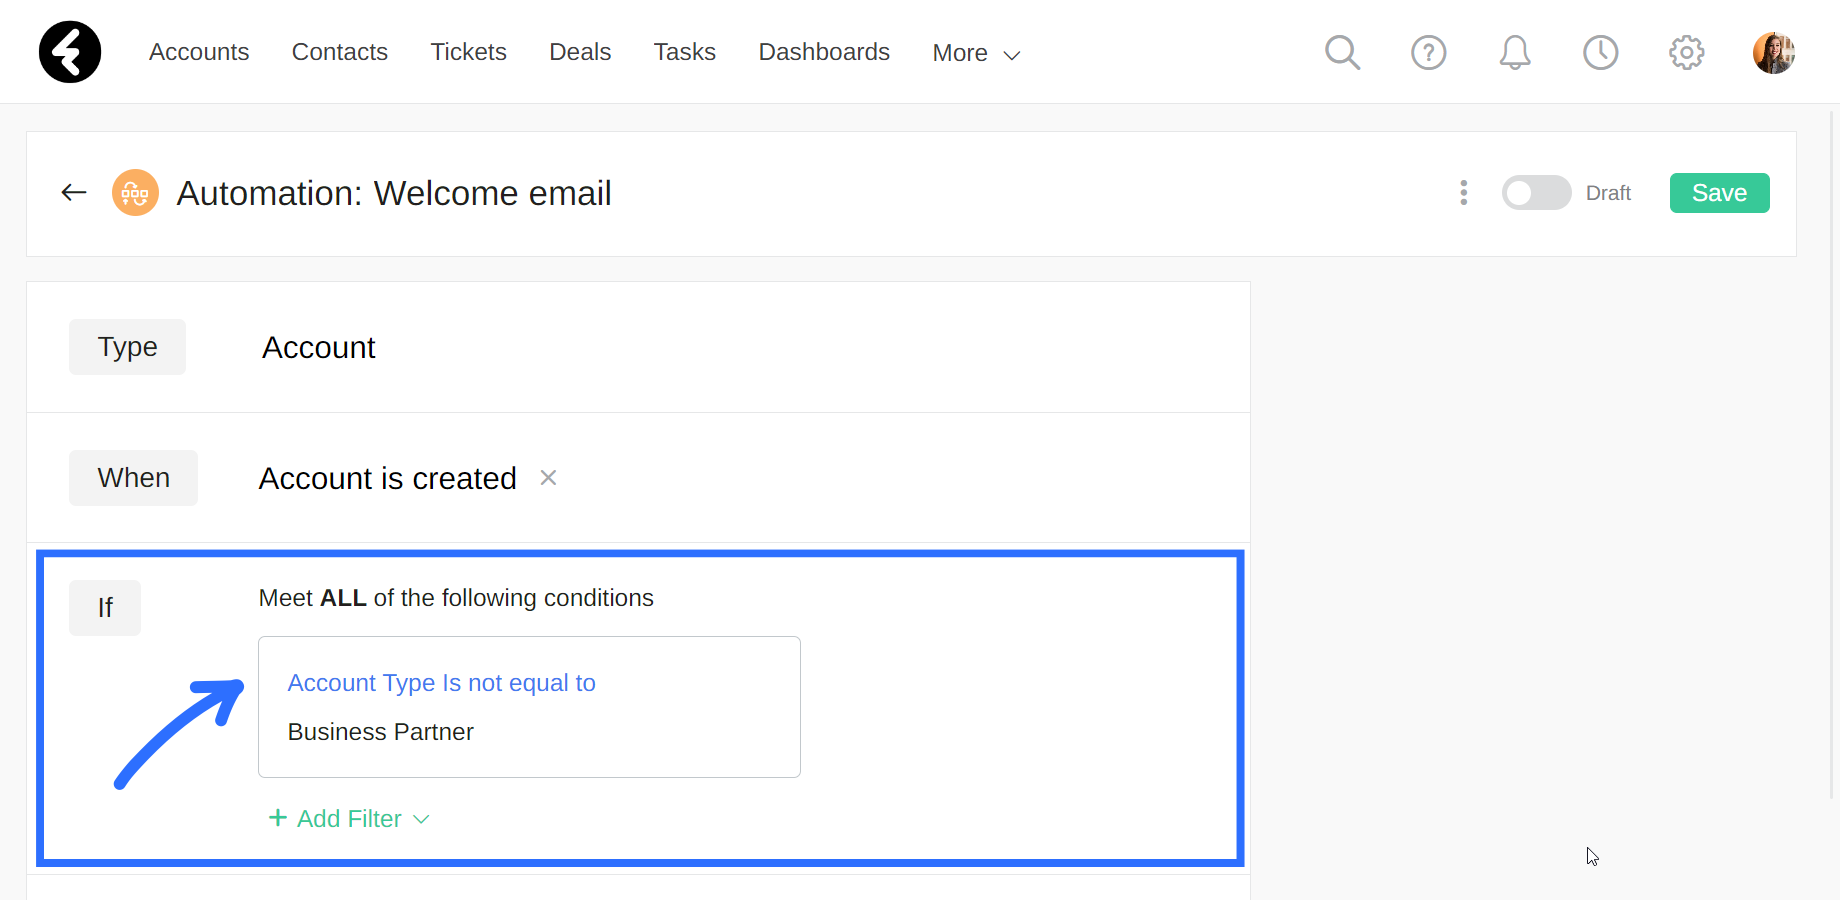
Using the If section, you can custom build a filter which will set which records the automation will be applied to. For example, you can create a filter which sends emails to new accounts, but only if the account type is not set to business partner. To set a filter, first click the green + Add Filter button. This will open three sections: field, operator, and value. Set the field to the system field you’d like to use, such as Account Type. Next, set the operator to the way you’d like to check or compare the field, such as Is changed, Equals, and more. If you’ve selected a comparison operator, such as equals or is not equal to, you’ll also set the value to compare the field to. For the above example, select Is not equal to for the operator and Business Partner for the value. Once you’ve finished setting the condition, click Apply. Now welcome emails will only be sent to accounts where the type is not set to business partner. You can add as many conditions as you’d like to your filter. You can also choose whether you’d like all your conditions to be met, or use a group filter so that only one must be met. Filters are also used to display views, and you can find a detailed explanation on how to use them here.
Choosing actions (Then)
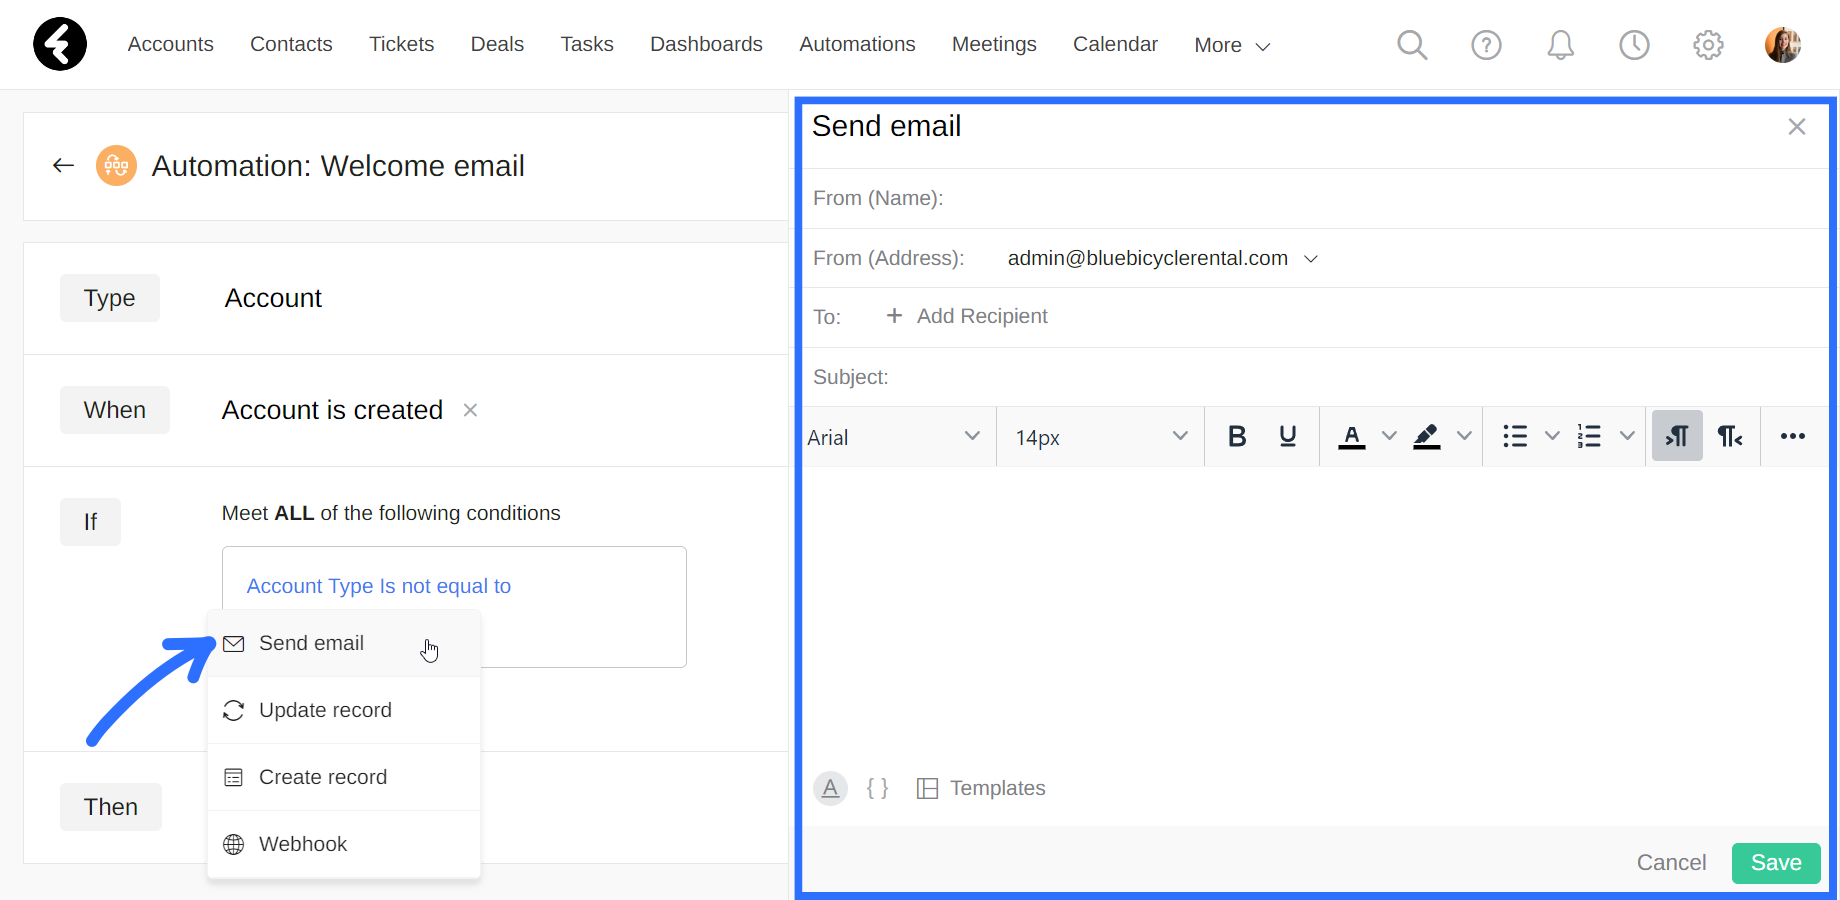
Under Then you can select one or more actions which will be executed when the triggers you set are met. The actions will be executed automatically. You must have at least one action in order to save an automation. You can automate the actions listed below. Click on the name of an action to open a detailed article explaining the action.
- Send Email: Send a custom and personal email using field references and/or fixed templates, such as a welcome email.
- Update Record: Change as many or as few values of fields as you’d like within the selected object, such as the account manager.
- Create Record: Create a new record in the system. You can select from a variety of options, such as Meetings, Tasks, Activity logs, and more. For example, create a new task record whenever an account is updated to active.
- Webhook: HTTP request/response methods used to pass and receive information from other systems, such as integrating a lead form from your website.
By clicking on an action, you’ll open a pop up on the left where you can set the action’s settings. For example, by clicking Send Email you’ll open a pop up where you can set up the email you’d like to send.
Activating automations
An automation’s activation status sets whether it will currently do anything. If an automation is set to active, the actions specified will be completed. If an automation is set to draft, the automation will not run and nothing will happen when the set triggers are met.
To activate an automation you must change the automation's status from Draft to Active. Simply click the gray toggle on the right side of the screen. You can deactivate an automation at any time by clicking the green toggle. Set automations to draft when you do not want them to run currently, but will need to use them in the future, such as those used to send emails to a specific list of customers.
Whenever you attempt to save a non activated email, the system will first pop up with a reminder that your automation is not active. You can then choose to either Save Without Activating or Save & Activate your automation.
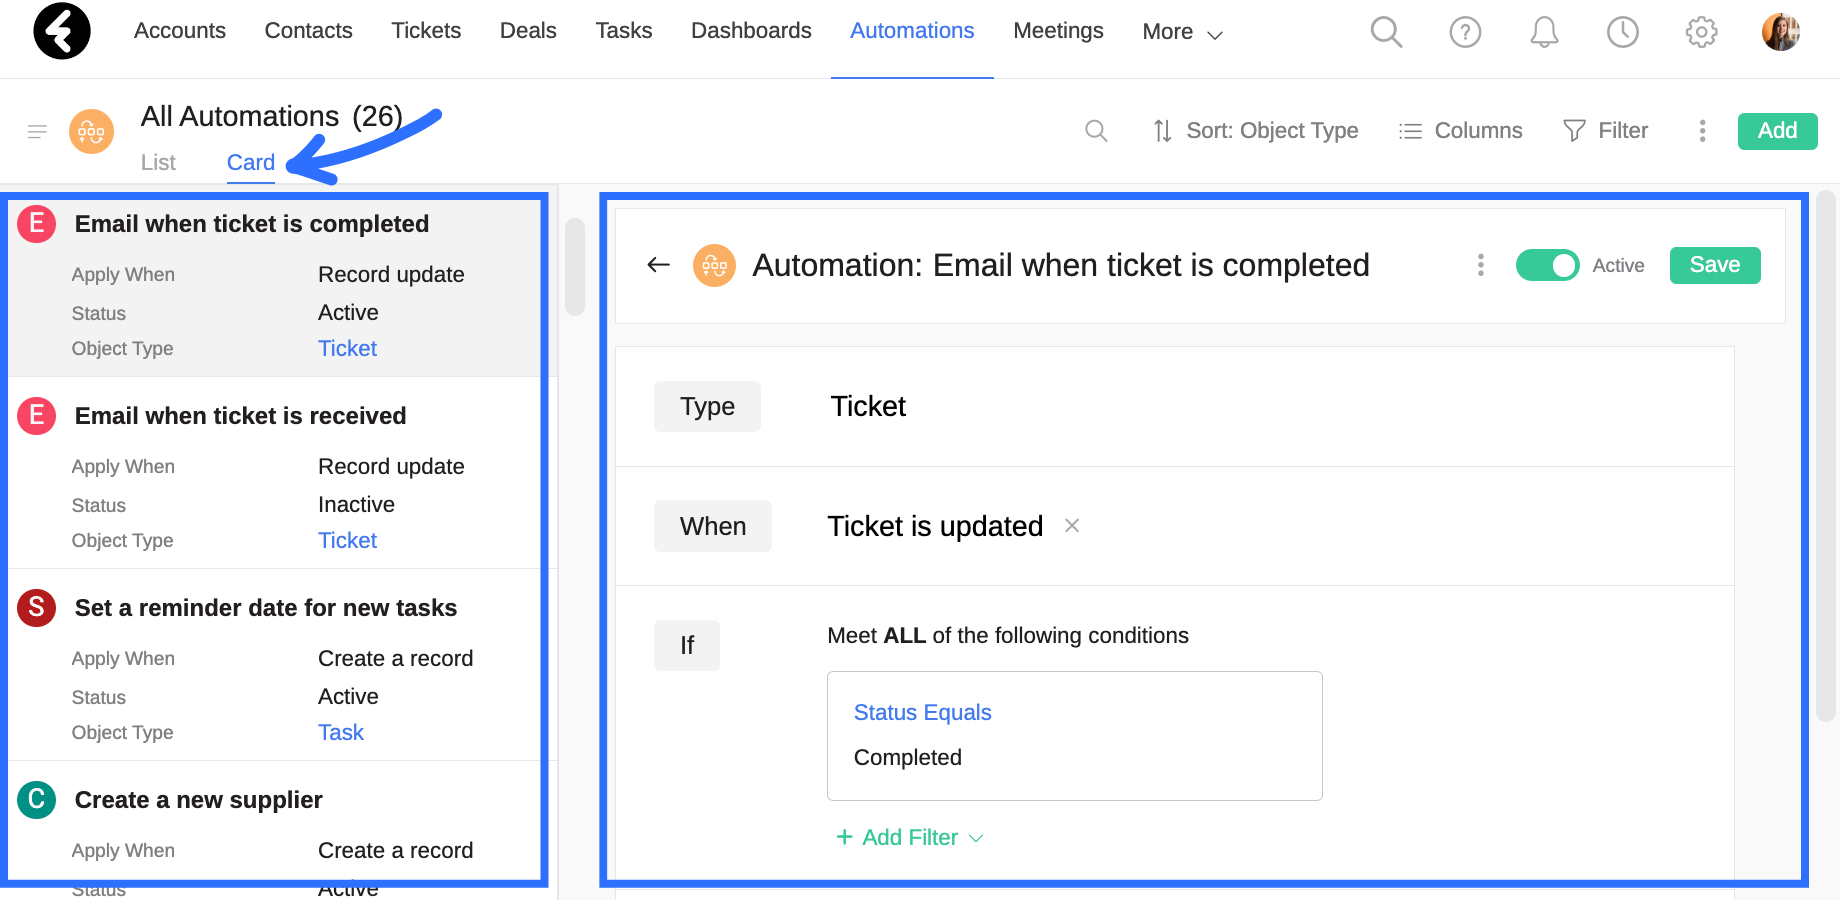
Card view
You can use card view in automations to easily go through a list of automations one after the other. On the left of the view you’ll find the list of automations you’re working with, and on the right you’ll find the individual record page of the selected automation. To use card view when working with automations, simply click the Card option under the view name on the top left.