Managing your user profile
View your profile
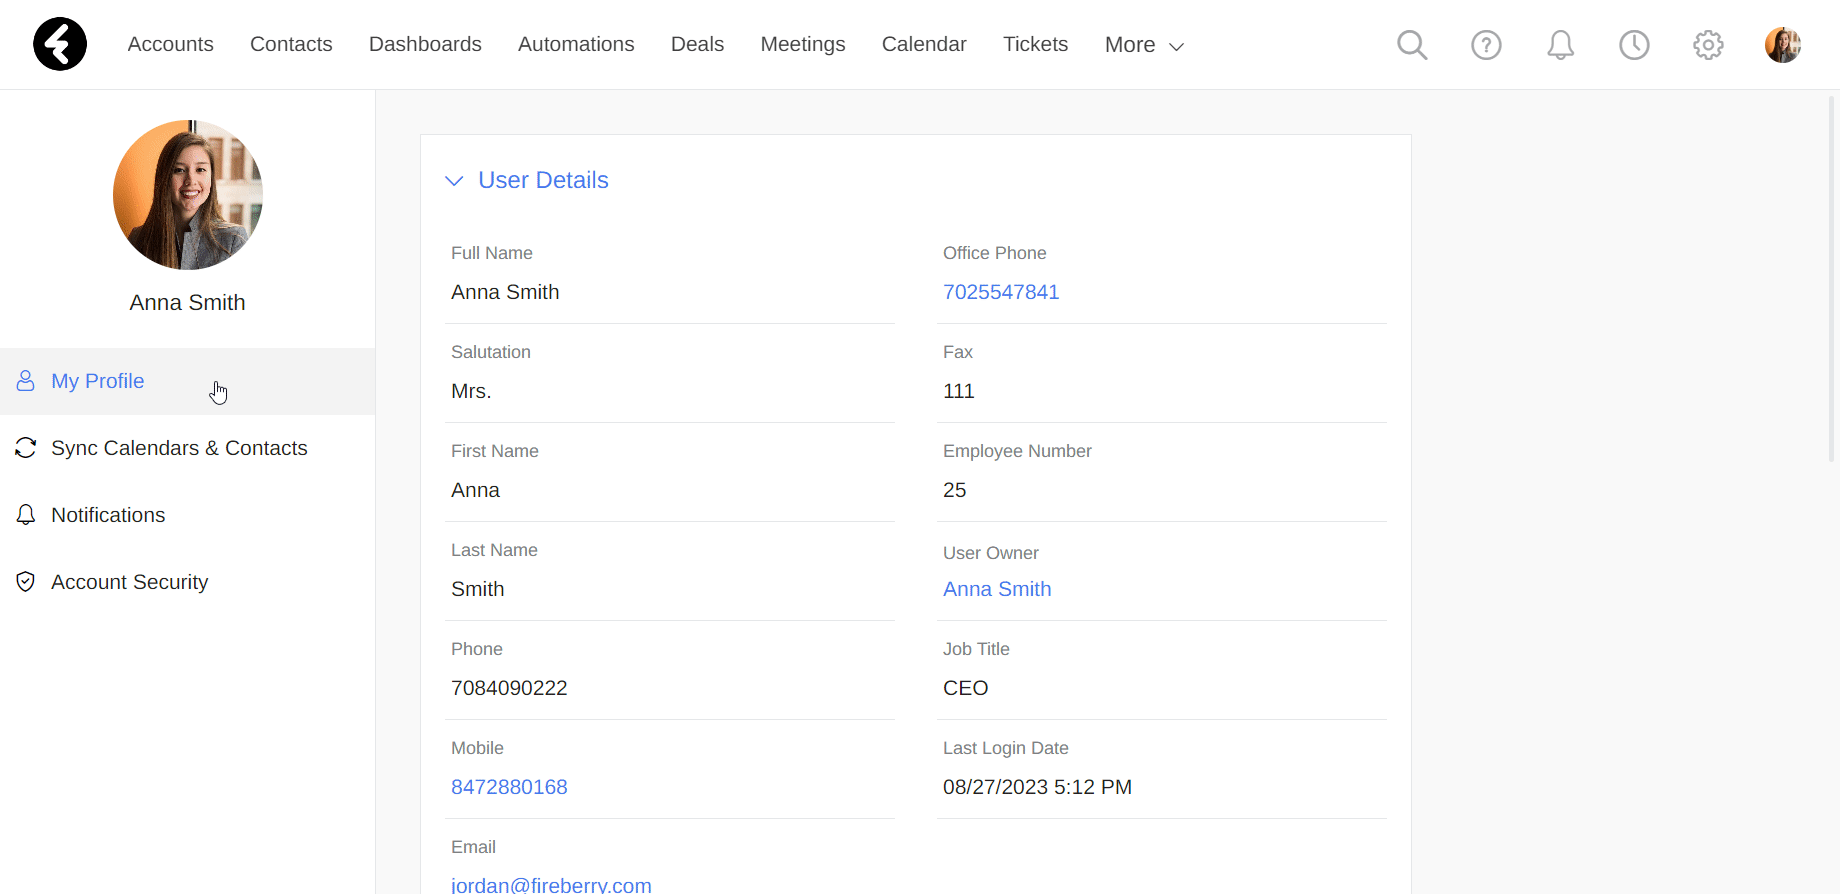
The user profile page shows detailed information about the current user, including their contact information, role, profile picture and more. To navigate to your profile page, click your profile picture in the top right corner, and then click Profile. This will take you to your profile.
Under My Profile, you can view and update a variety of different fields which define a user’s personal information and permissions.
User details
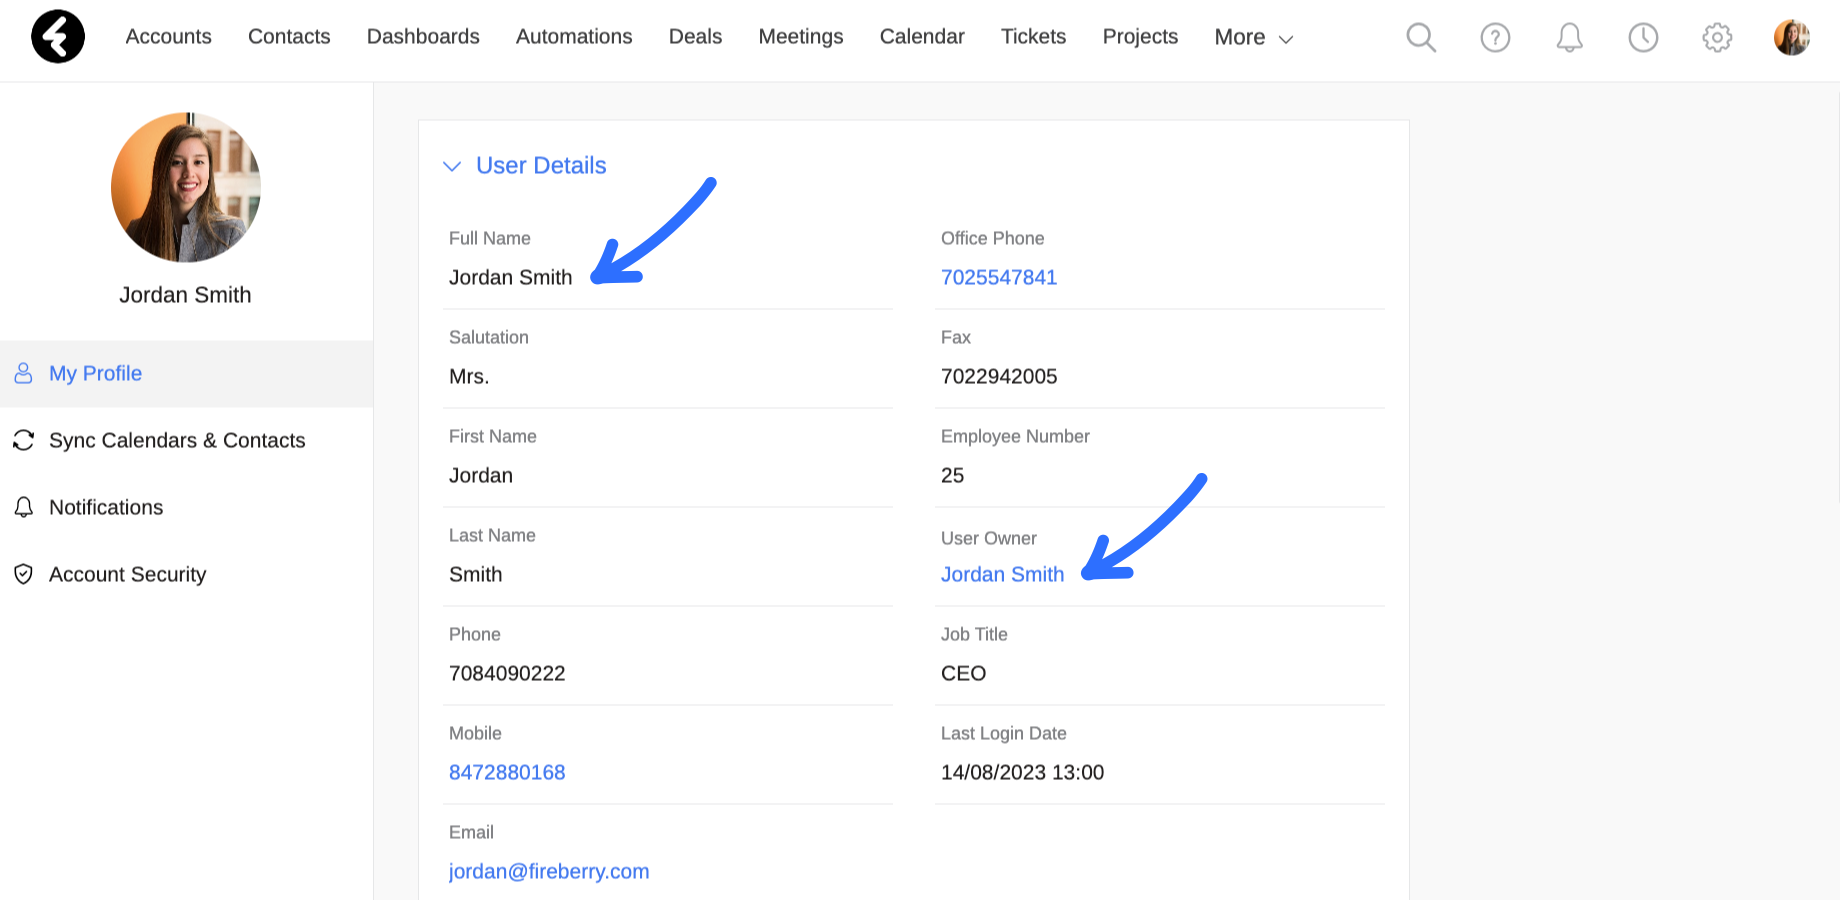
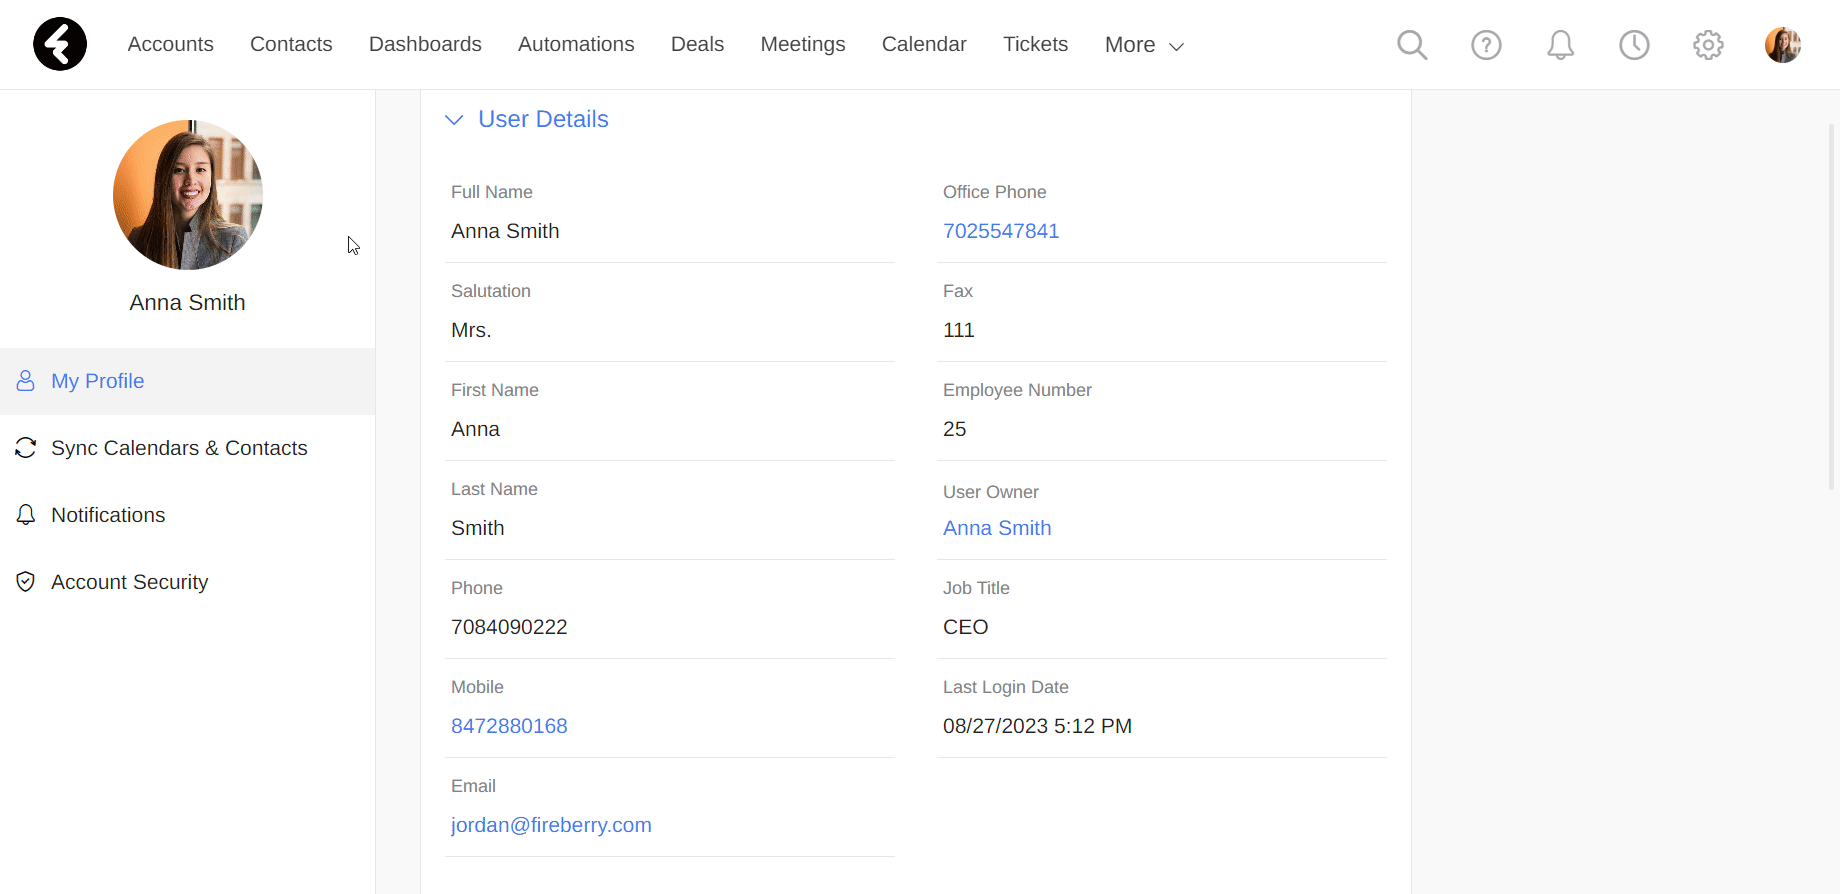
Under the User Details section you’ll find personal information such as your name, salutation, contact information, and more.
Setting your name
The name you set in your profile will be used throughout the system. The Full Name field is a read only field which is filled in automatically using the First Name and Last Name fields. Whenever you change either of these fields, the Full Name field will also update. You can also choose to set the Salutation field to the relevant honorific.

The email set here will be used for everything besides your login, which is explained below. Some uses for this email are:
- Notification emails, such as updates about open tasks or upcoming meetings. To learn more click here.
- Under e-Sign in the system settings you can choose to use this email by selecting the Current user email option.
- Password reset emails, which are explained below.
Employee details
You can choose to set a user’s Employee Number or Job Title to provide easy access to this information. The various phone number fields can be filled in for easy use across your organization.
The Last Login Date field is automatically filled in with the last time this user signed into the system. You can use it to find out the last time this user logged in.
User Owner
The User Owner field connects your profile to the record which represents your user. This field is a lookup field and must be set to the same user as the profile. Updating any settings in the profile settings, such as the name, automatically updates the user record.
User settings
Under the User Settings section you can find and set system specific information, such as the login, status, and locale of a user. Some of these fields control the permission settings of this user.
Username (Login Email)
This field contains your Fireberry login email address. If you forget your password, you’ll use this email on the Forgot your password? page. You can use any email address for your login email, it does not need to be the email you receive messages to. The email field explained above under User Details will be used by the system to send you emails.
Status
This is a read only field which automatically fills in and indicates whether the user is active or has been deactivated. Note that users who have been deactivated cannot perform actions from their user profiles.
Role
The Role field determines the role permissions of each user in the system. You can view all your current system permissions by clicking your role. Note that this field is a required field, and must be filled in. To learn more, click here.
Business unit
Your organization may use business units to separate between different operations. For example, you can create a business unit for the north branch and a separate one for the south branch. These units will each have their own permissions, and will keep accounts, deals, and more separate between the two branches. The Business Unit field helps to create a broader permission level for your users.
Language and locale
The Language field will automatically be set to English. Using the Locale field you can choose how you’d like dates and times to appear in the system. The English - UK option which will use the DD/MM/YYYY format and 24-hour clock, while the English - US option will use the MM/DD/YYYY format and the 12-hour clock with AM and PM.
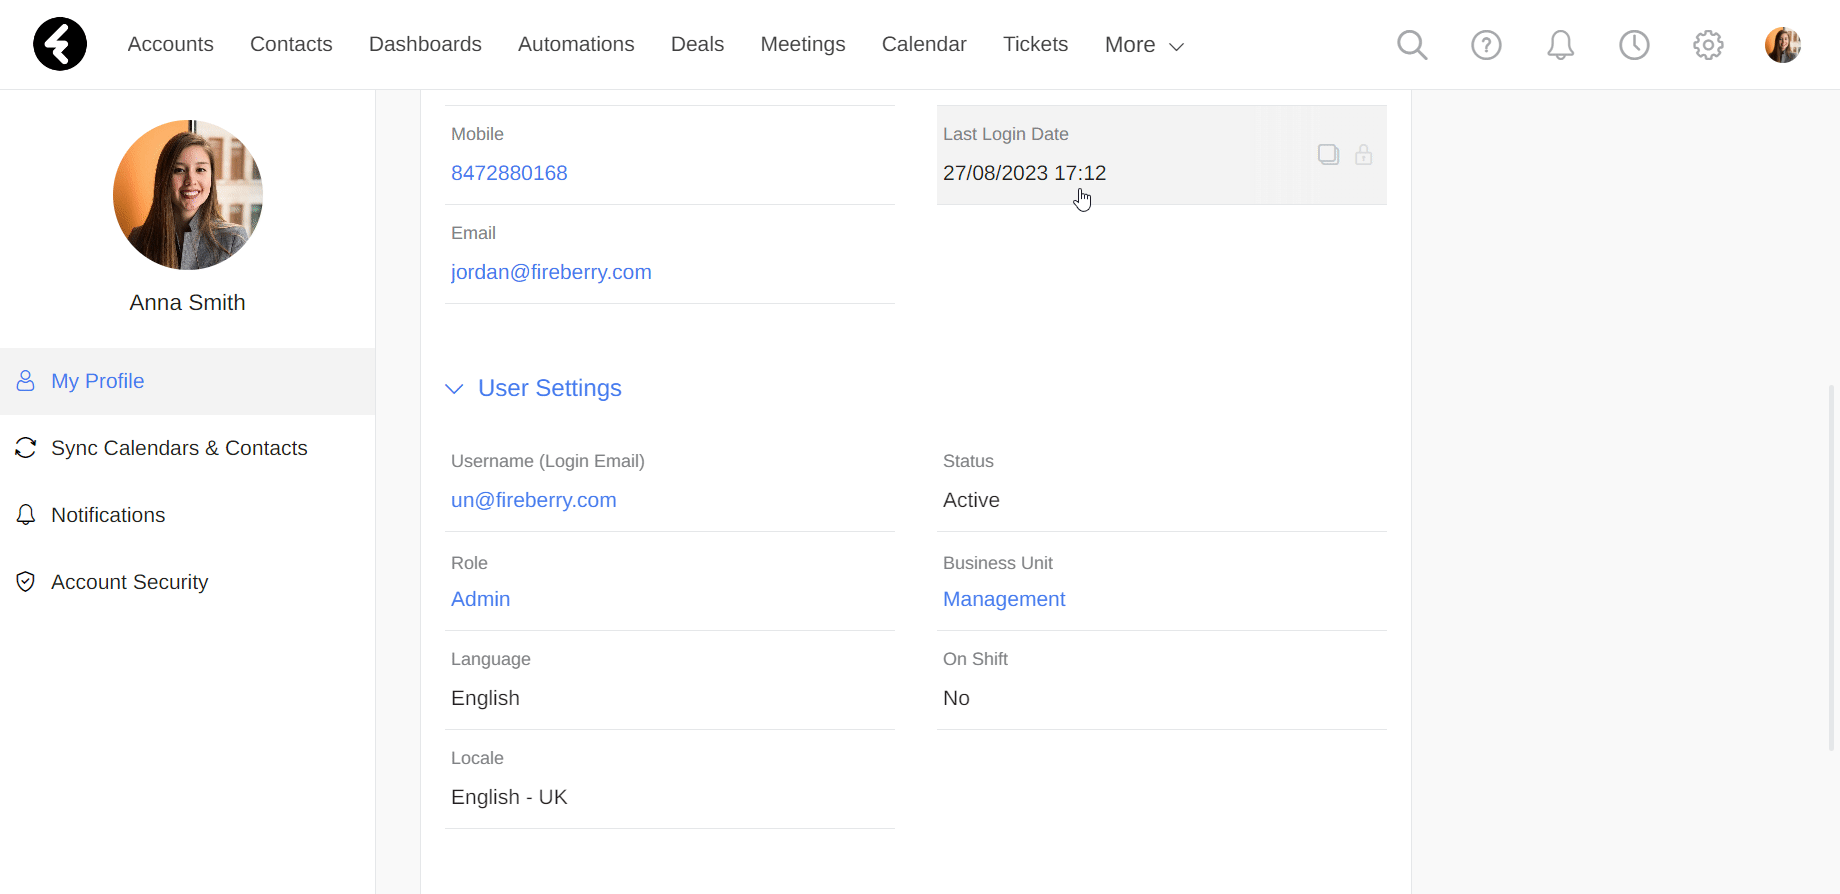
On shift
The value of this field updates automatically whenever you clock in or out using the Time Clock. The value will be set to Yes when the user clocks in, and No when the user clocks out.
Profile picture
Your profile picture can be found in the top left corner of the profile settings. To update it, click on your current profile picture, and then use the Upload Image button to open your local files. Choose one of your image files to upload to the system. The image must meet the specified size limit in order to be uploaded. Once you upload your image, you can click and drag the corners of the crop circle to change its size, or click on the circle to drag it to the part of the image you’d like to capture. To save your new image click Crop. You can also click Cancel at any point if you’ve changed your mind.
To learn about the Sync Calendars & Contacts tab, click here. If you’d like to learn about the Notifications tab, click here.
Account security
The Account Security tab can be found in the left sidebar menu of the profile settings. Using these settings you can access and set security settings which are relevant to your personal profile.
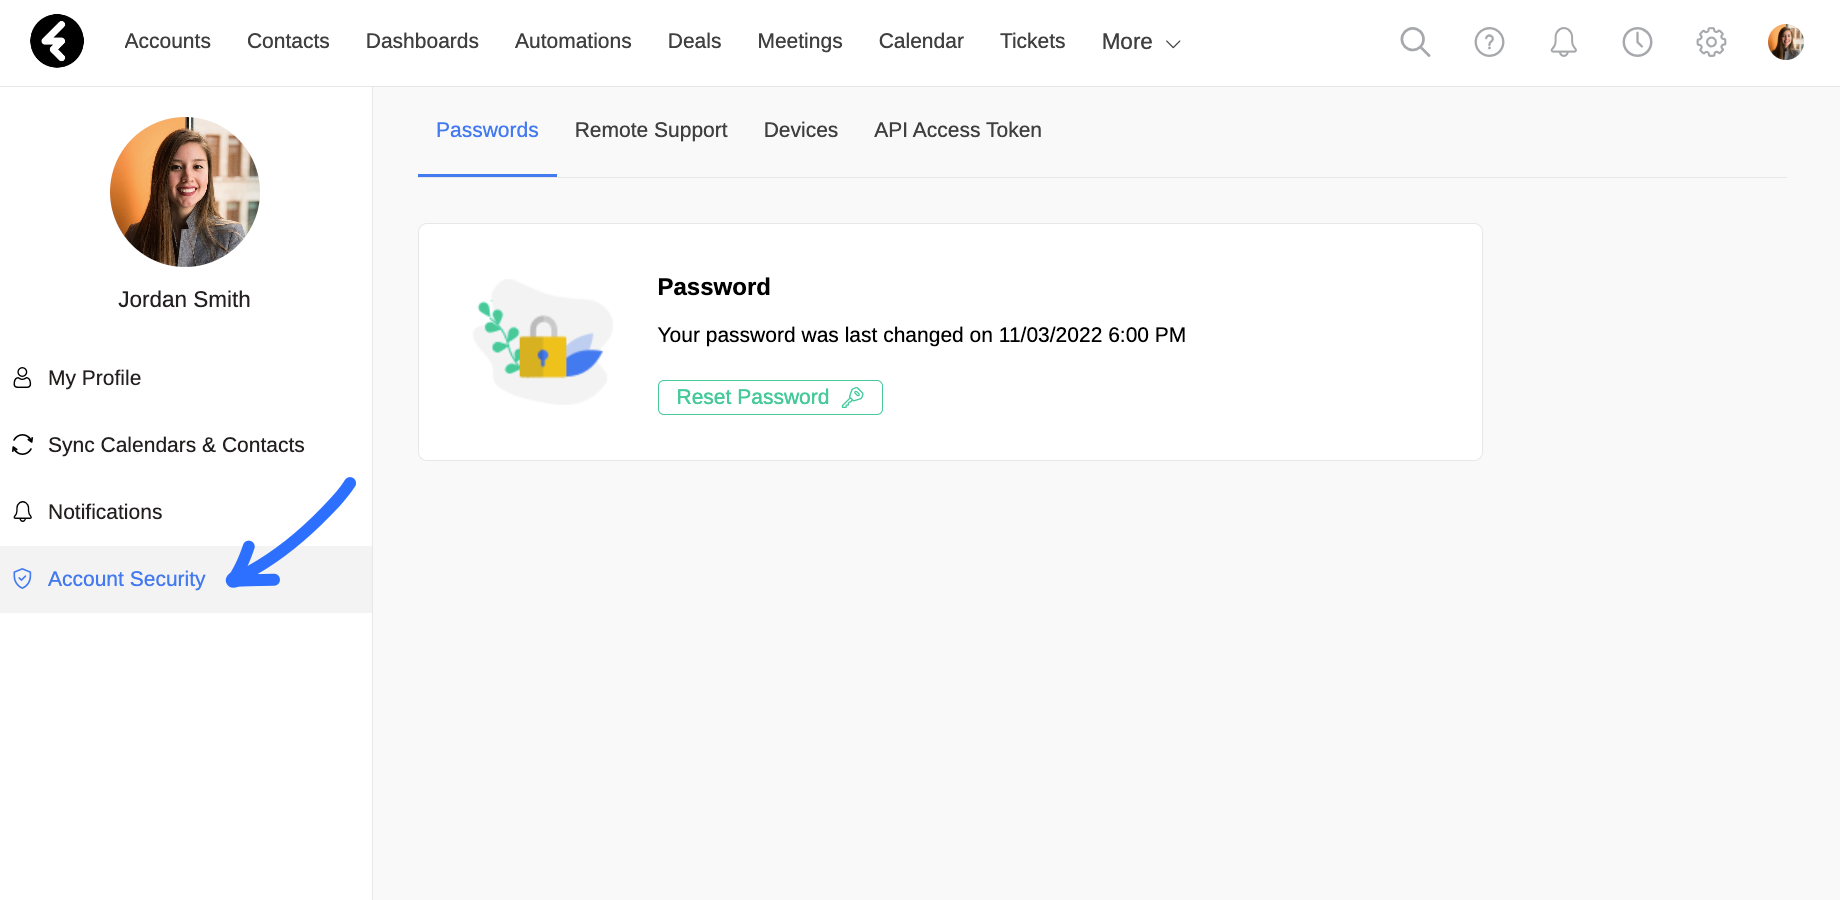
Reset your password
If you’d like to reset your password while logged into your account, use the Password page which opens by default under Account Security. Click the Reset Password button, and then select Ok in the popup. This will send a reset password link to your email.
Next, open the reset password email and click on the Password Reset button. Then follow the instructions to set a new password.
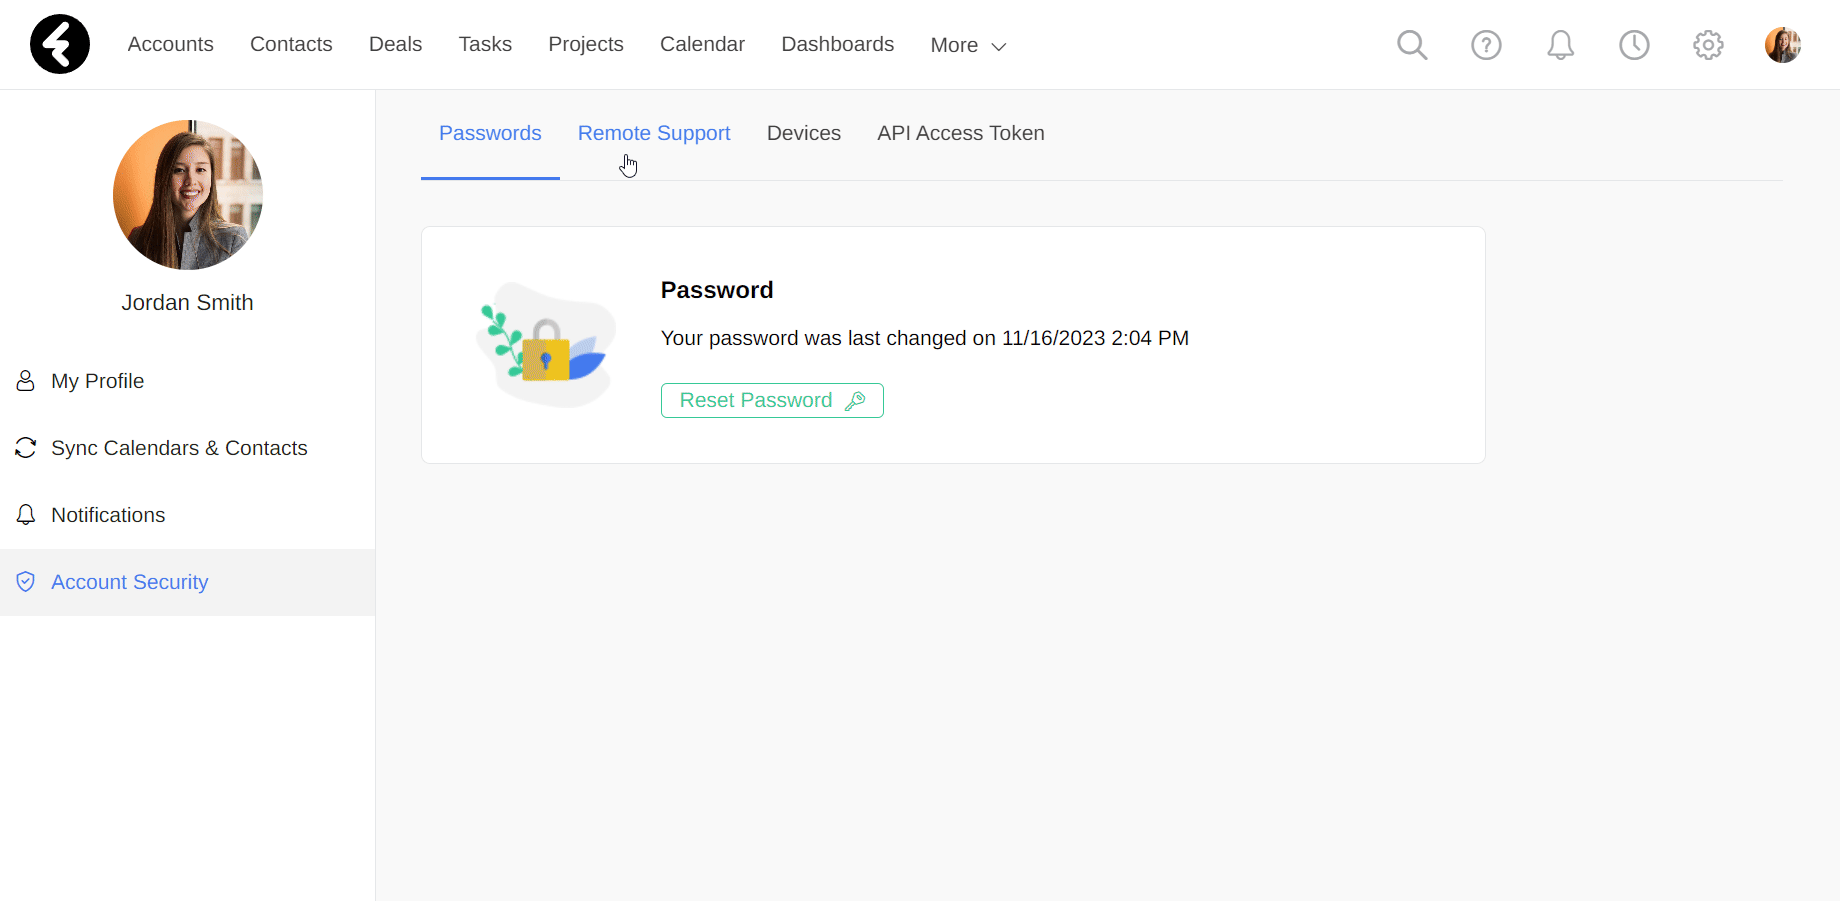
Remote support
Click on the Remote Support page to allow the Fireberry team access to your account for a specific period of time. We may ask you to provide this option if we’re in the process of looking into any potential issues you’re having trouble with.
In order to allow access, start by selecting one of the time frame options by clicking the circle next to it. You’ll find the expiration date in a light gray to the right of each time; The remote support access will expire at 12:00 AM on the night following the expiration date. Once you’ve selected a time frame, click Enable Access. This will open a pop up where you will need to confirm you’ve read and agree to both the Terms of Use and the Privacy Policy by clicking I Agree To The Terms. By agreeing you’ll enable access to the Fireberry support team, and the text Access Enabled will be displayed, along with the expiration date. If you change your mind, you can click Revoke at any time and then the Revoke Remote Support button in the pop up.
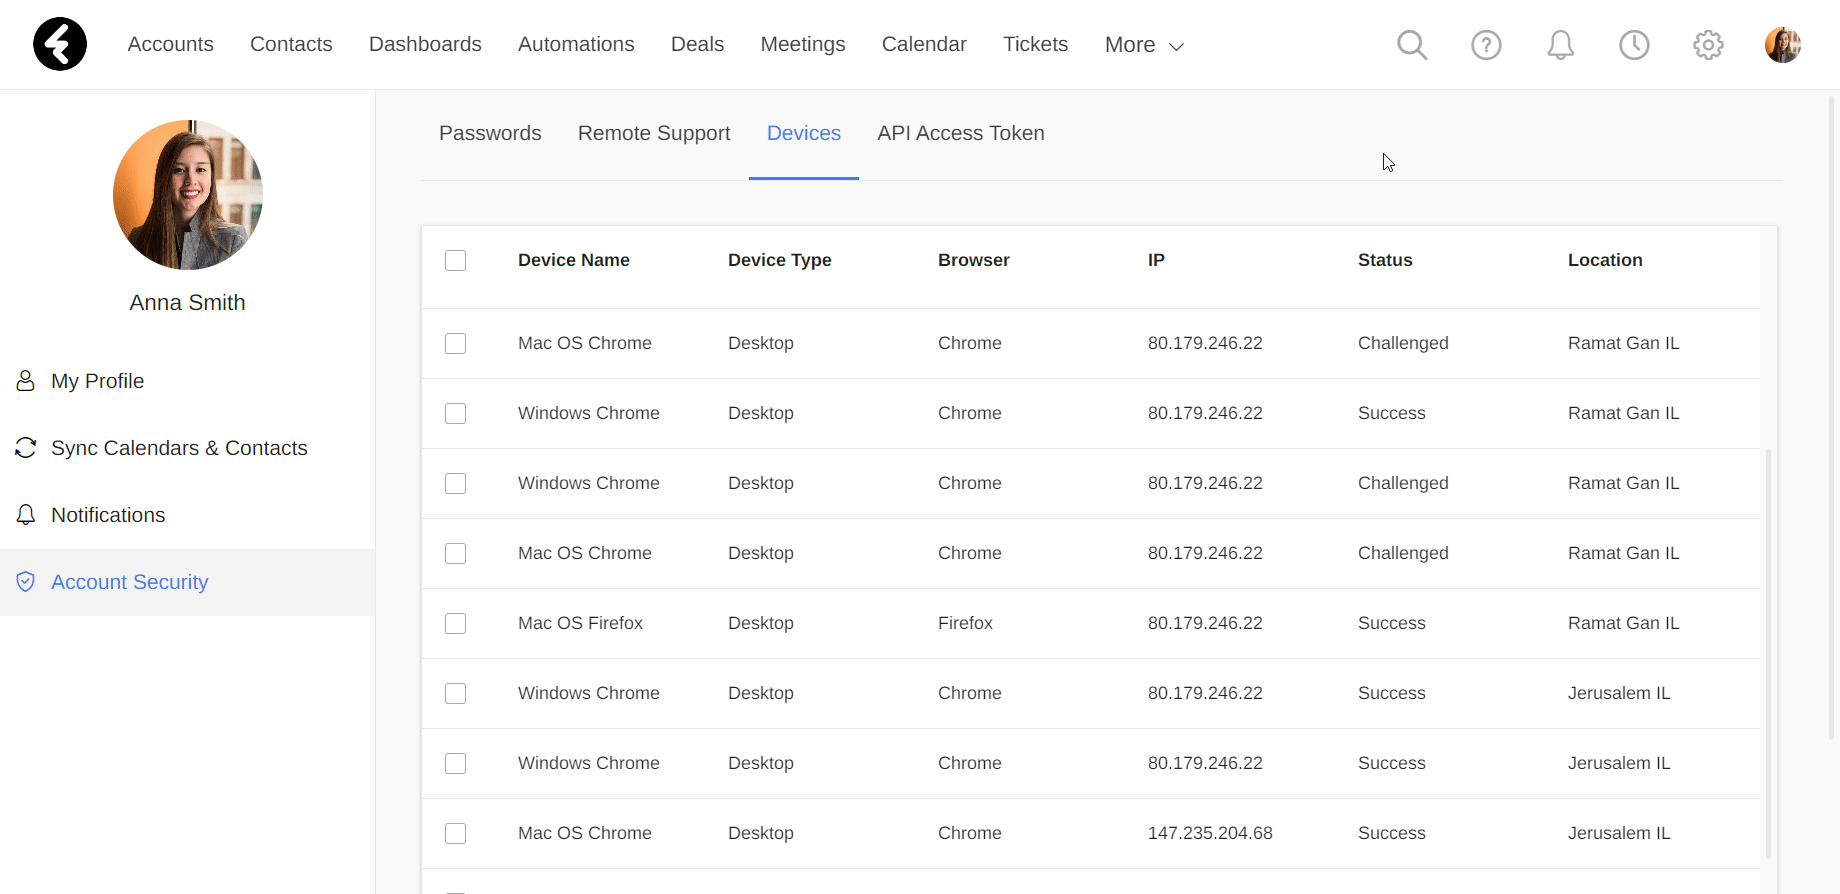
Devices
Device verification keeps your information safe by providing an extra layer of security. Under Devices you’ll find a list of all the devices which have attempted to log into your account from a new device. Each attempt includes details such as the browser used, IP address, location, and more. The Status field will display Challenged for unsuccessful attempts and Success for successful attempts. If you’d like to remove the verification of a specific device, simply delete the record by checking the box on the left, clicking Bulk Delete, and then typing DELETE into the pop up.
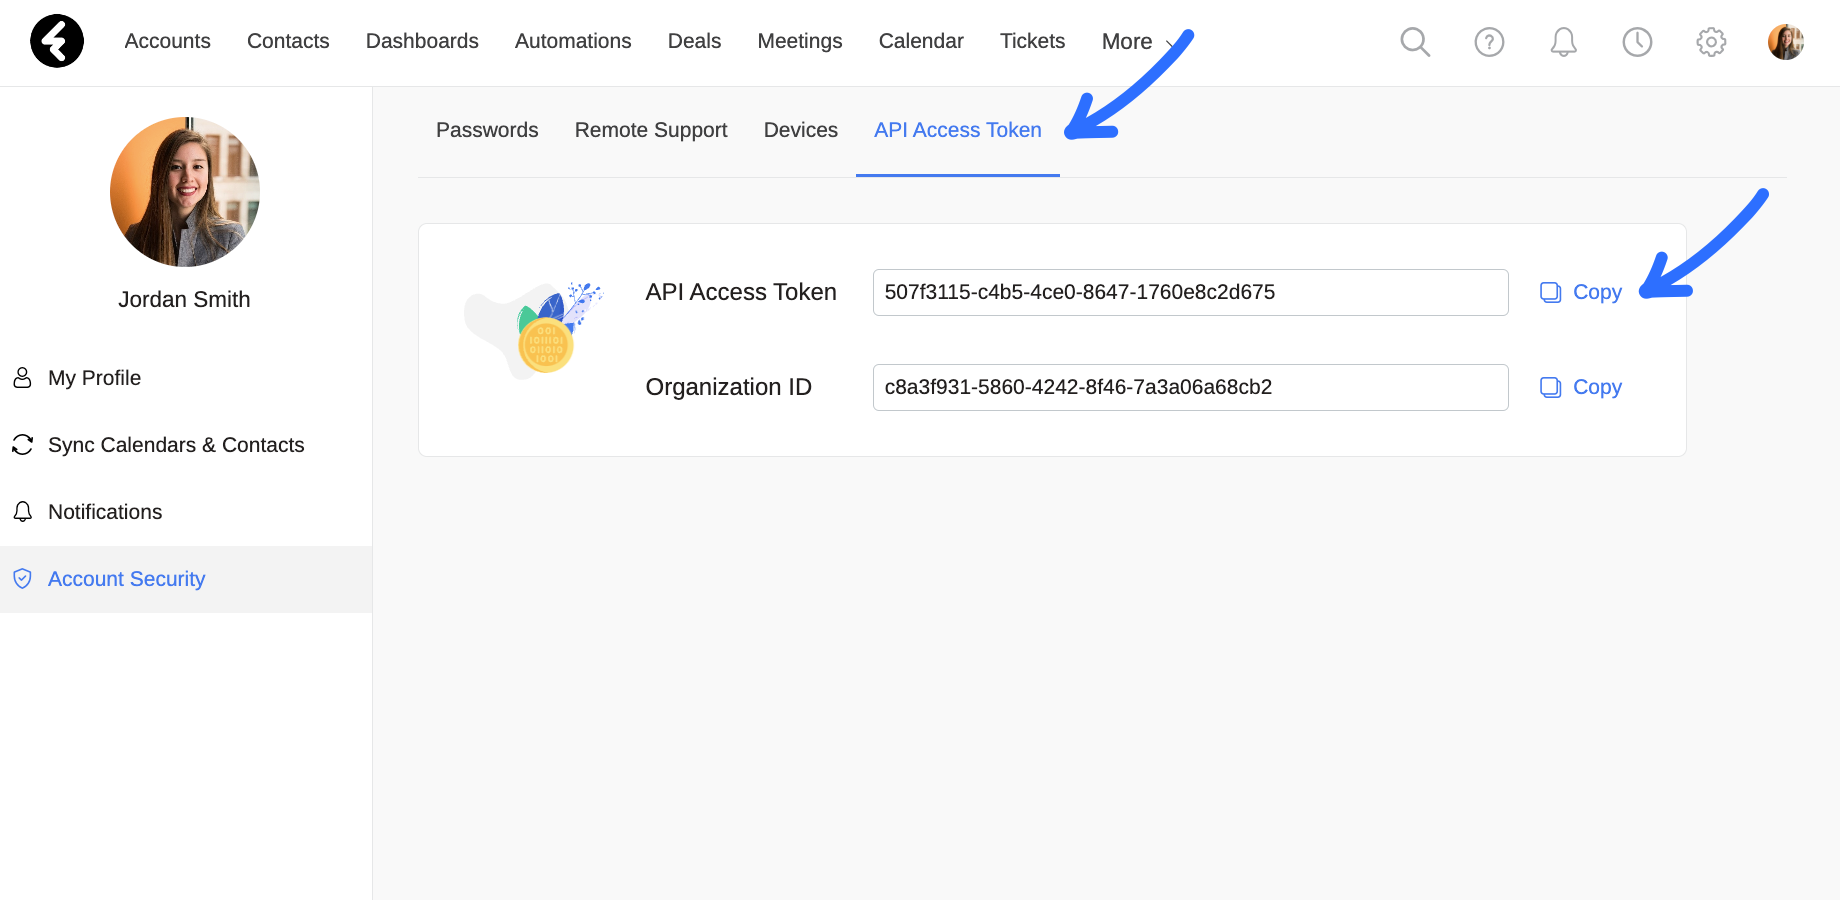
API Access Token
You can find both your API access token and your organization ID under the API Access Token page. These are used as unique identifiers for various integrations. The API Access Token is individual for each user, while the Organization ID is uniquely used for your entire organization. To use these identifiers, simply click the Copy button found on the right.
To learn more about integrations, check out our Fireberry API documentation here.