Set Google Team Inbox
By using Team Inbox, you can manage all your emails directly from the system and centralize your workspace. Team Inbox also helps you easily track all your email correspondence and work together with other system users to respond to emails. This article will walk you through the exact steps you need to take in order to set up a Google Team Inbox. You can integrate multiple team inboxes into the system.
Preliminary setup
Before connecting a Google Team Inbox to Fireberry, you’ll need to ensure you have all the necessary accounts. Be sure you meet the following conditions:
- You have a Workspace account.
- You are defined as an Admin in the Workspace account.
- You have a Google Developer Console account.
- You are defined as an Admin in the Google Developer Console account.
If all the above conditions are met, follow the steps below to set up your Google Team Inbox integration with Fireberry. If not, first set up the necessary accounts, and then use the steps below.
Step I - Google Developer Console
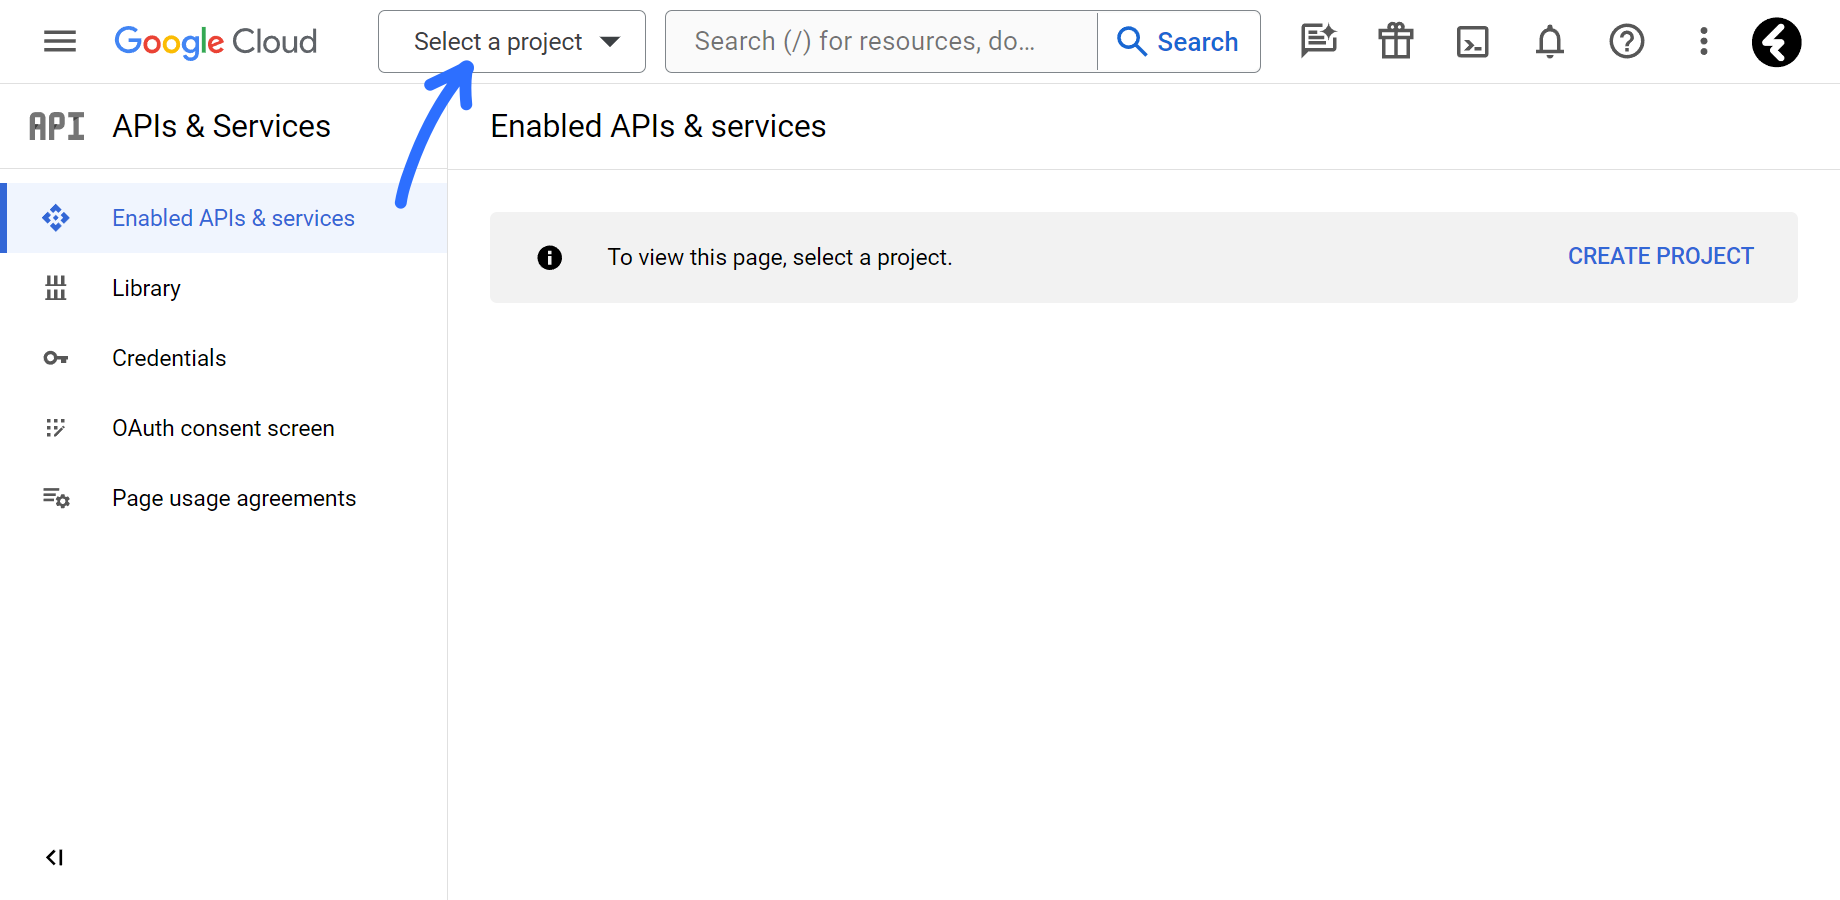
1. Go to https://console.developers.google.com
2. Click the Select a project dropdown in the top bar on the left to open the projects page. If you’ve already selected a project, the dropdown will display the name of the currently selected project.
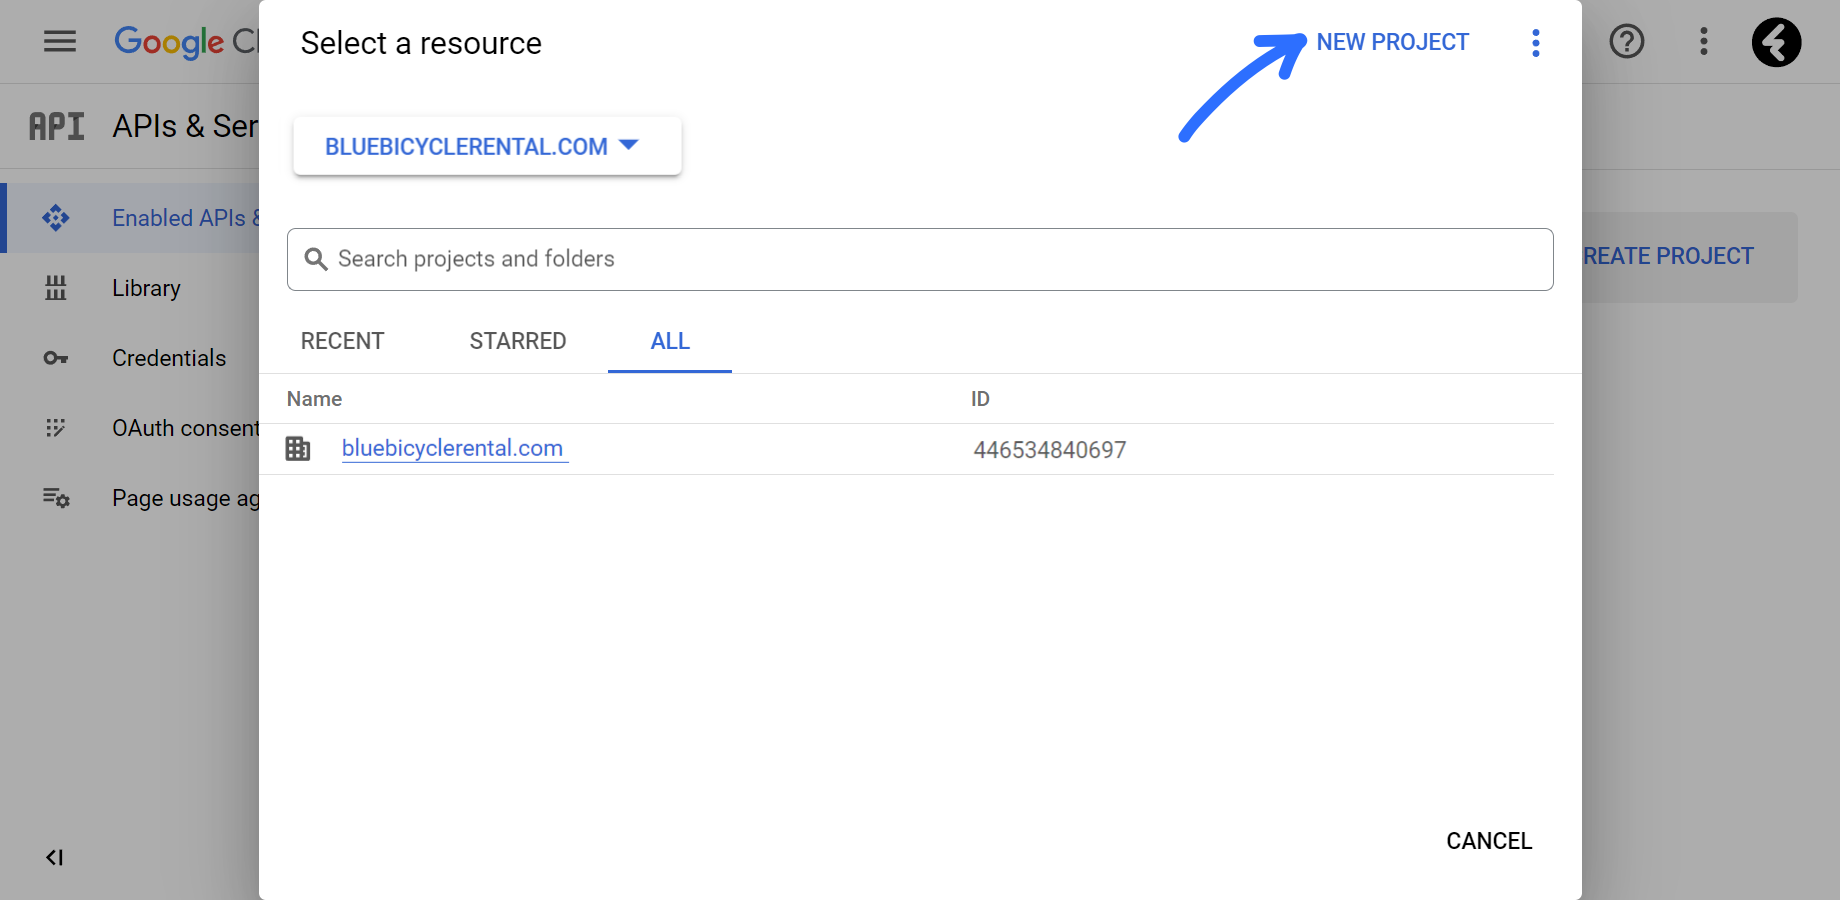
3. Click New Project in the top right corner. This will open a new project page where you can set the project details.
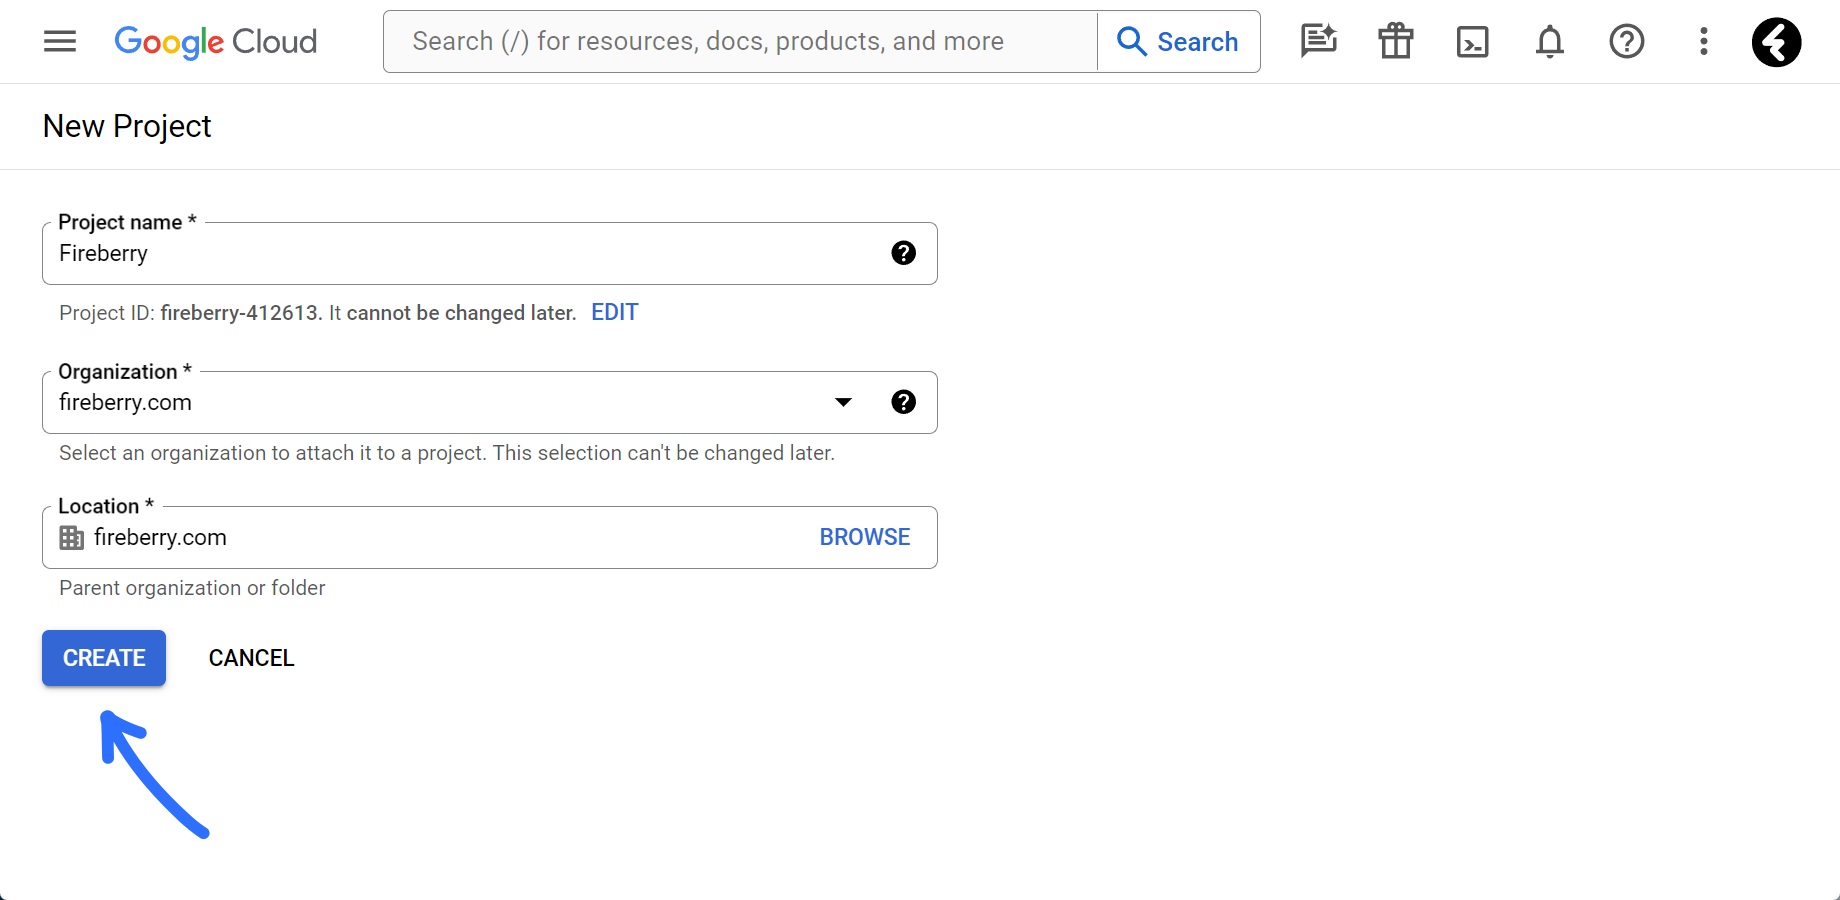
4. Set the name of the project under Project name.
5. Click the blue Create button. Your new project should open automatically.
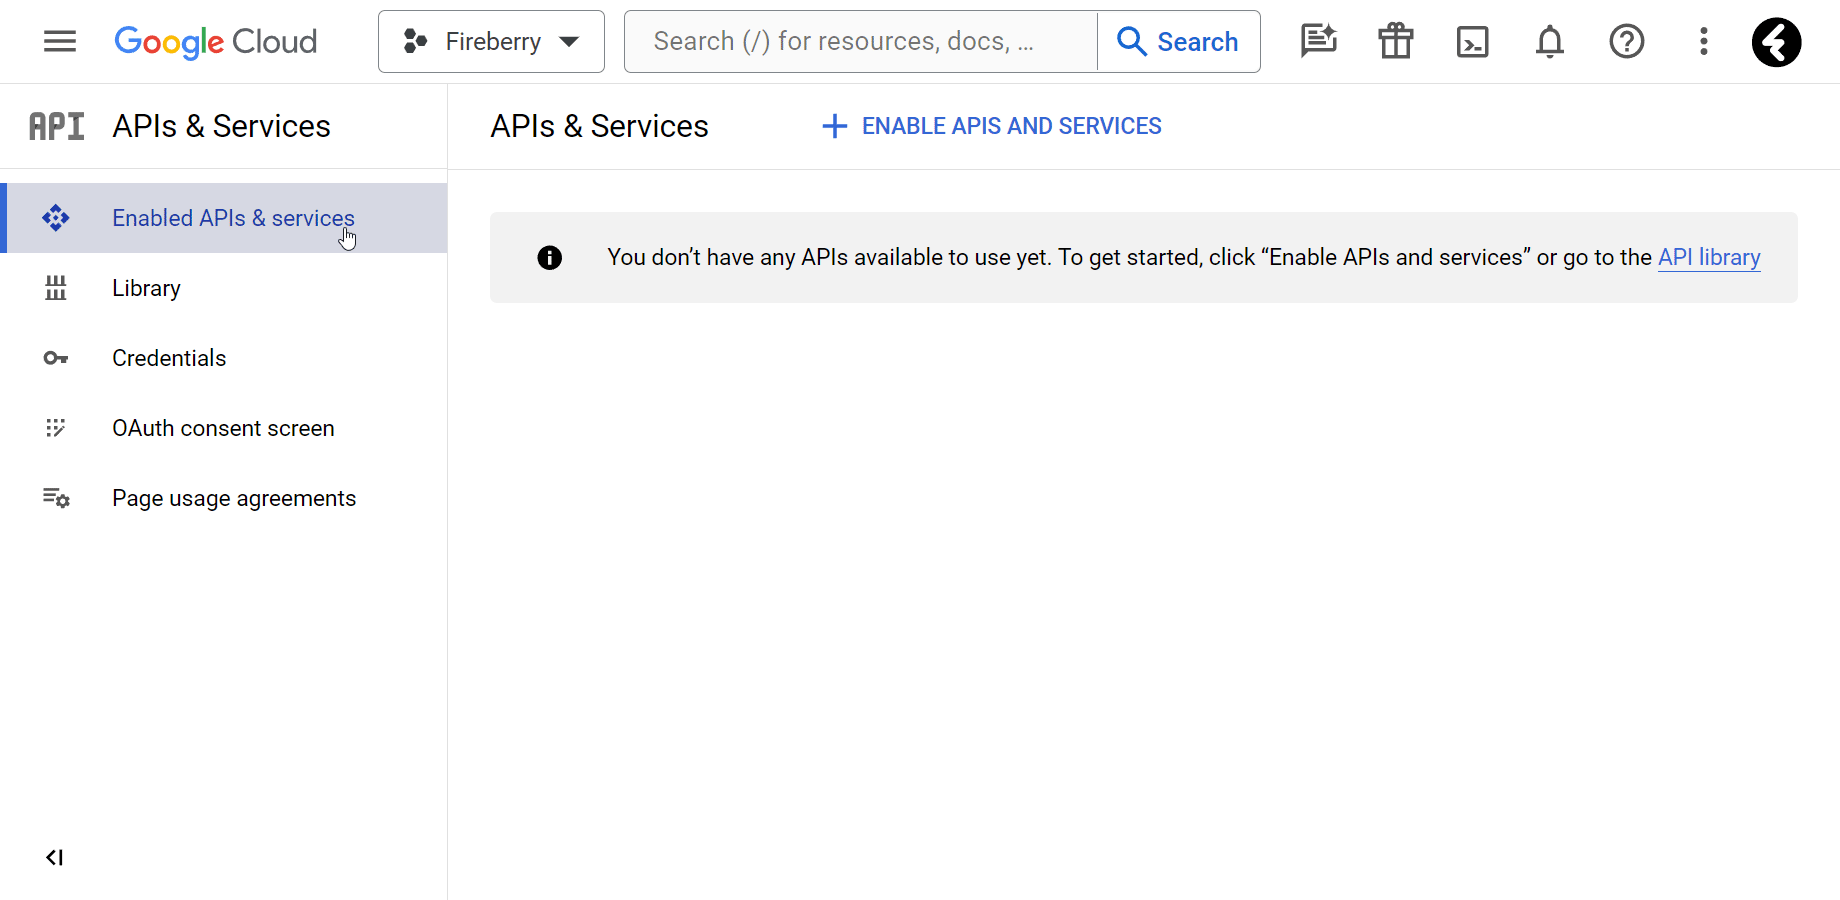
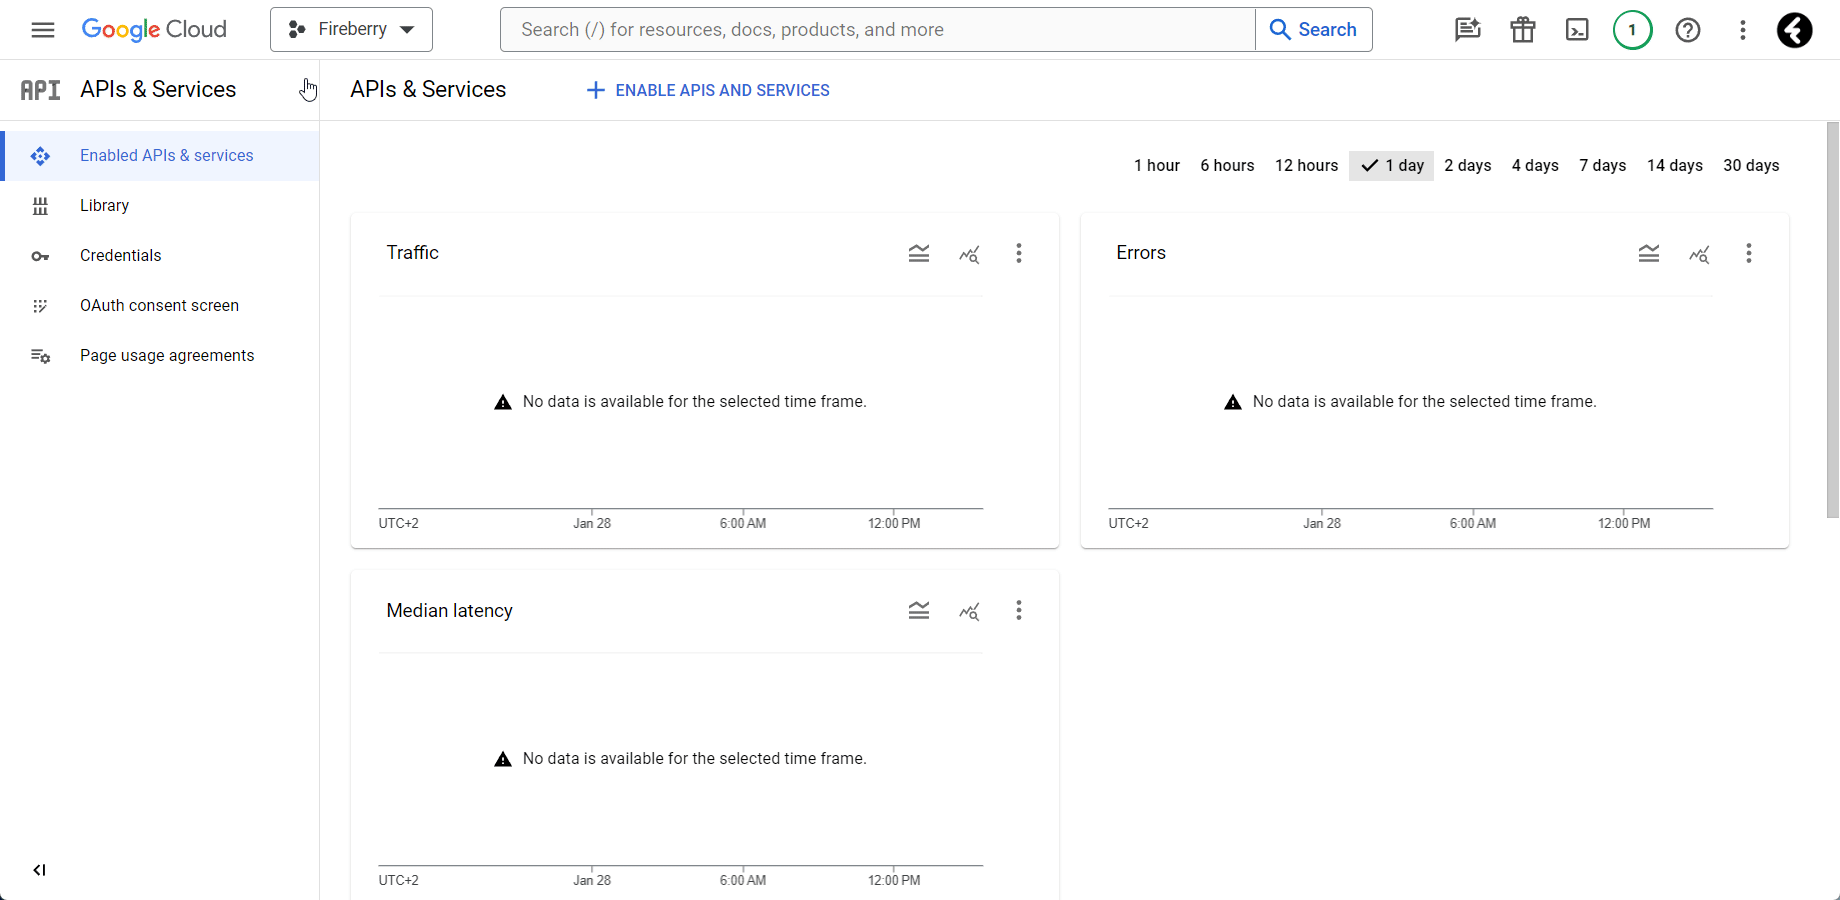
6. Open the Enabled APIs & Services page from the sidebar menu. Click on the blue + Enable APIS AND SERVICES option found at the top of the page. This will open the API Library.
7. In the search bar, type in Gmail API and click enter.
8. Select the Gmail API option to open its page, and then click the blue ENABLE button.
9. Click Credentials in the left sidebar menu.
10. Click the blue + CREATE CREDENTIALS option at the top of the page.
11. Select the Service account option.
12. Fill in a name under Service account name.
13. Click the CREATE AND CONTINUE option to create your new service account.

14. Under the Grant this service account access to project option, open the Select a role dropdown menu.
15. Hover over the Basic option, and then select the Owner option from the secondary menu on the right.
16. Click the blue DONE button to finish setting up your service account. The Credentials page will open with your new service account.
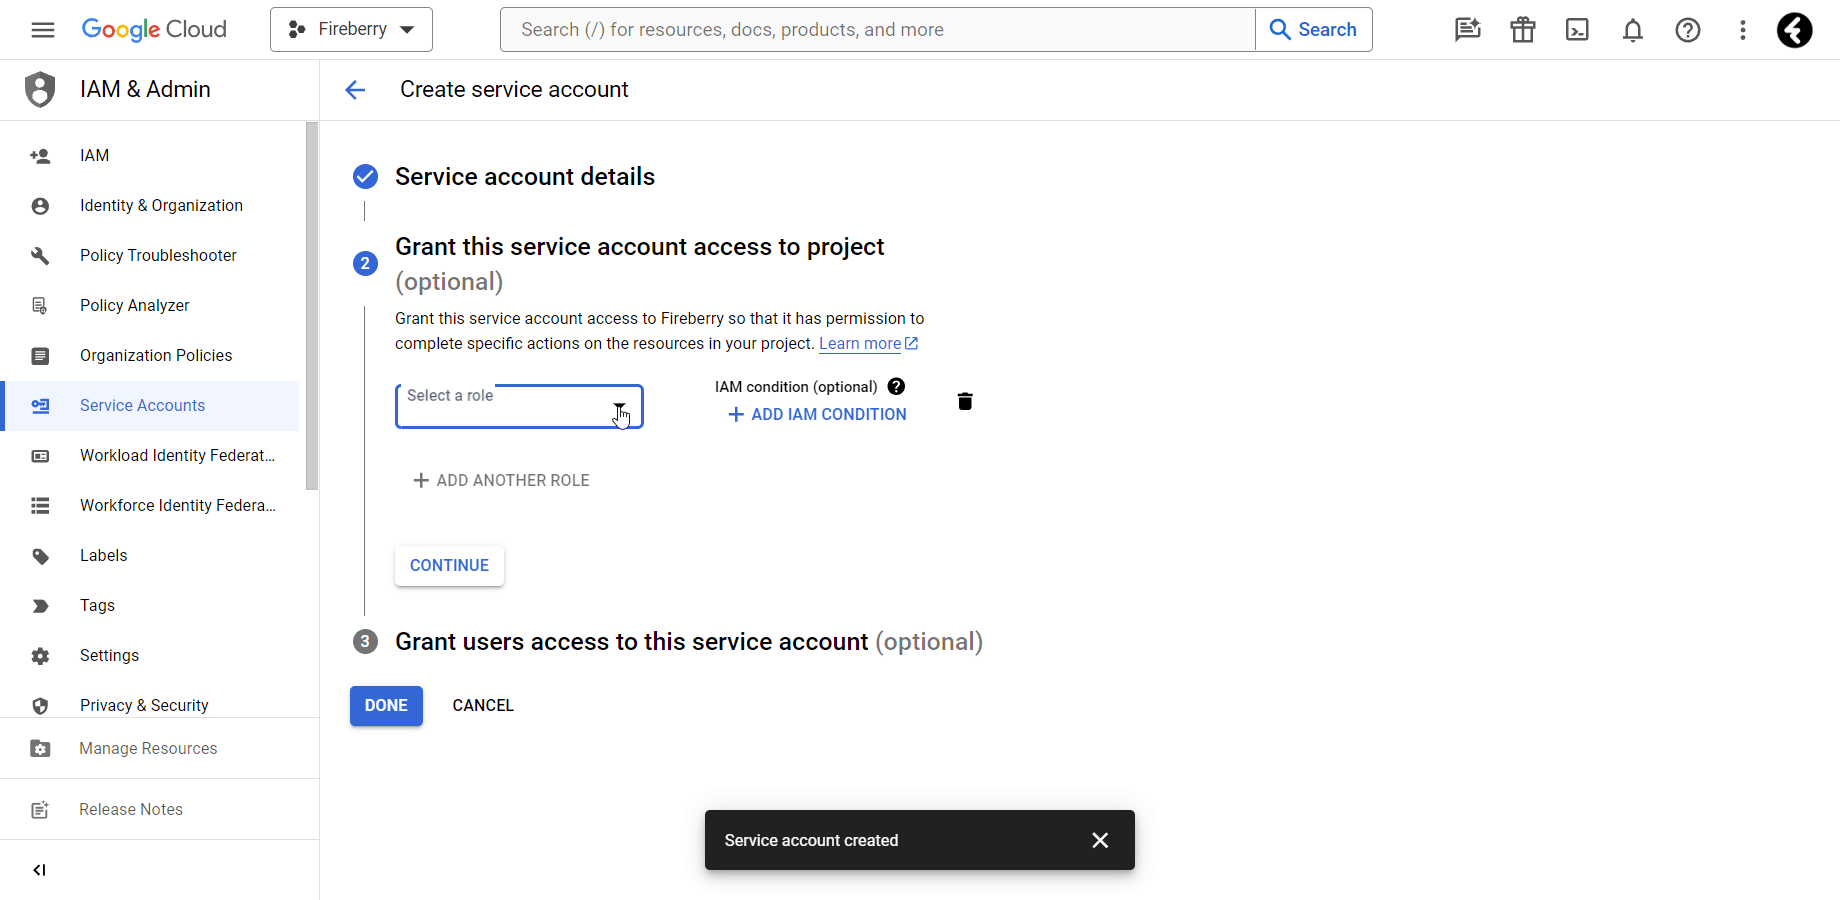
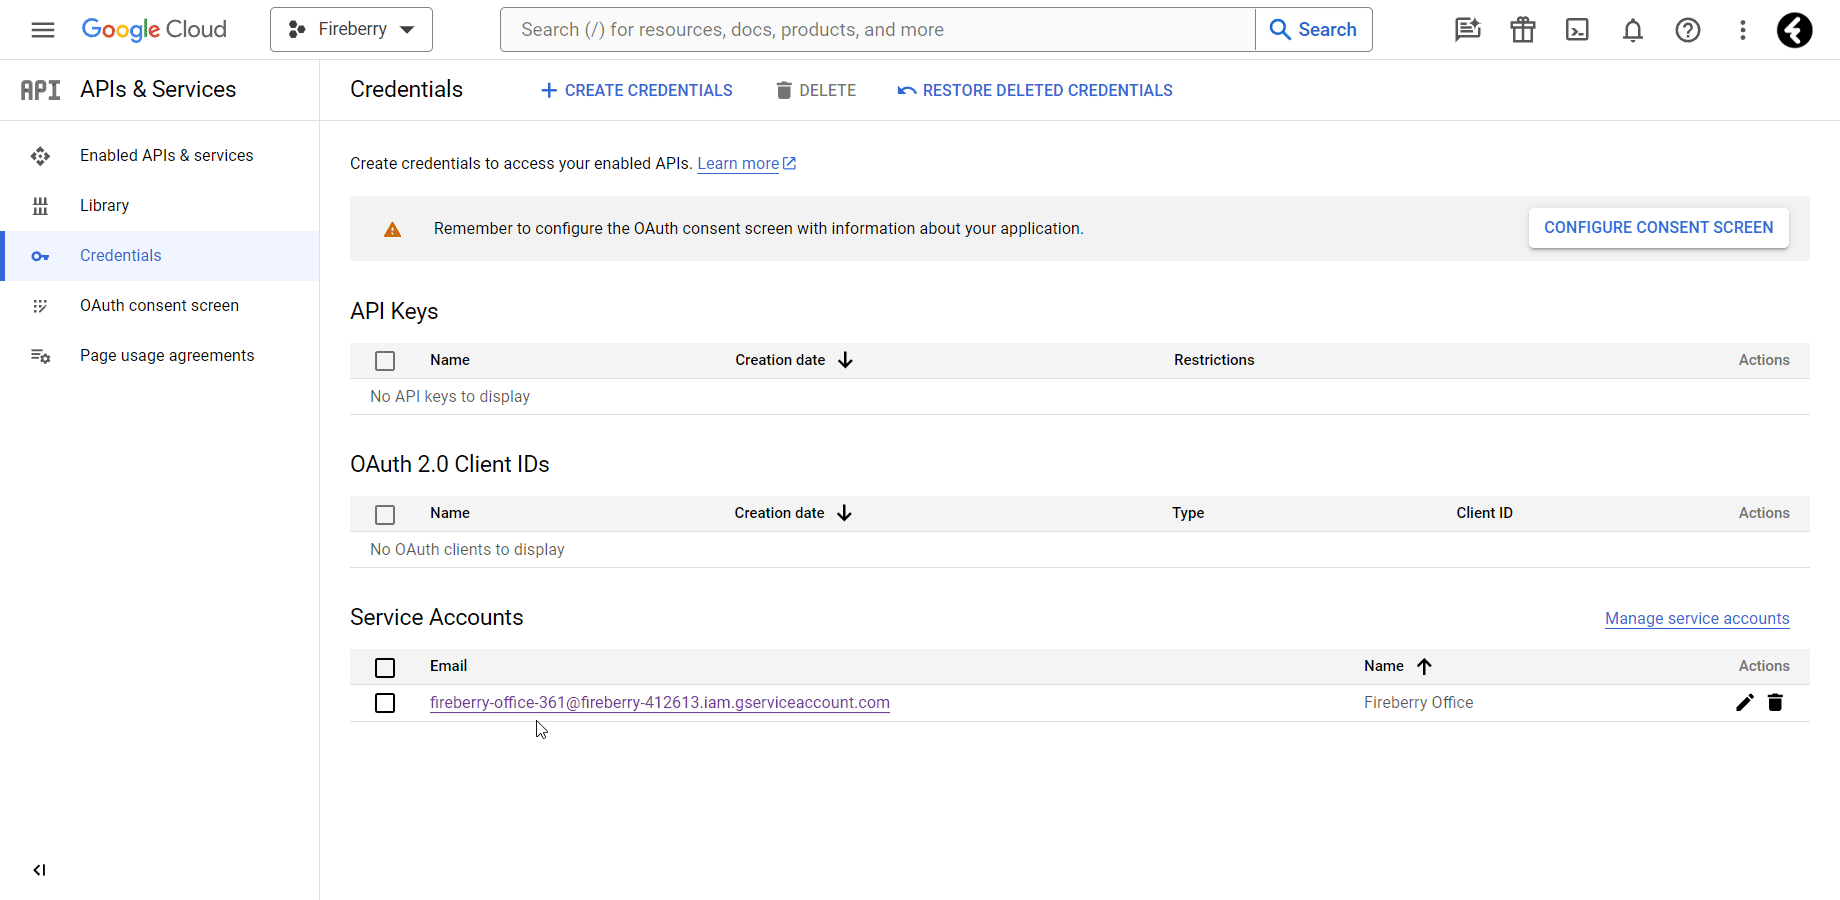
17. At the bottom of the Credentials page, you’ll see the Service Accounts section with a list of all this project’s service accounts. Click on the link of the service account you just created to open its individual page.
18. Select KEYS from the top bar menu.
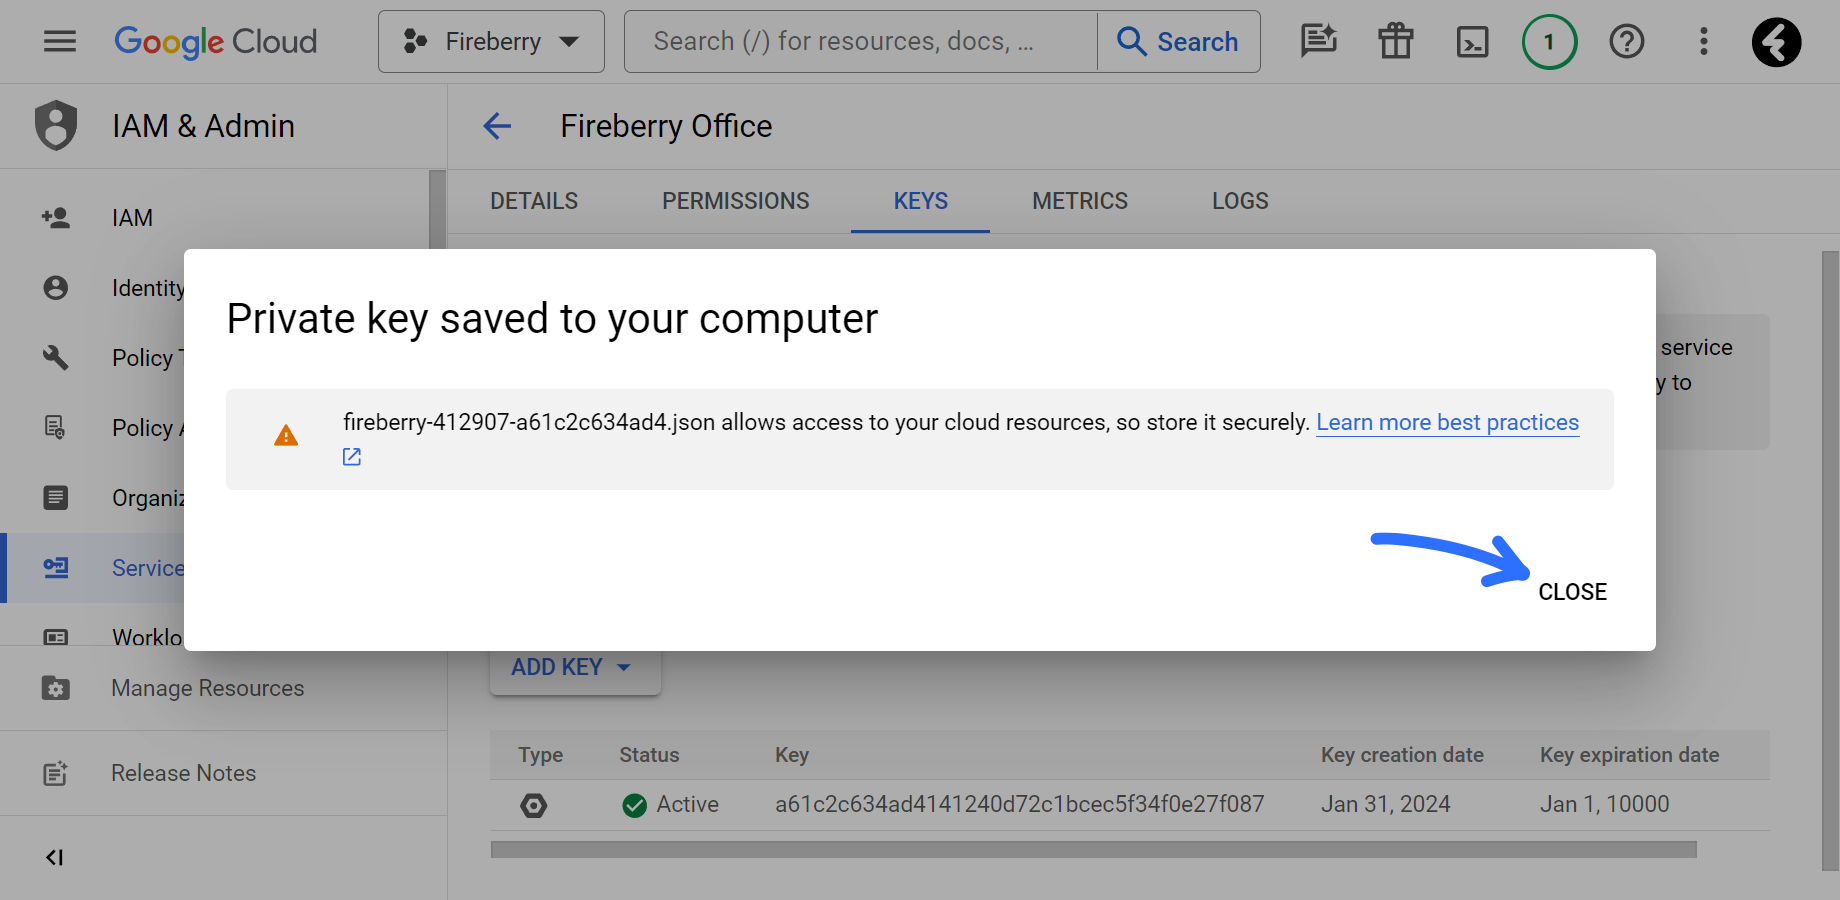
19. Click the ADD KEY option from the middle of the page and select the Create new key option. This will open a pop up where you can create a new private key.
20. Under Key type, make sure the JSON option is selected and then click the blue CREATE button. This will download a file containing the private key onto your computer.
21. Open the downloaded file and leave it open for the rest of this process.
22. Close the pop up with the download status by clicking CLOSE.
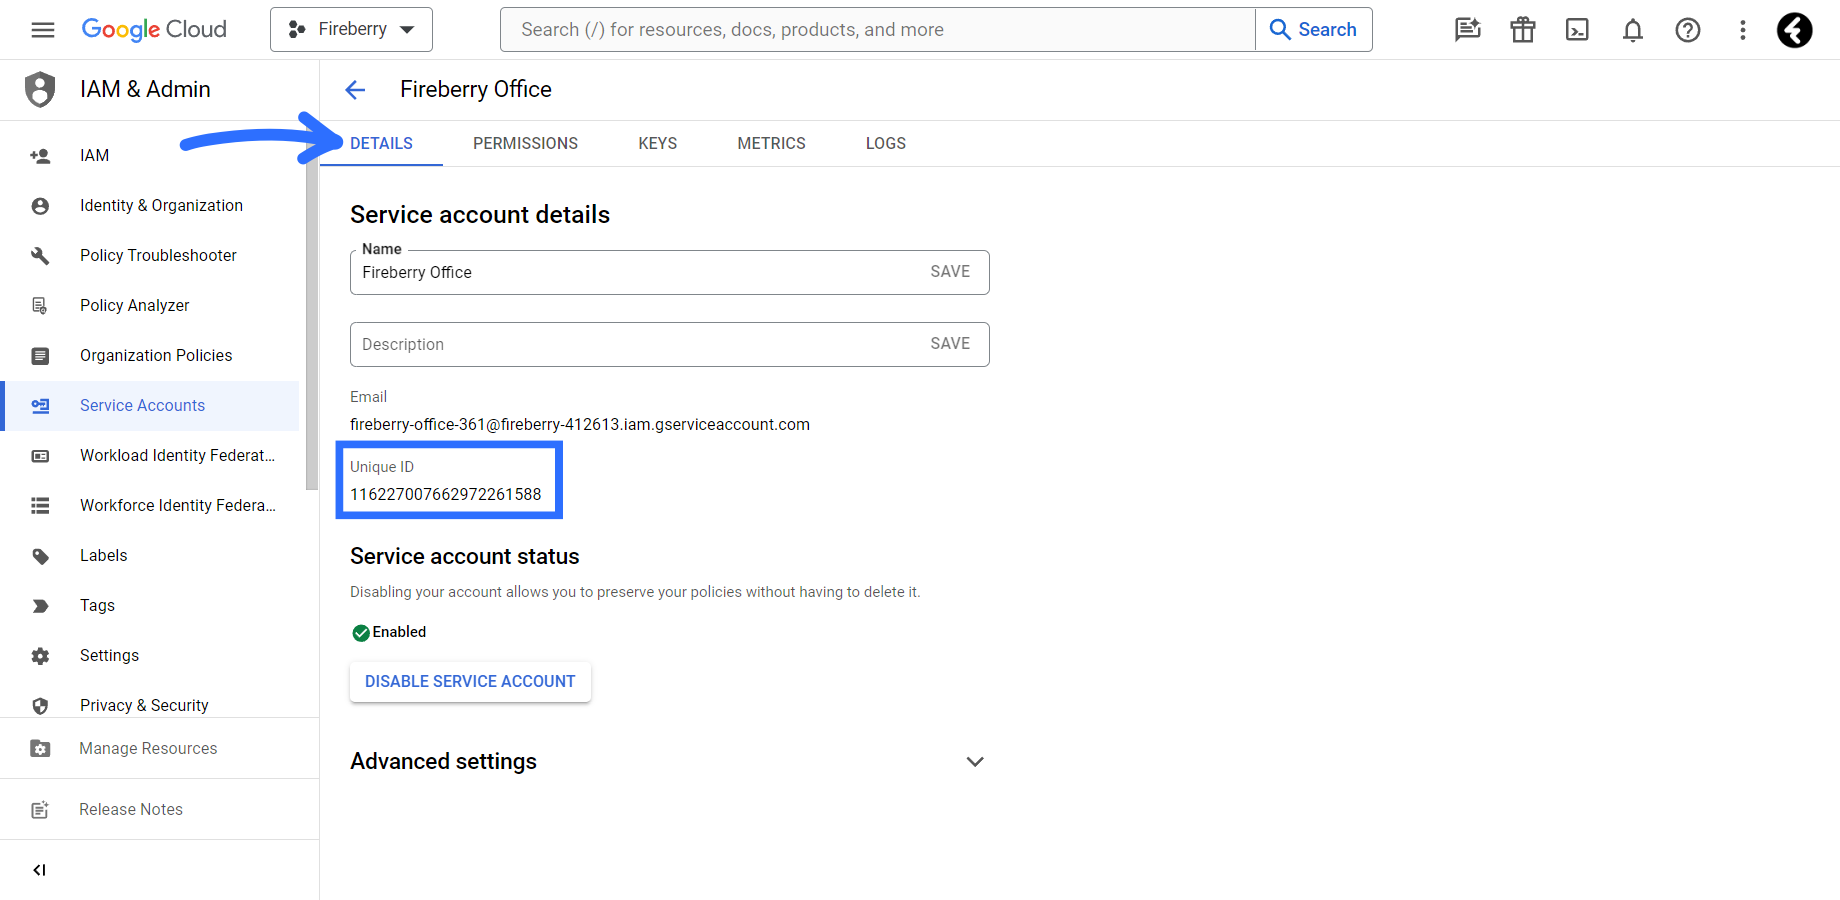
23. Open the DETAILS page from the top bar menu.
24. Copy the Unique ID and paste it somewhere accessible on your computer, such as your Notepad.
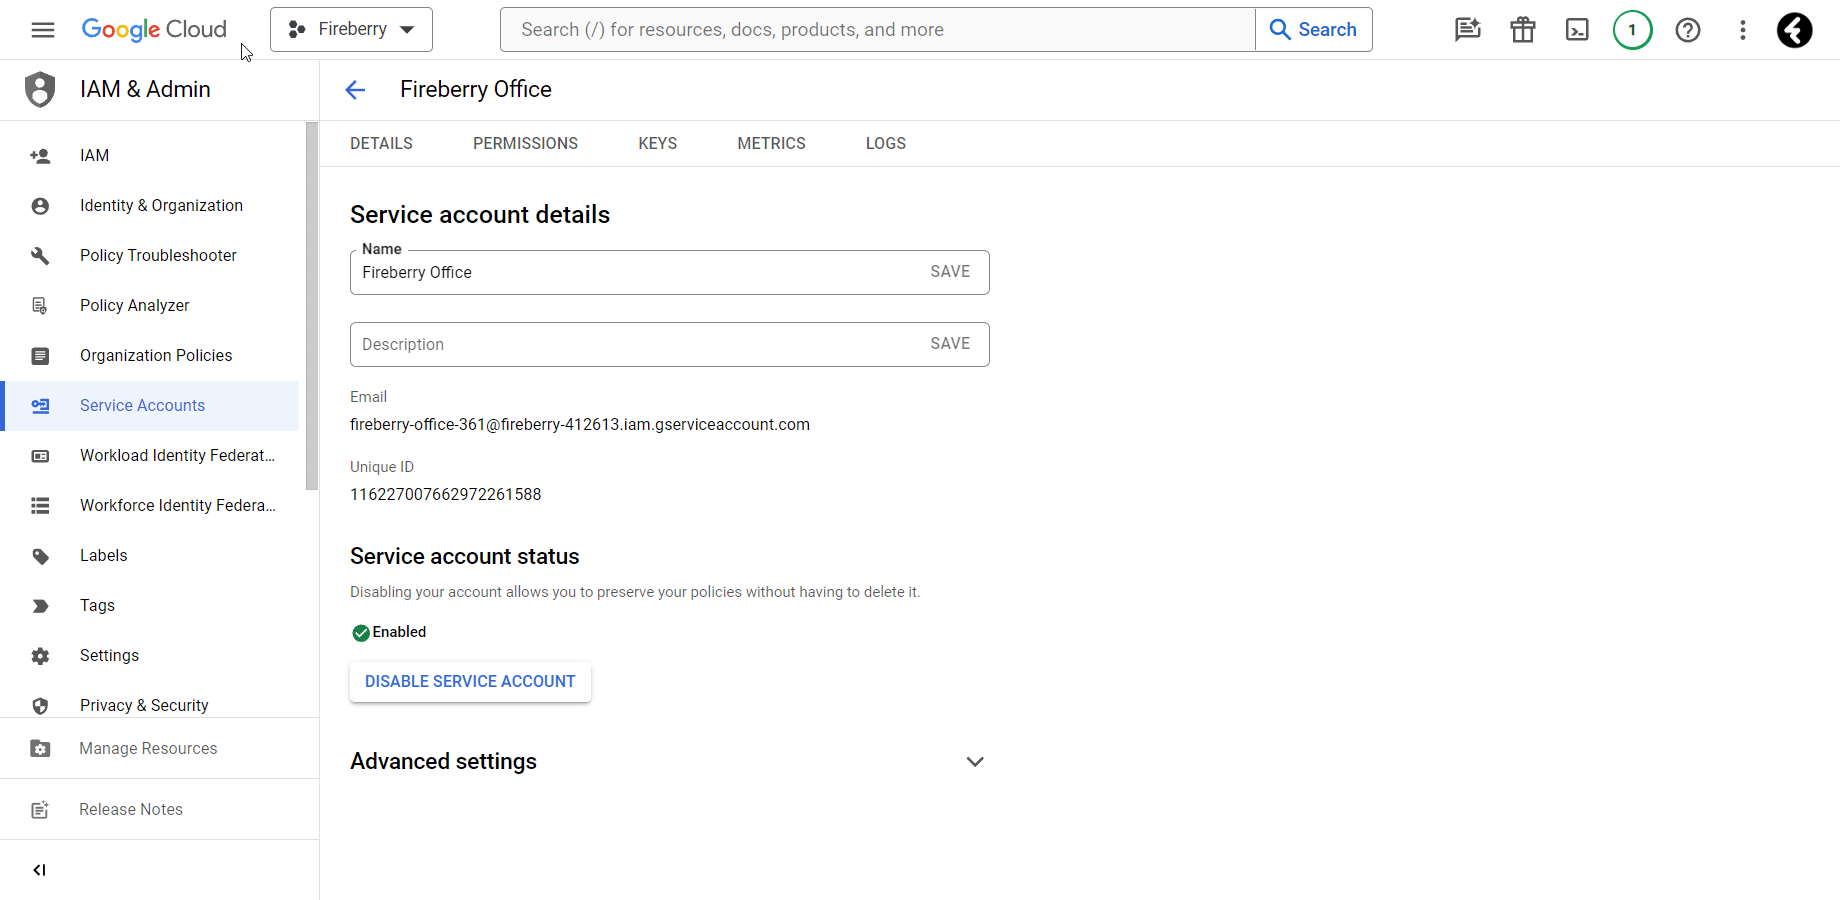
25. Click Google Cloud in the top left corner to go to the main menu.
26. Hover over the APIs & Services tab in the left bar menu and then click Enable API & services in the menu that opens.
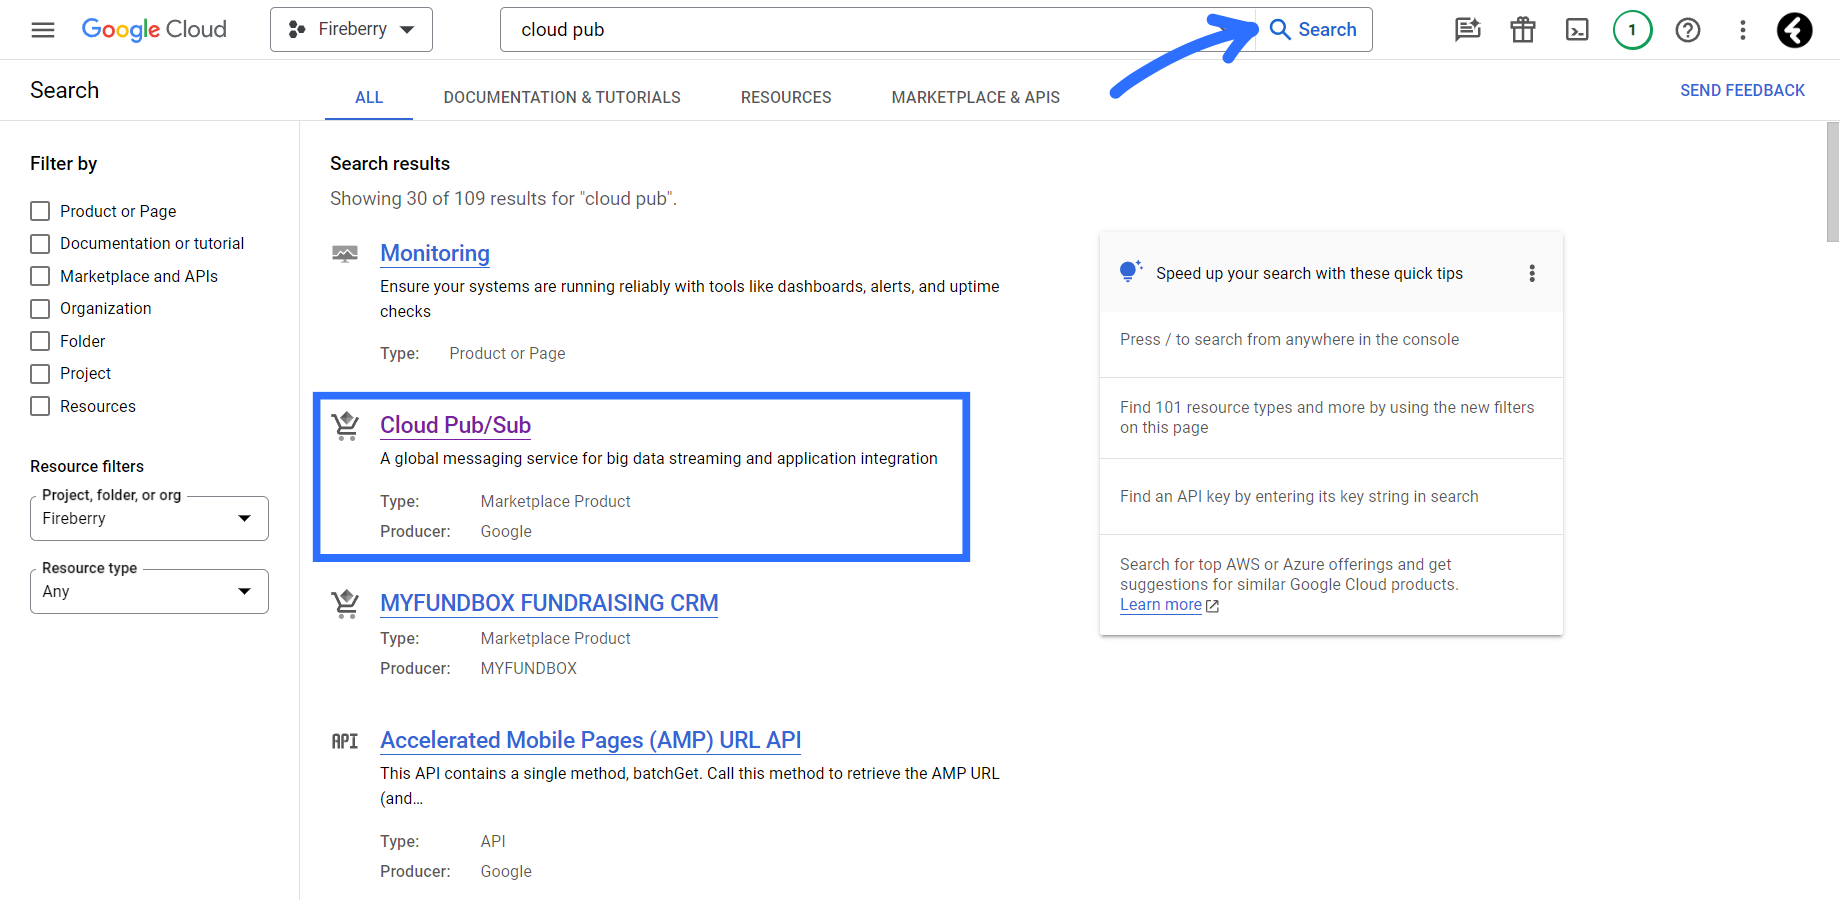
27. In the search bar type in Cloud Pub/Sub and click Search.
28. Click on the Cloud Pub/Sub option to open its page.
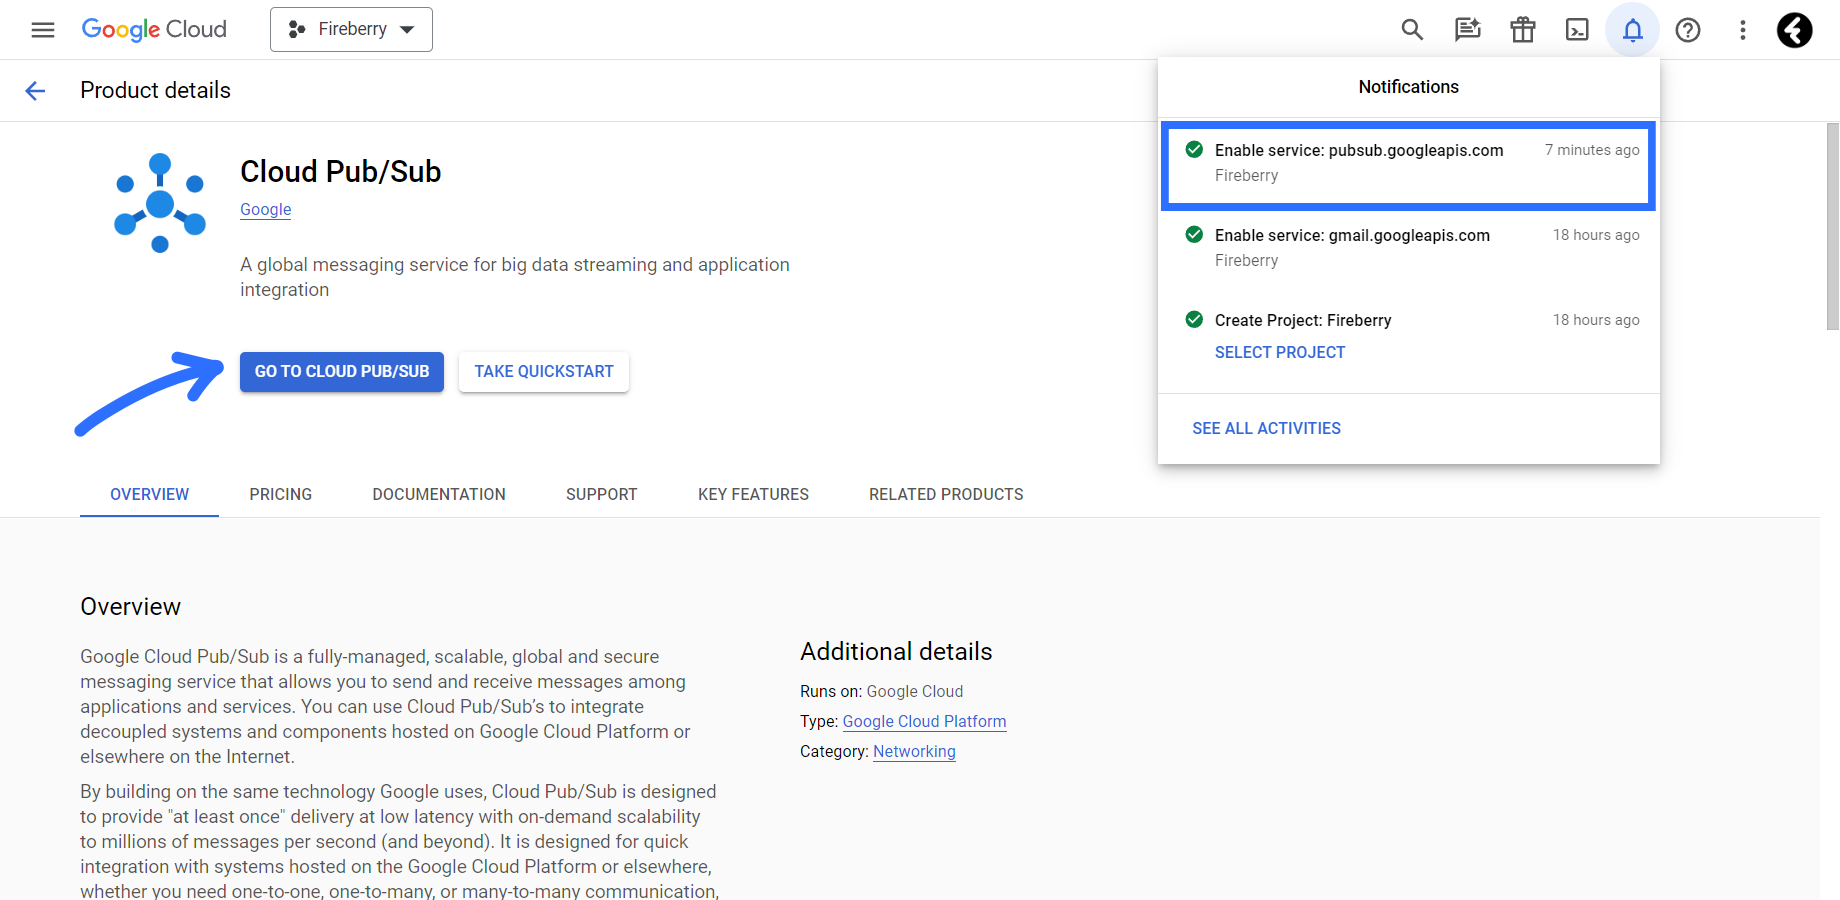
29. Click the blue GO TO CLOUD PUB/SUB button to enable the service. You’ll receive a notification under the bell icon on the top right where you can confirm the service was successfully enabled.
Step II - Google Admin
1. Go to https://admin.google.com/ac/home
2. From the Admin home page, scroll down and click the Security option to open the security page.
3. Scroll down to the bottom of the security page and then click the API controls option to open its page.
4. Within the Domain wide delegation box, click the blue MANAGE DOMAIN WIDE DELEGATION option.
5. Click on the blue Add new option from the API clients top bar. This will open the Add a new client ID box.
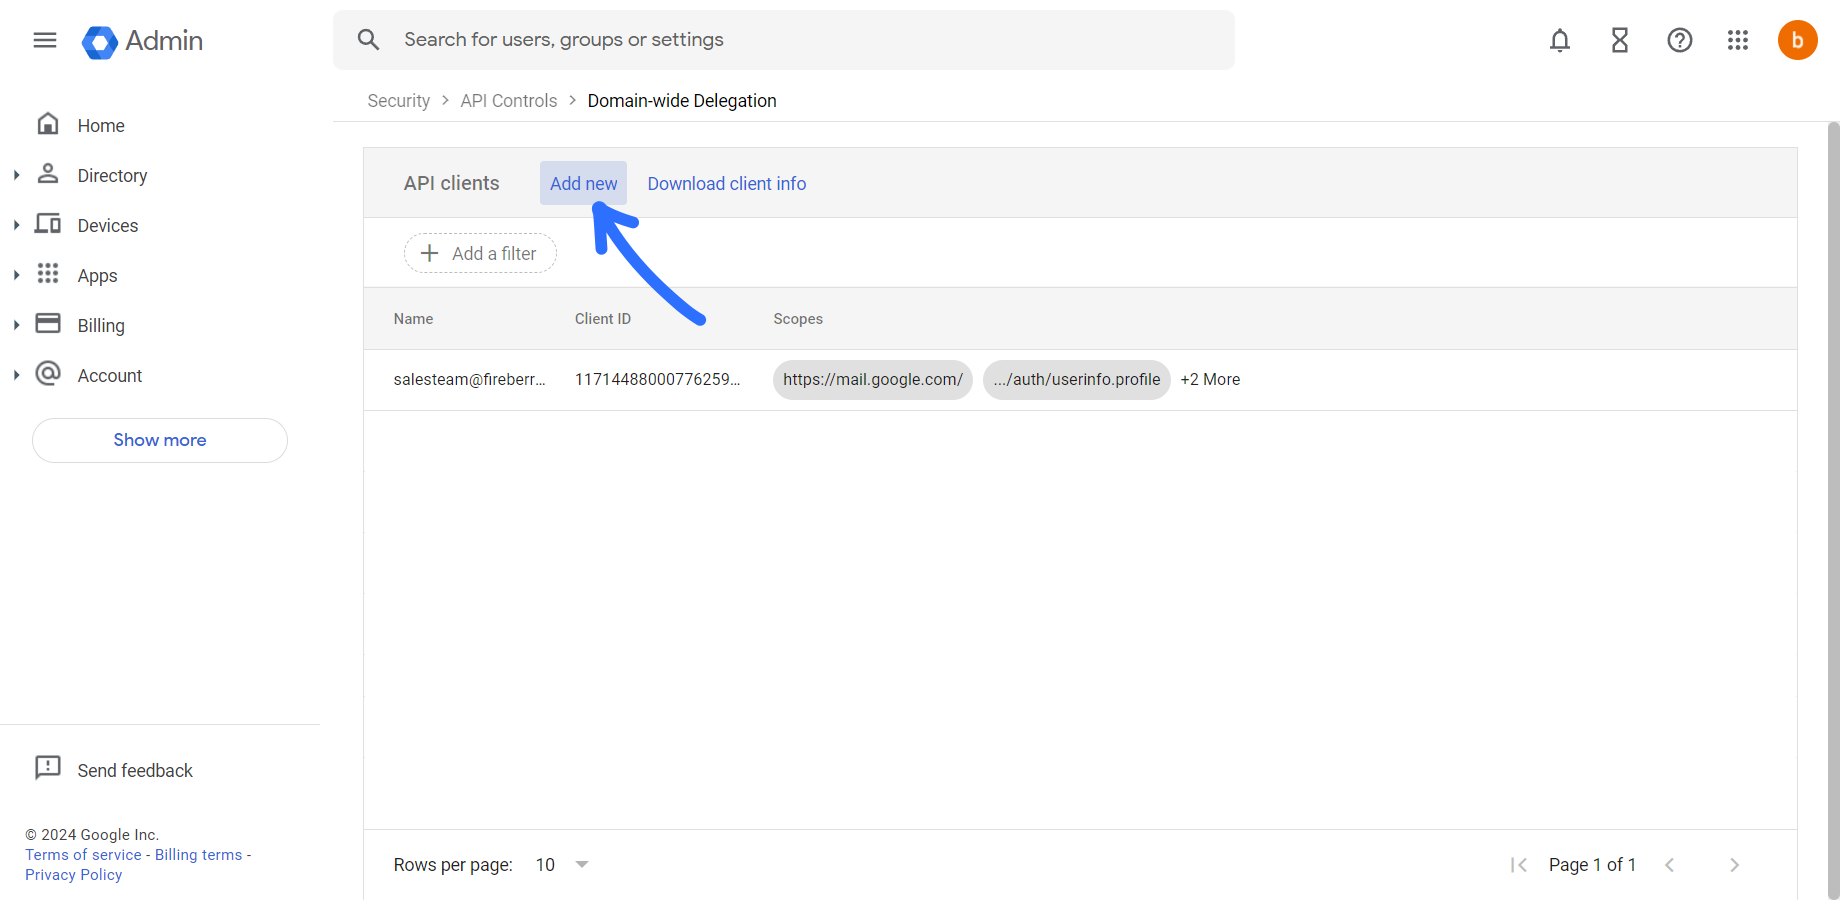
6. Paste the Unique ID you copied from the Google Developer Console into the Client ID section.
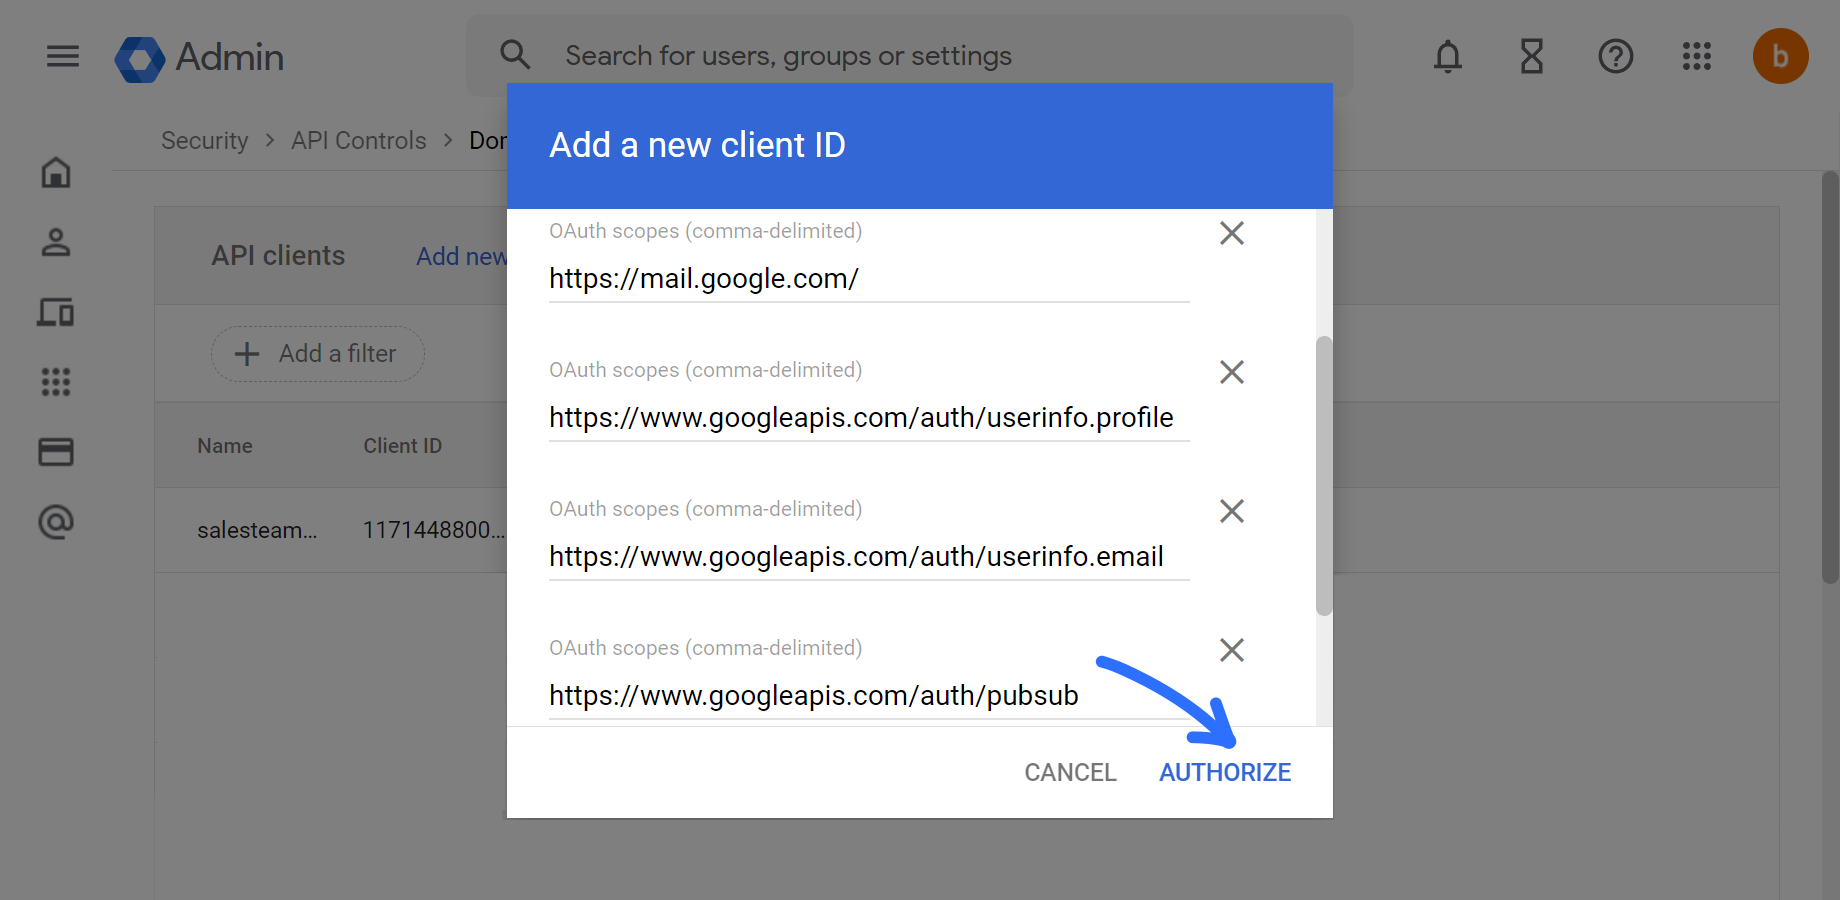
7. Copy the following links in the order they appear into the OAuth scopes (comma-delimited) section. After pasting each link, a new line will appear where you can paste the next link.
https://www.googleapis.com/auth/userinfo.profile
https://www.googleapis.com/auth/userinfo.email
https://www.googleapis.com/auth/pubsub
8. Click the blue AUTHORIZE button.
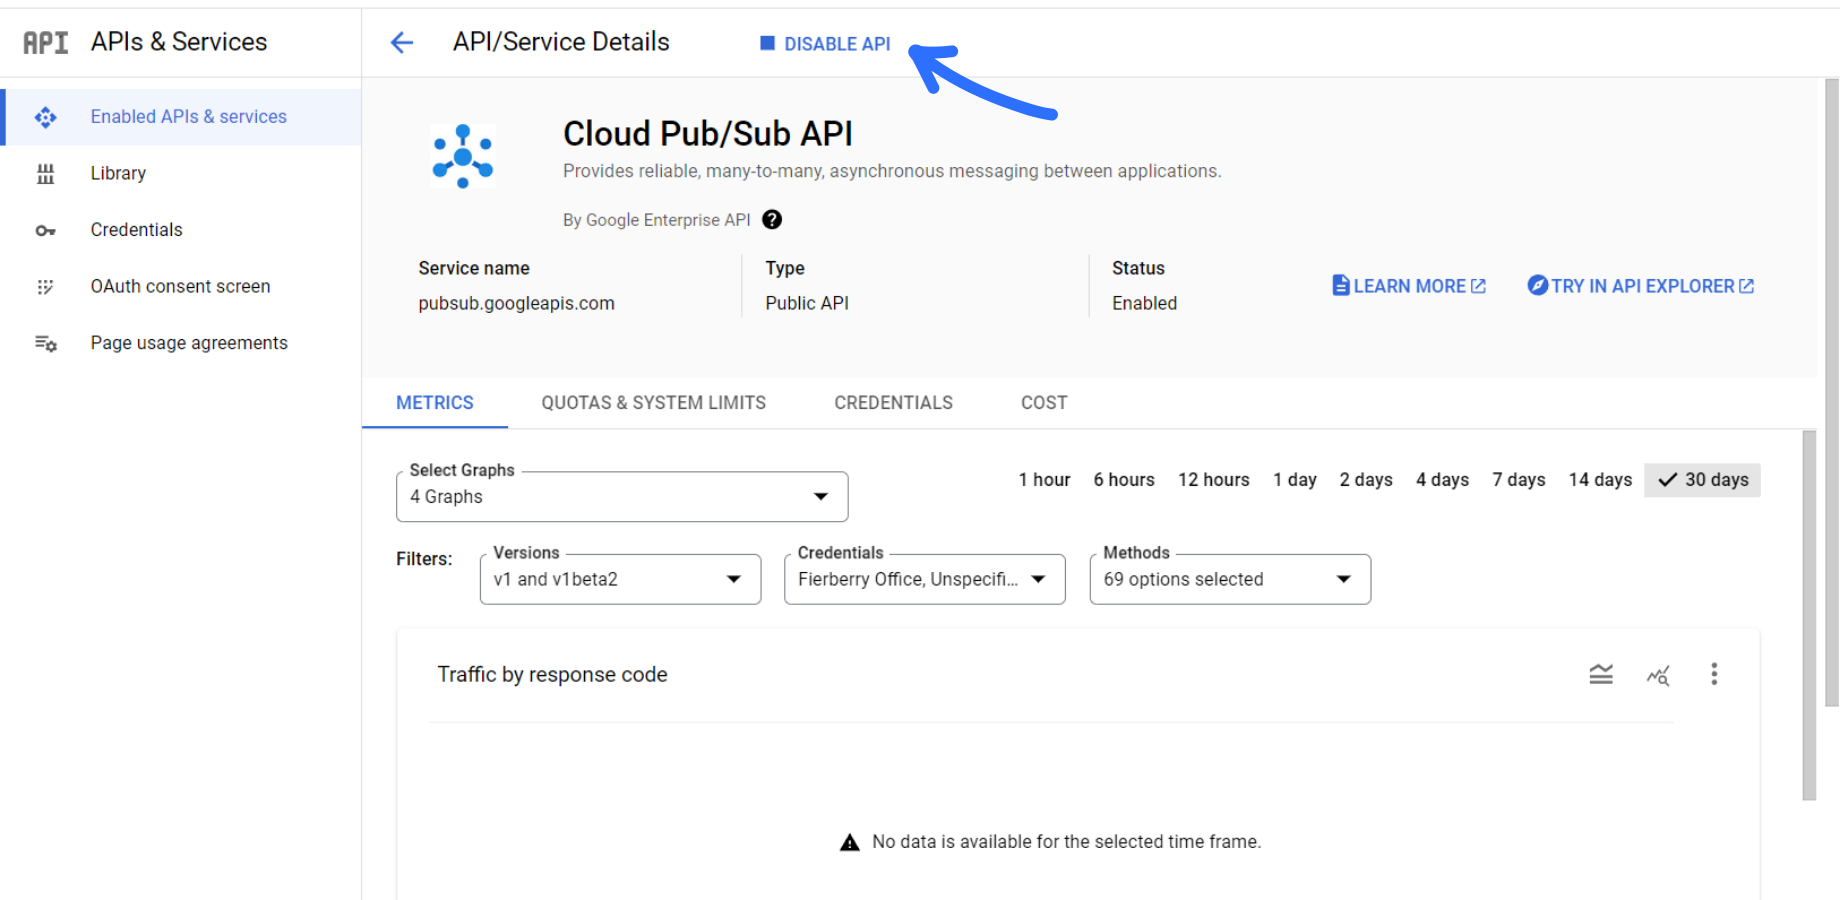
9. Now open the following link: https://console.developers.google.com/projectselector2/apis/api/pubsub.googleapis.com/
Verify that this api is enabled by selecting the project you’ve set up in step I above, and making sure the DISABLE API option is displayed. If you instead see the blue ENABLE button, click it to enable the Cloud Pub/Sub API.
Step III - Fireberry system
1. Click the gear settings icon from the top right of any system page, open the Integrations page from the left menu, and open the Team Inbox page.
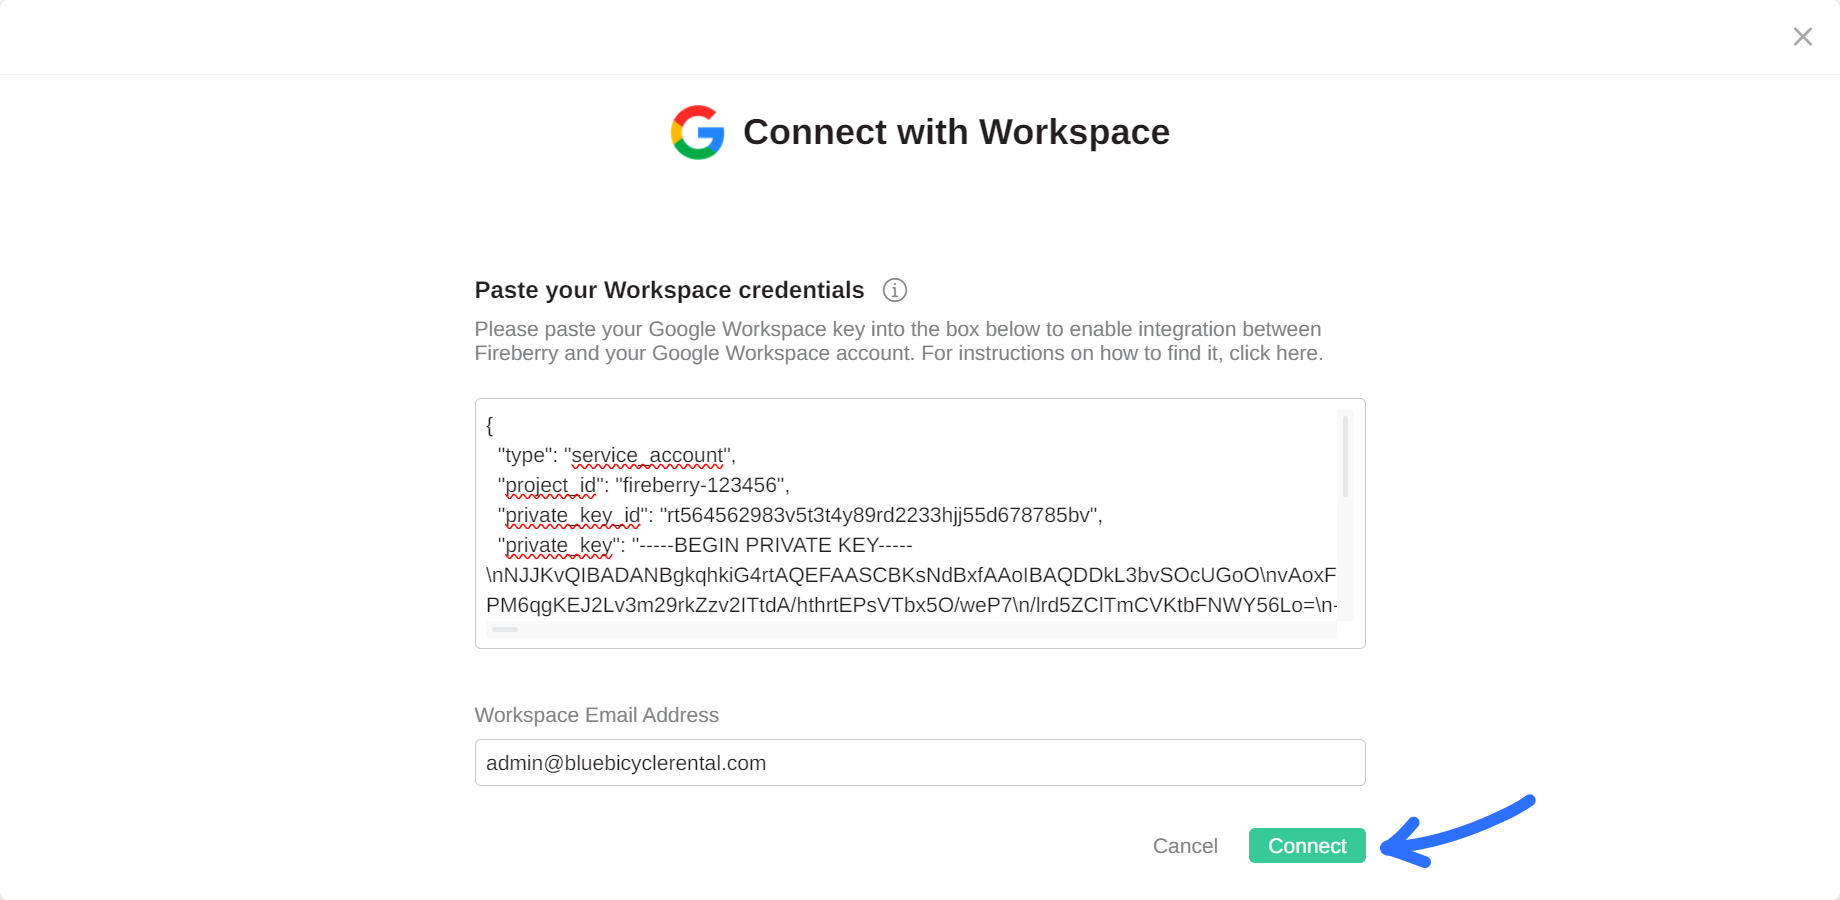
2. Click Connect with Google. This will open the Connect with Workspace page where you’ll enter the credentials created above.
3. Open the JSON file that was downloaded to your computer from the Google Developer Console.
4. Select all the text in the file (right click and press select all or press Ctrl+A / ⌘+A).
5. Copy everything (right click and press copy or press Ctrl+C / ⌘+C).
6. Go back to the Connect with Workspace page and paste the text into the Add your credentials here box (right click and press paste or press Ctrl+V / ⌘+V).
7. Type your Workspace email address into the Workspace Email Address box.
8. Click the green Connect button.
9. Click Allow in the permissions page to grant Fireberry access to your email.
Congratulations! You have integrated your Google Workspace email into the system. You can now set up your team inbox settings, which you can learn how to do here. To learn how to use team inbox throughout the system, click here.
Connection issues
If the connection does not go through, confirm the following steps: