Team Inbox settings
By using team inbox, you can manage all email correspondence directly from the system. In this way, you can easily track and access all emails from their relevant record, and work together with other members of your team. Below you’ll learn how to set up all the team inbox settings. For instructions on how to use team inbox, click here. Additionally, both access to the Team Inbox feature and the amount of inboxes you can add is based on your license. To learn more check out our pricing page here.
Accessing the settings
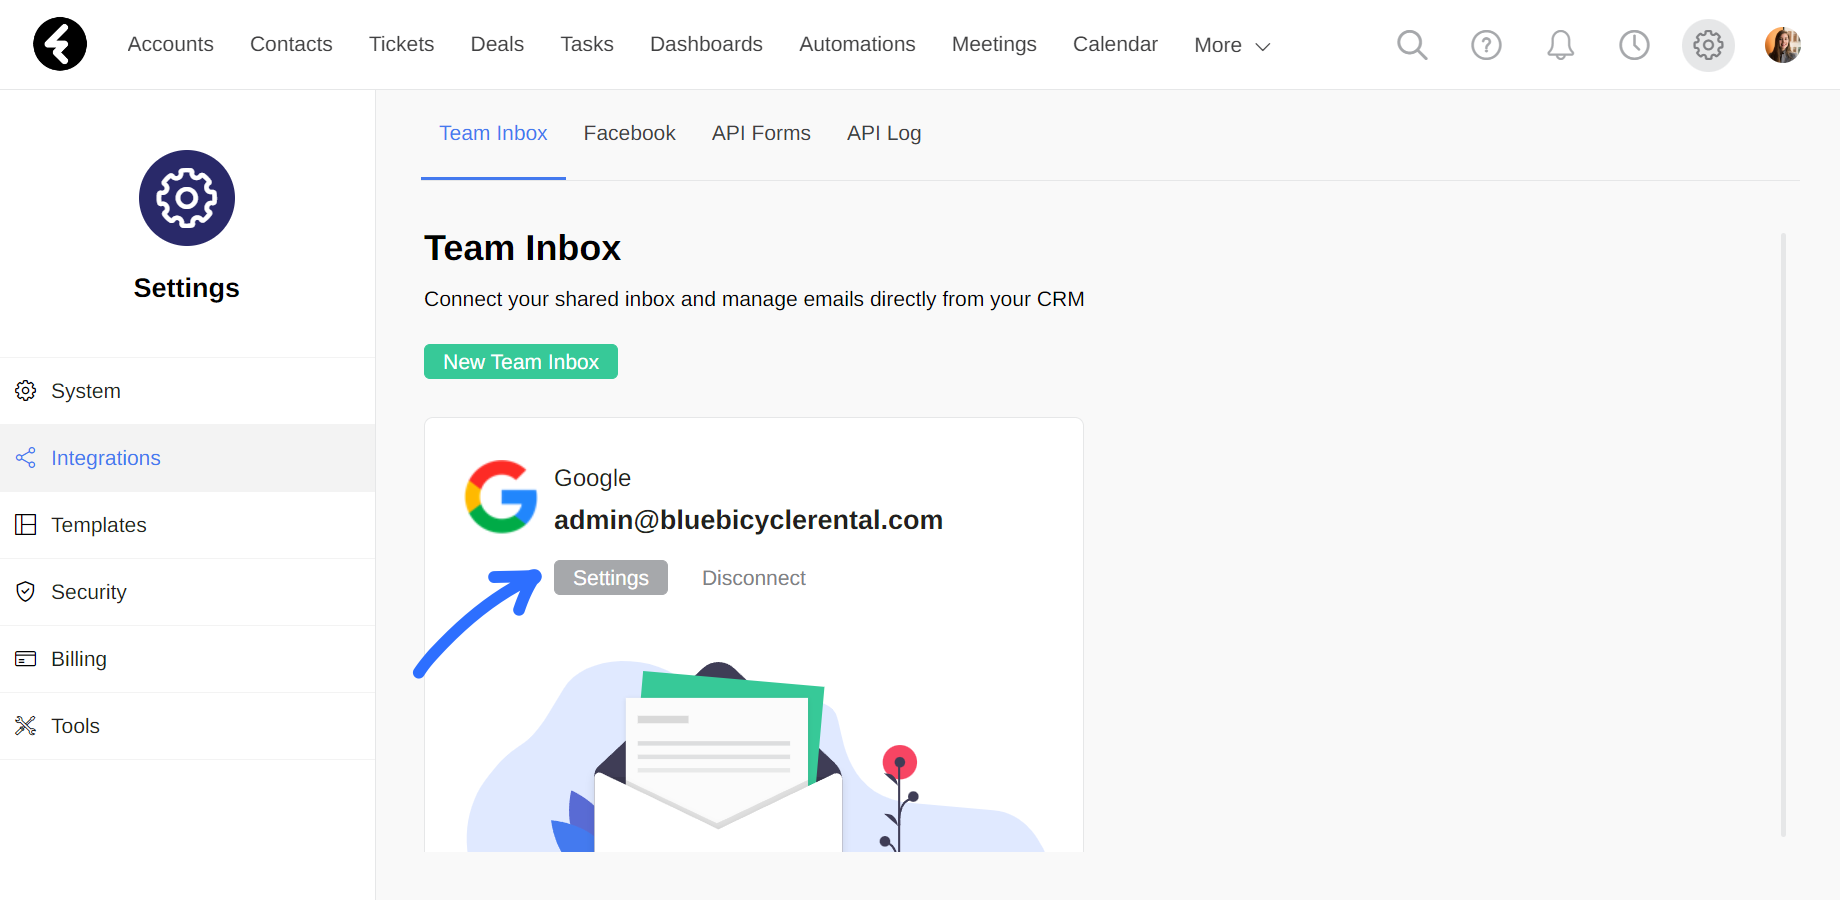
To open the team inbox settings, first click the settings gear from the top right of any system page. Next, select the Integrations tab from the sidebar menu, and then open the Team Inbox page.
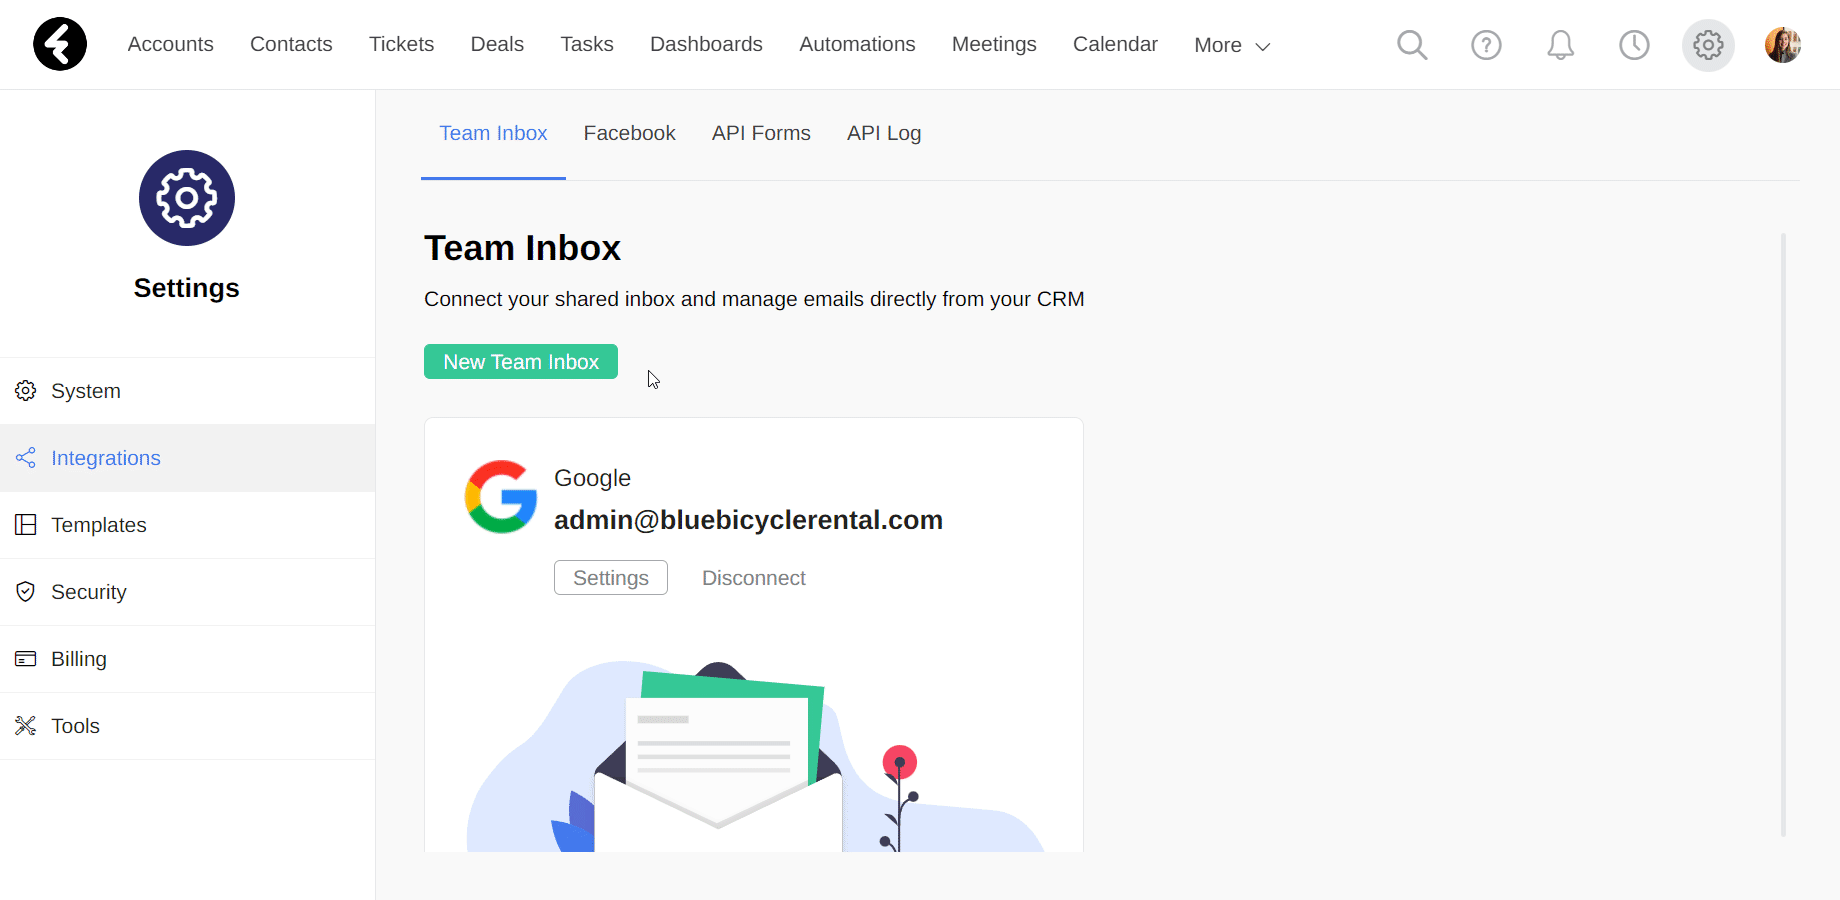
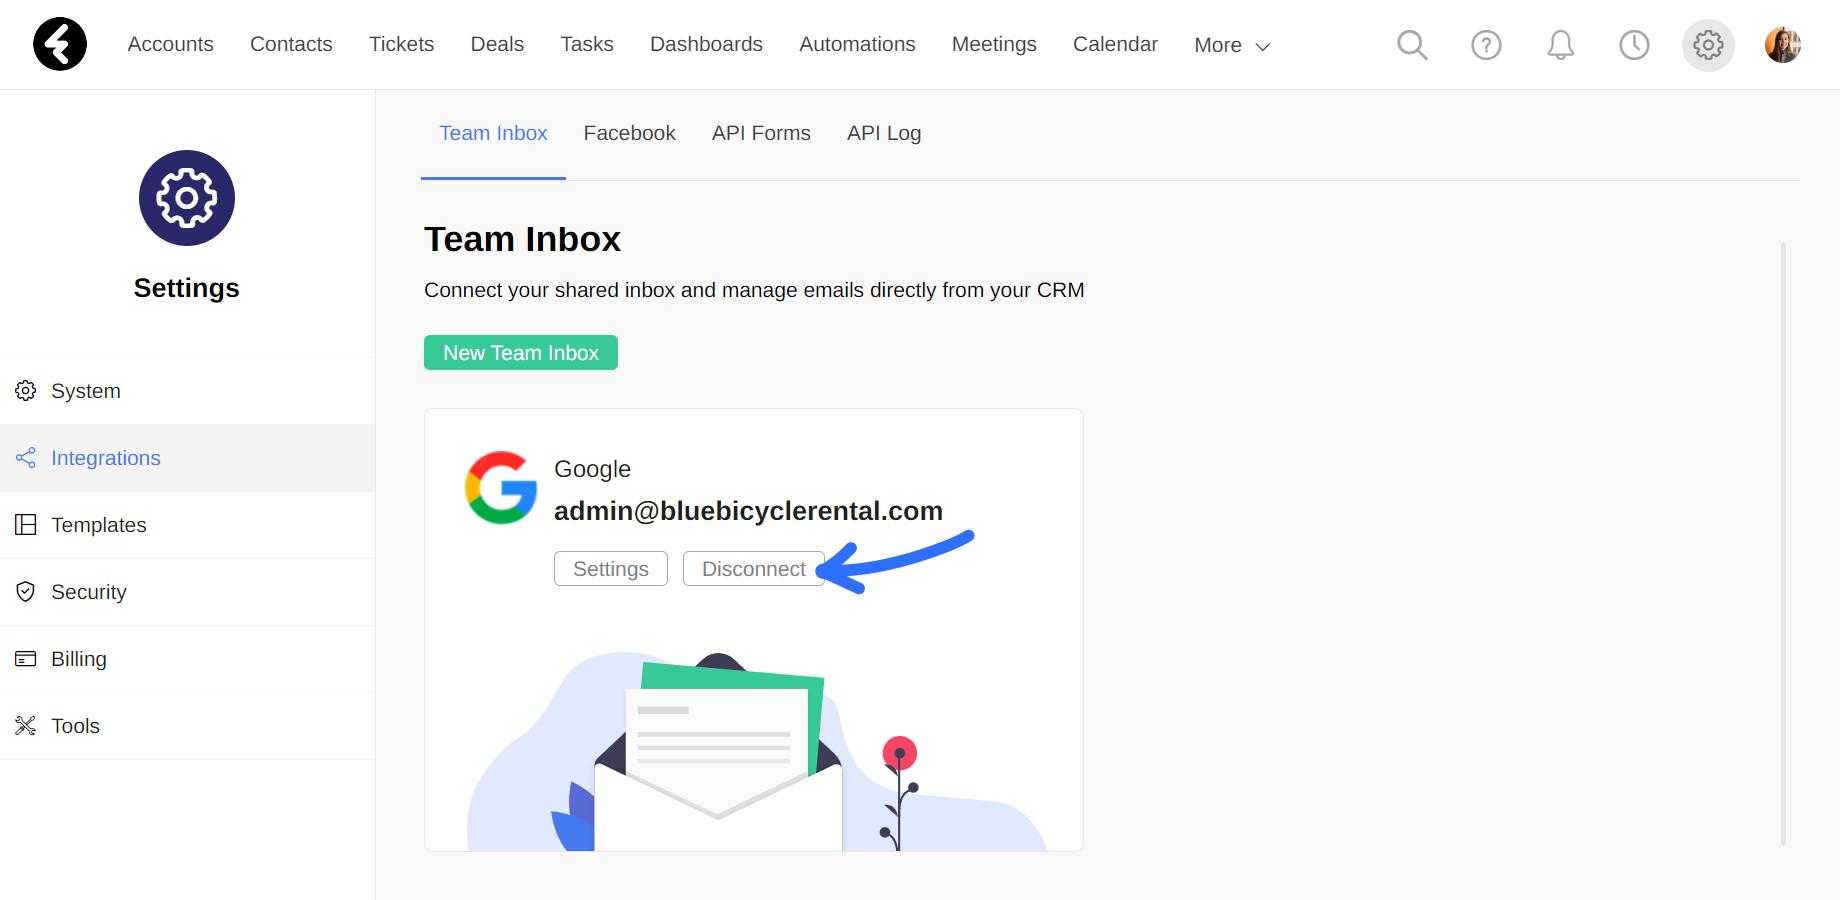
This will open the Team Inbox page. If you do not have a connected team inbox or would like to connect a new inbox, follow the instructions below. Otherwise, you’ll see a box for each of the connected team inboxes. The email address of each connected inbox will be displayed. Find the email address of the team inbox you’d like to edit the settings of, and then click the Settings button. This will open the settings page for the selected team inbox.
Connecting an inbox
If you would like to connect a new team inbox, first follow the steps above to open the team inbox integration page. The page will display the Connect with Google and Connect with Office 365 boxes. If you already have a connected team inbox and would like to add another, simply click the green New Team Inbox button. This will open the connection options. You can then select whether you’d like to connect a Google or Office 365 account. For Office 365 accounts, first click the Connect with Office 365 box. This will open the Office 365 login page. You can then sign into your Office 365 account. After logging in, click Accept to allow Fireberry access to your email. The connected email address will then integrate into your system and can be used to send and receive emails within the system.
For Google accounts, the process is a bit more complex and you can find instructions here.
To disconnect any connected team inbox, simply click the Disconnect button to the right of the Settings option, and then select Ok in the pop up.
Edit sender details
Click on the Edit sender details section to edit the name the team inbox emails will be sent from. You’ll see the From (Name) field, where you can choose from one of the following three options:
- User Name: This will display the name field set in the Full Name field of the user’s profile who sends the email. You can learn how to set the user profile name here. The name used here will change dynamically based on the system user who sends out the email.
- Team Name: Selecting this option will open a Team Name field immediately under the From (Name) field. You can then set the name which will be displayed for all emails, no matter which system user sent them.
- User Name + Team Name: This option combines the two options above by writing the name of the user followed by a dash and then the written in team name.
To the right, you’ll see a preview of what will be displayed in the From (Name) section of sent emails. In this way you can visualize the name that will be displayed and select the option which works best for you.

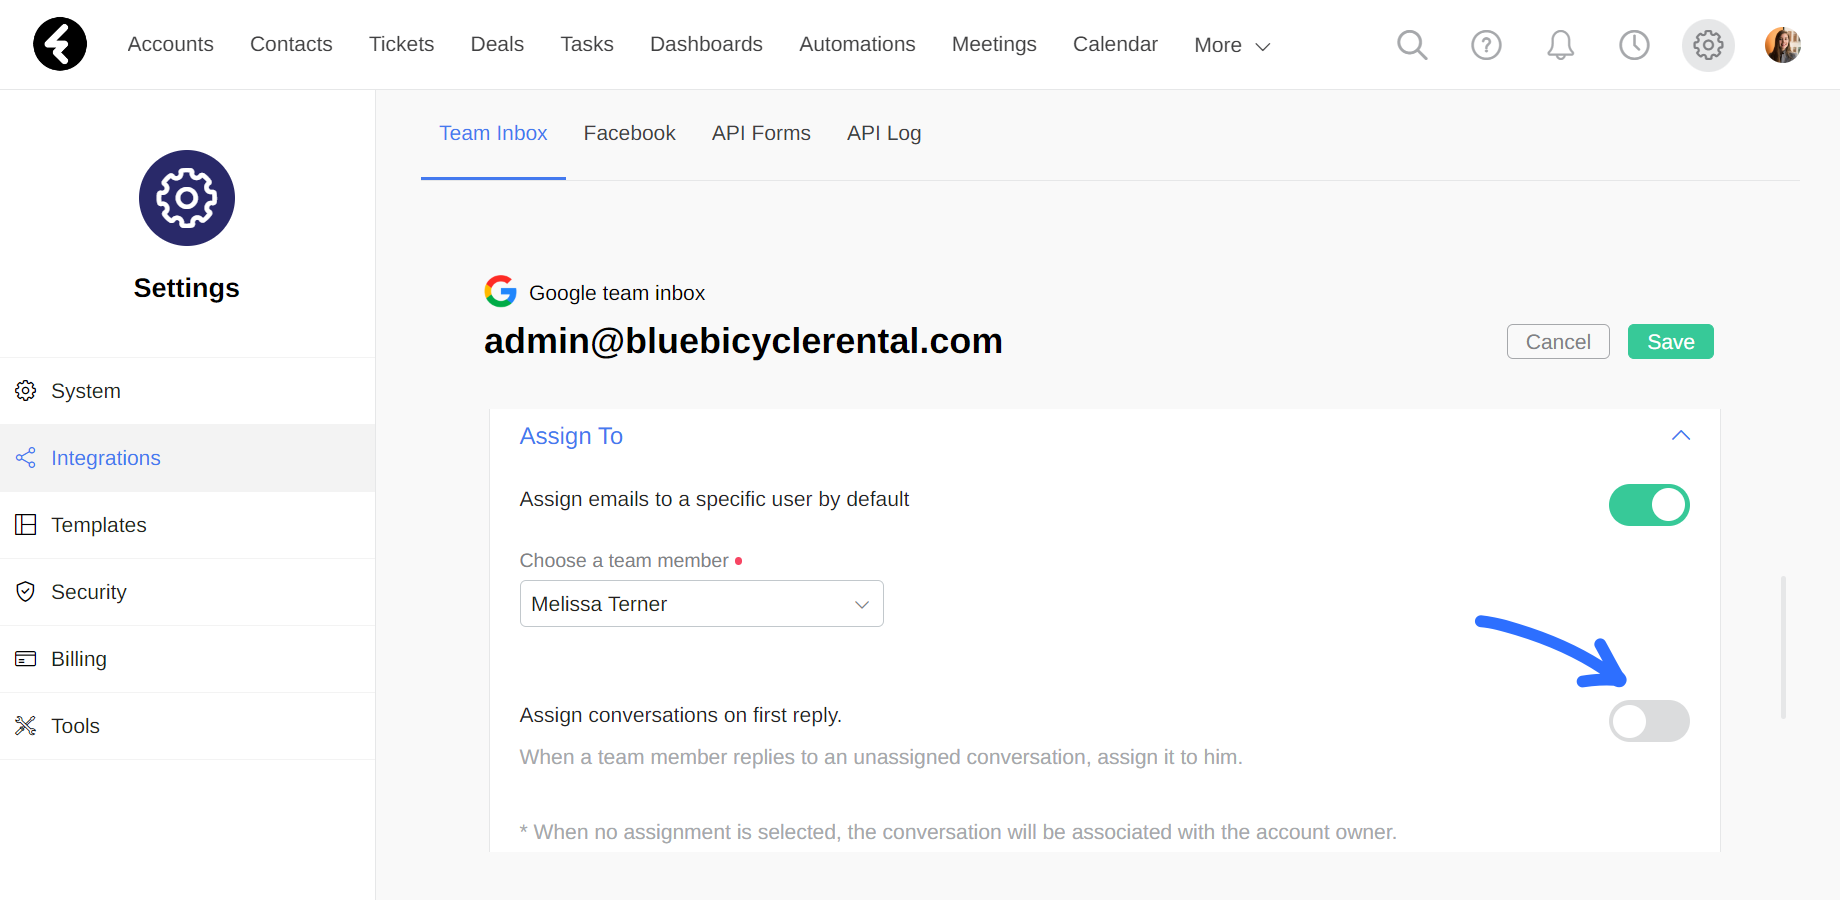
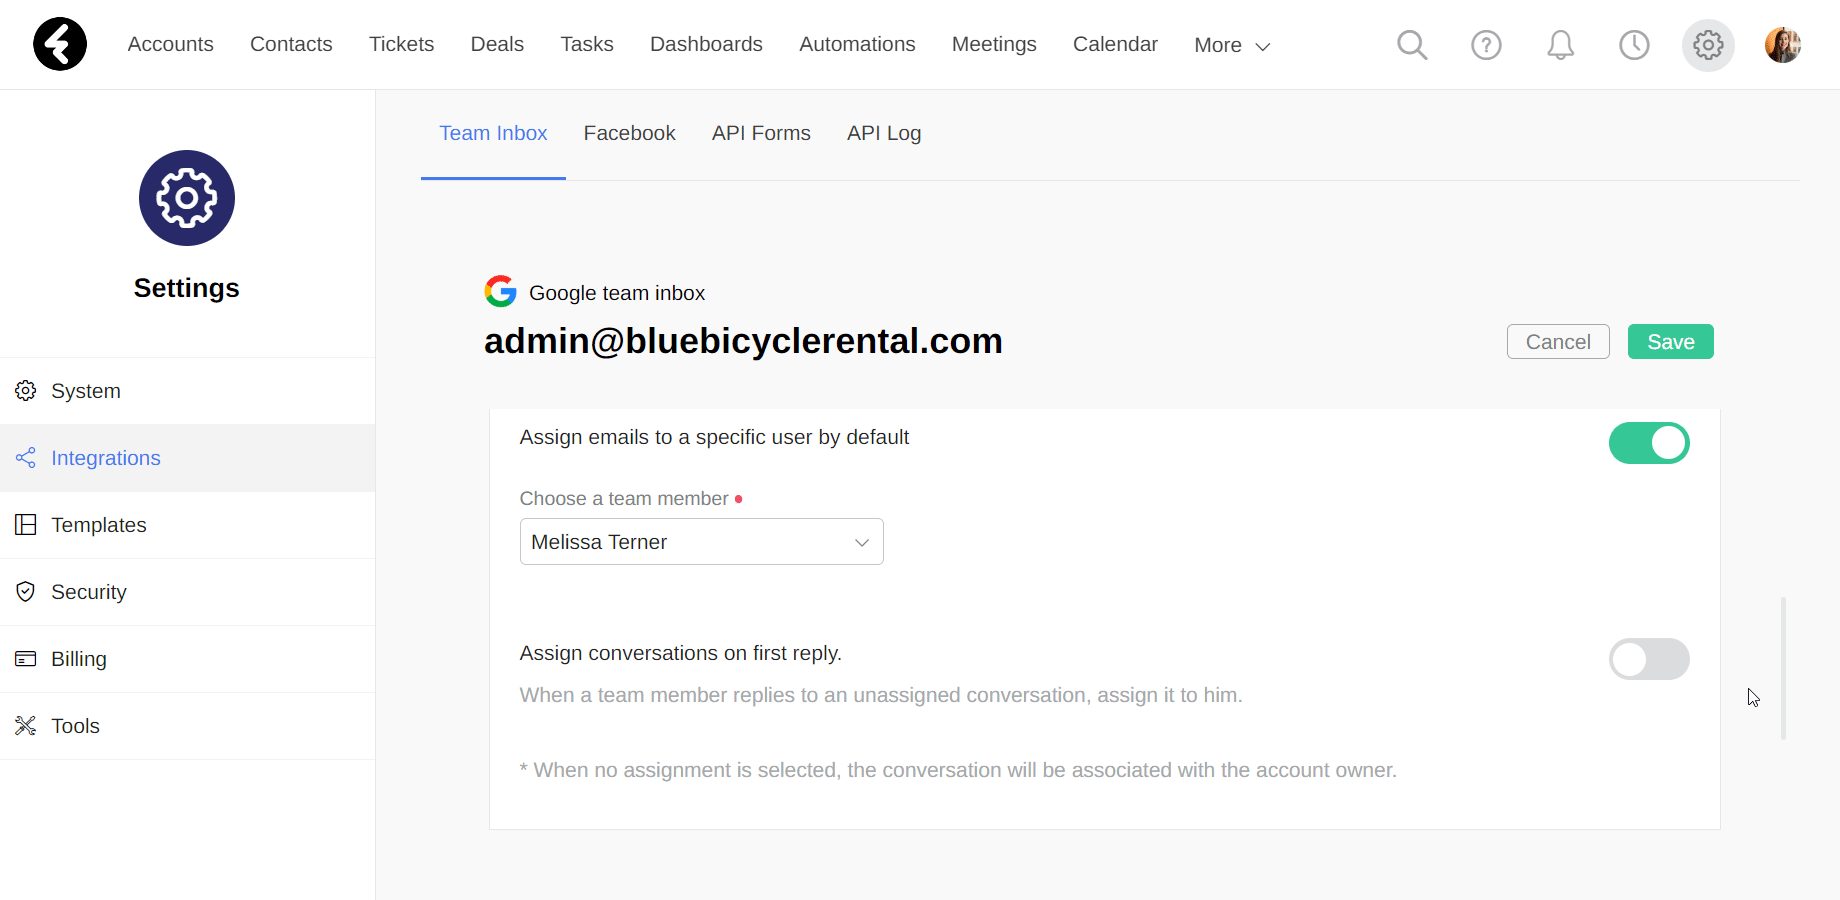
Assign To
You can use the options under the Assign To section to automatically assign emails to system users. This will set system users as the owner of the emails.
Assign a default user
By turning the toggle green next to the Assign emails to a specific user by default option, you can automatically assign each incoming email to a specified user. After clicking the toggle, be sure to select a user from the Choose a team member searchable dropdown list. After saving this setting, every single incoming email will be automatically assigned to the selected system user.

Assign a user on first reply
You can also choose to have emails automatically assigned to the user who first replies to them. In this way, every time a user replies to a new email, the email will be assigned to that user. To activate this setting, simply change the toggle to green next to the Assign conversations on first reply option.
You can easily turn off either of these features at any time by switching the toggle back to gray.
Create records for each received email
By using this option, you can automatically create a new record each time an email is received in the system by the current team inbox. This is quite useful when you’d like to track and access new emails using records. For example, you can have a new ticket created each time an email comes in. This ticket will be related to the incoming email, and can be easily delegated to system users. To activate this option, first set the toggle to green next to this option. Next, use the Choose a record dropdown menu to select the type of record you’d like to create. You can choose from three different options:
- Ticket: This will create a new ticket every time an email is received. This may be useful when setting up your support team inbox, as you can then easily track and move the ticket along as you answer support inquiries.
- Deal: This will create a new deal record every time an email is received. This may be useful when setting up your sales team inbox, as you can then easily track incoming leads.
- Custom: You can select any custom created object to create a new record of this type. To learn how to create custom objects, click here.
The name of the newly created record will be the subject line of the email, and the email will be related to the newly created record and appear in its stream. If there is a related account for the email, the newly created ticket or deal will be related to the account.
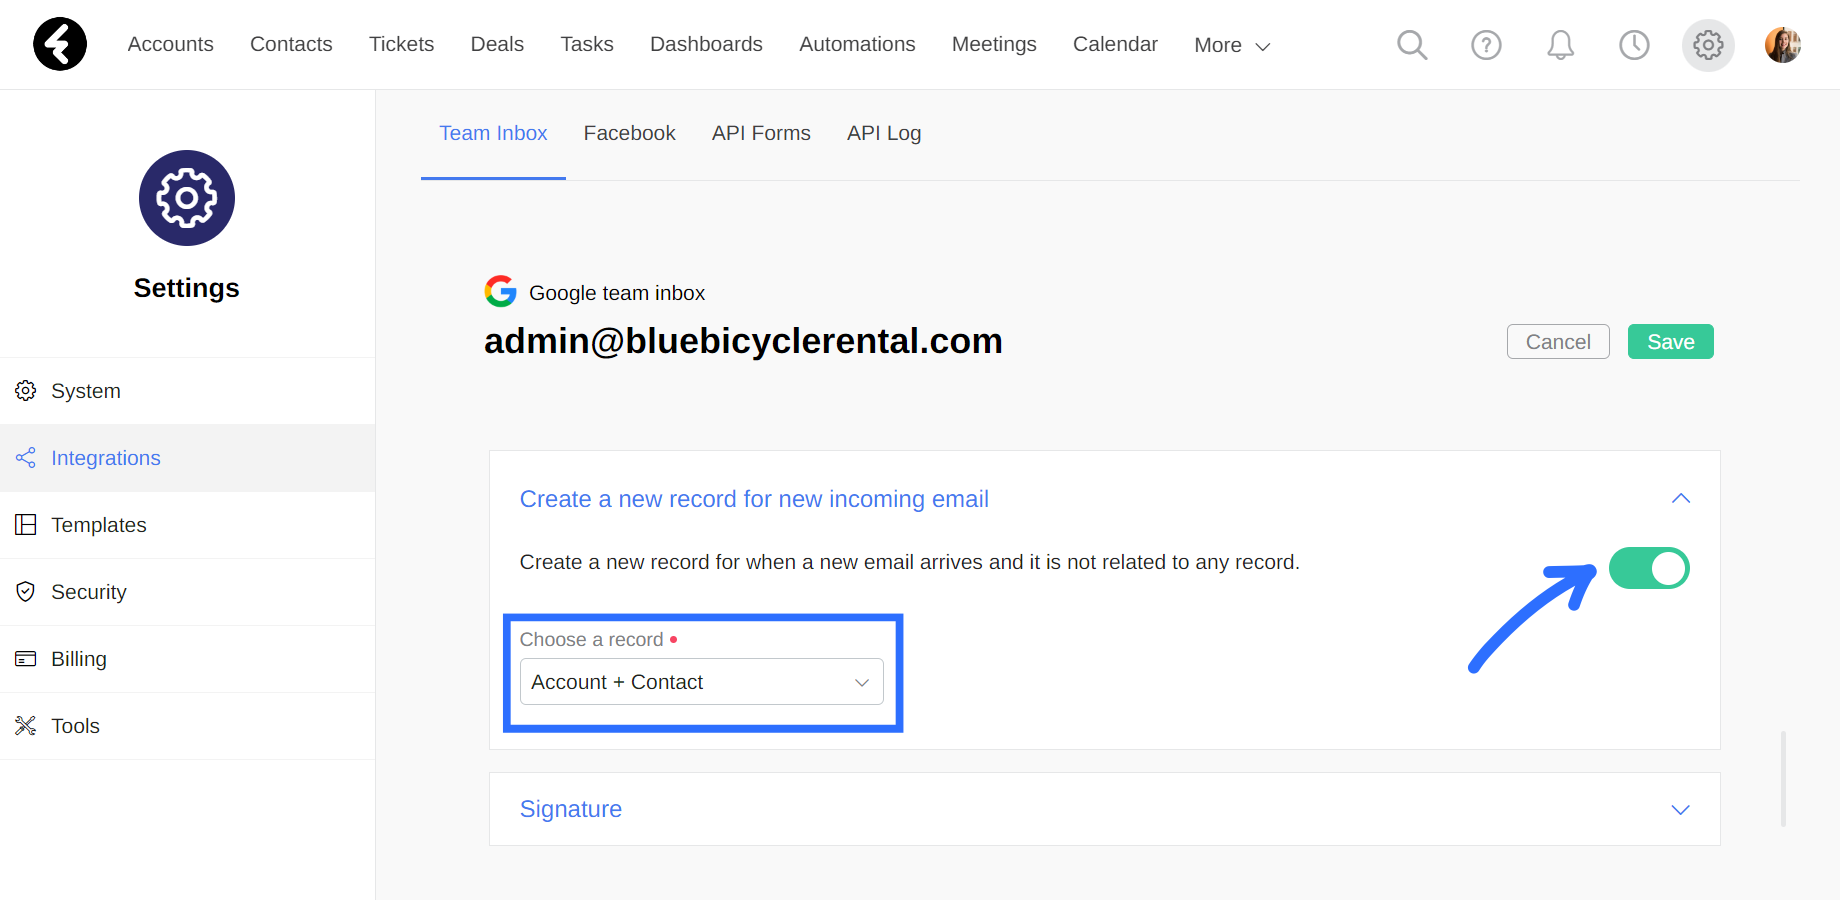
Create records for unrecognized email addresses
Each email received by the system will take the email address of the sender and try to match it with the contact and account email fields in the system. When a field is found which matches the email address of the sender, this email will be related to the relevant account or contact. You can find an in depth explanation of this process here.
The Create a new record for new incoming email option allows you to automatically create a new account or contact record for each incoming email where the system does not find an account or contact to relate it to. The new account or contact record will set the name as the name of the sender of the email, and the email field will automatically fill in with the email address. The received email will of course be related to the new account or contact record.
To activate this option, simply switch the toggle to green. Then, under the Choose a record dropdown, select if you’d like to create a new account record, contact record, or both. The incoming email will then be related to the newly created records.
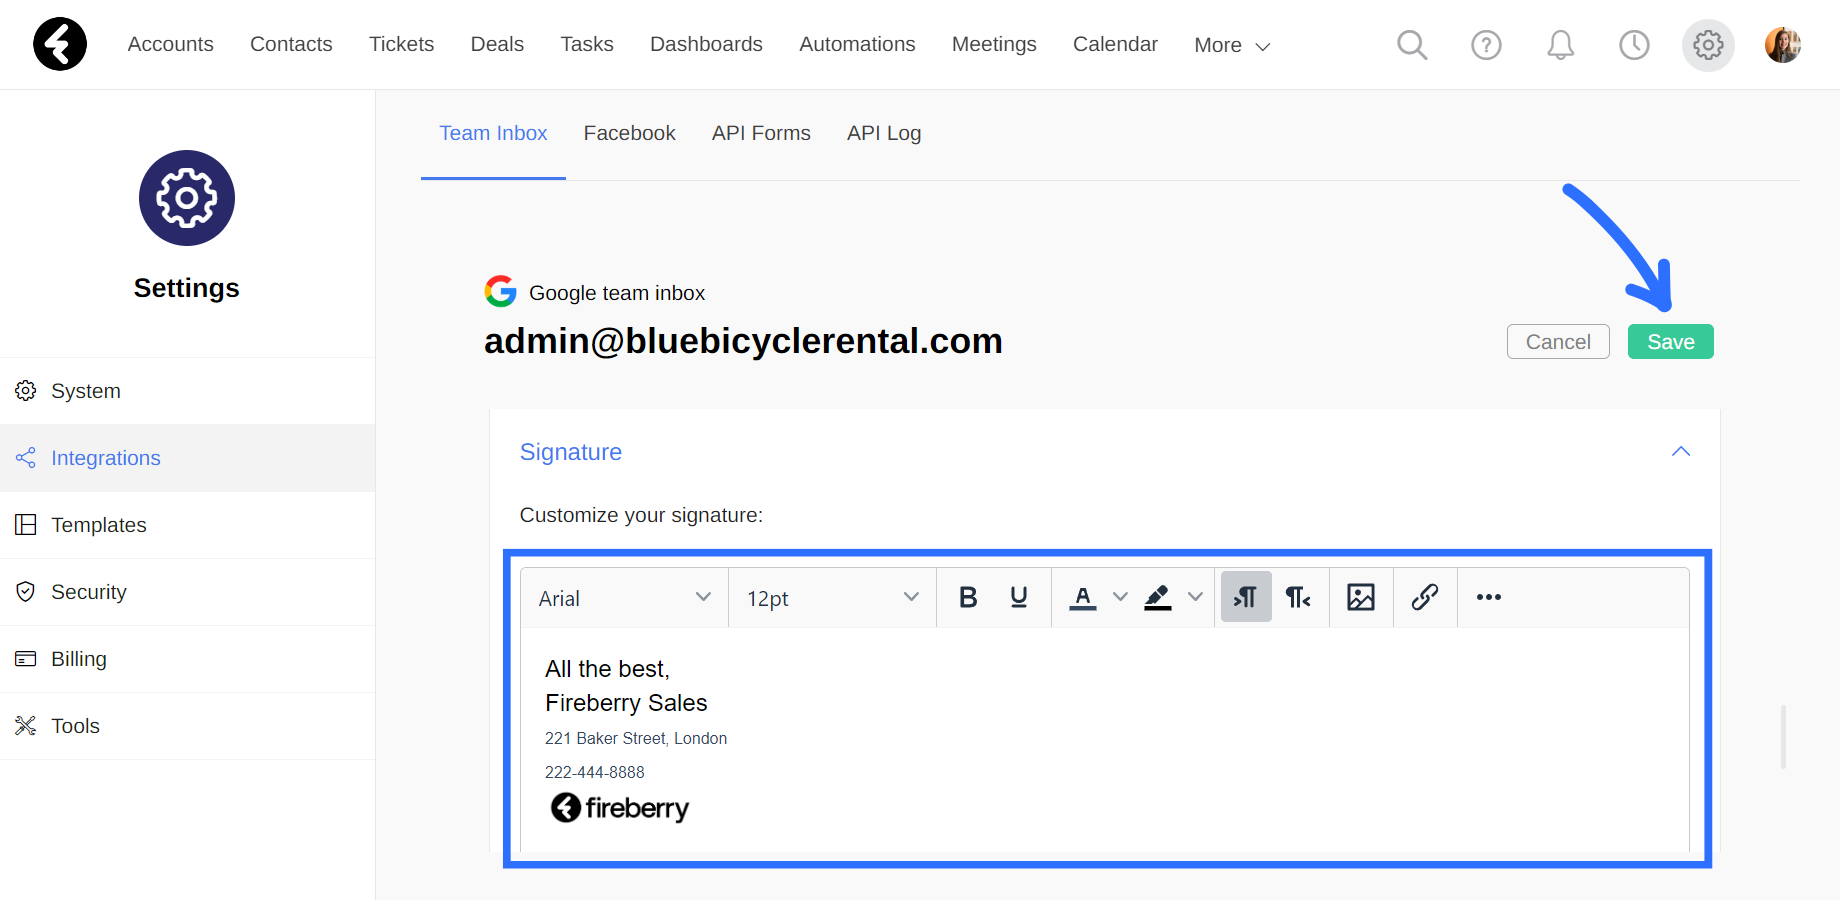
Signature
Using the Signature section, you can create a custom signature which will be included at the end of each email sent from this inbox. You can customize the signature using fonts, size, images, links, and more. This feature works similarly to HTML fields, which you can learn how to use here. Not all the options provided in HTML fields are accessible within the signature option. Once you’ve finished setting up all the system settings, be sure to click the green Save button at the top right of the page. You can also click Cancel at any time to undo any changes you may have made and revert the team inbox settings to their previous state.