Setting up a lead in the system
Add new accounts to Fireberry as new records when they join your account database. It will allow you to track their processes, provide them with feedback, and ensure that all information is available and easy to access.
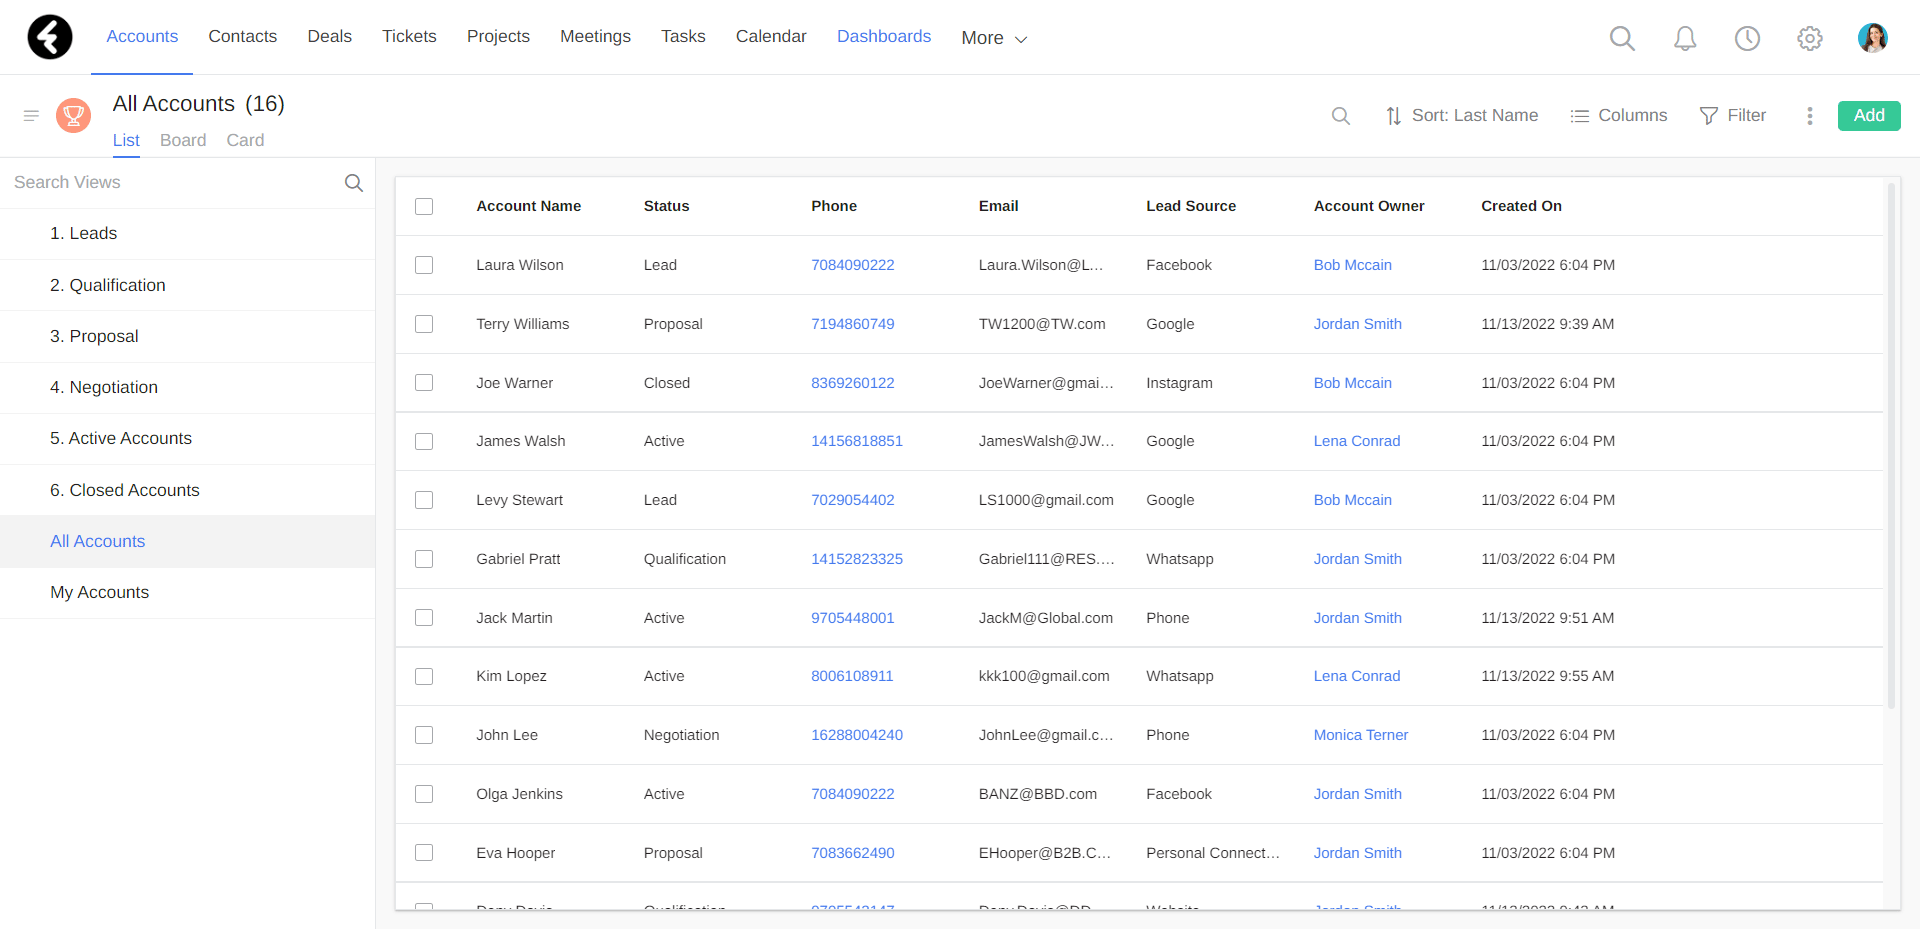
Adding a new account
To add a new account, go to the main menu and click on the Accounts object.
.png)
If you do not see this object on the main menu, click More and search for Accounts in the list that appears.
To add a new account, click Add.
.png)
Fill in the account's details in the window that opens, then click Save.
.png)
After adding a new account to the system, you can edit their record at any time.
Structure of the account record
All of the information about your accounts is centralized within the system's account record.
Account records consist of the following components:
Account form
The account form is located on the left side of the account record, and is made up of fields. Form fields include account name, status, phone, email, address, and other basic information about the account.
.png)
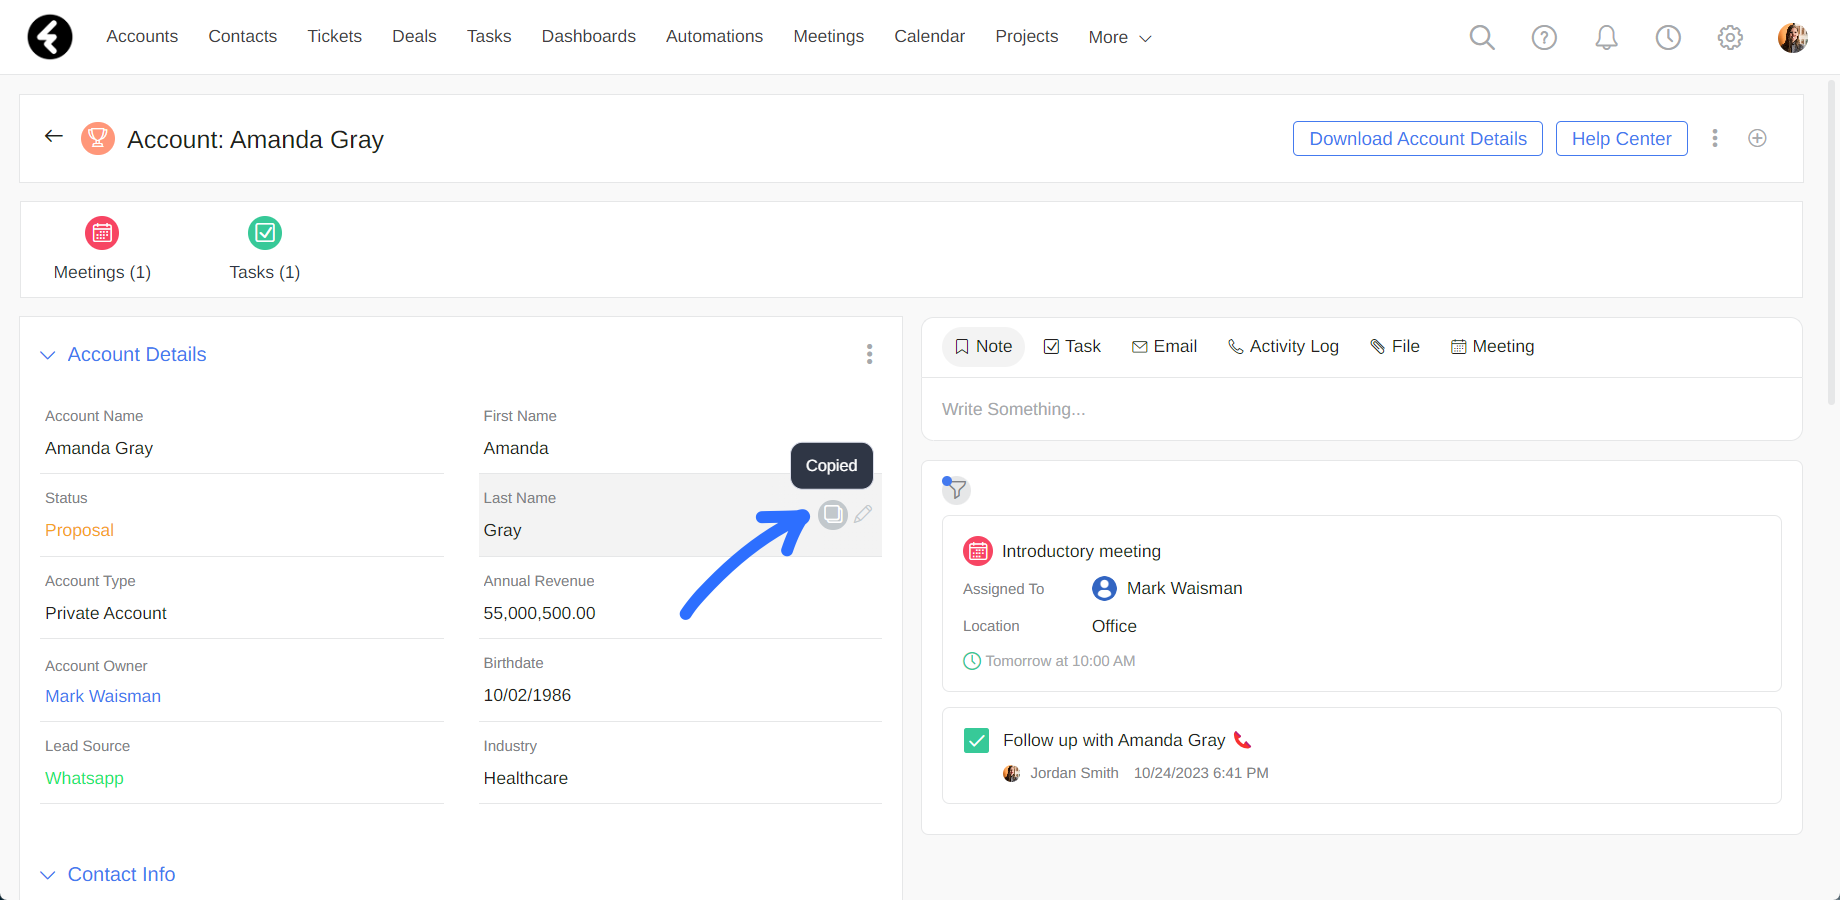
You can easily change the value of any field, such as an account’s name and status. To start, click on the field you’d like to edit. This will put the field into edit mode, where you can change the value of the field to anything which matches the field type. For example, the name field is a text field where you can input free text, while the status field is a picklist where you can choose from a list of predefined options. Click on the green check icon on the right side of the field to save your new value.
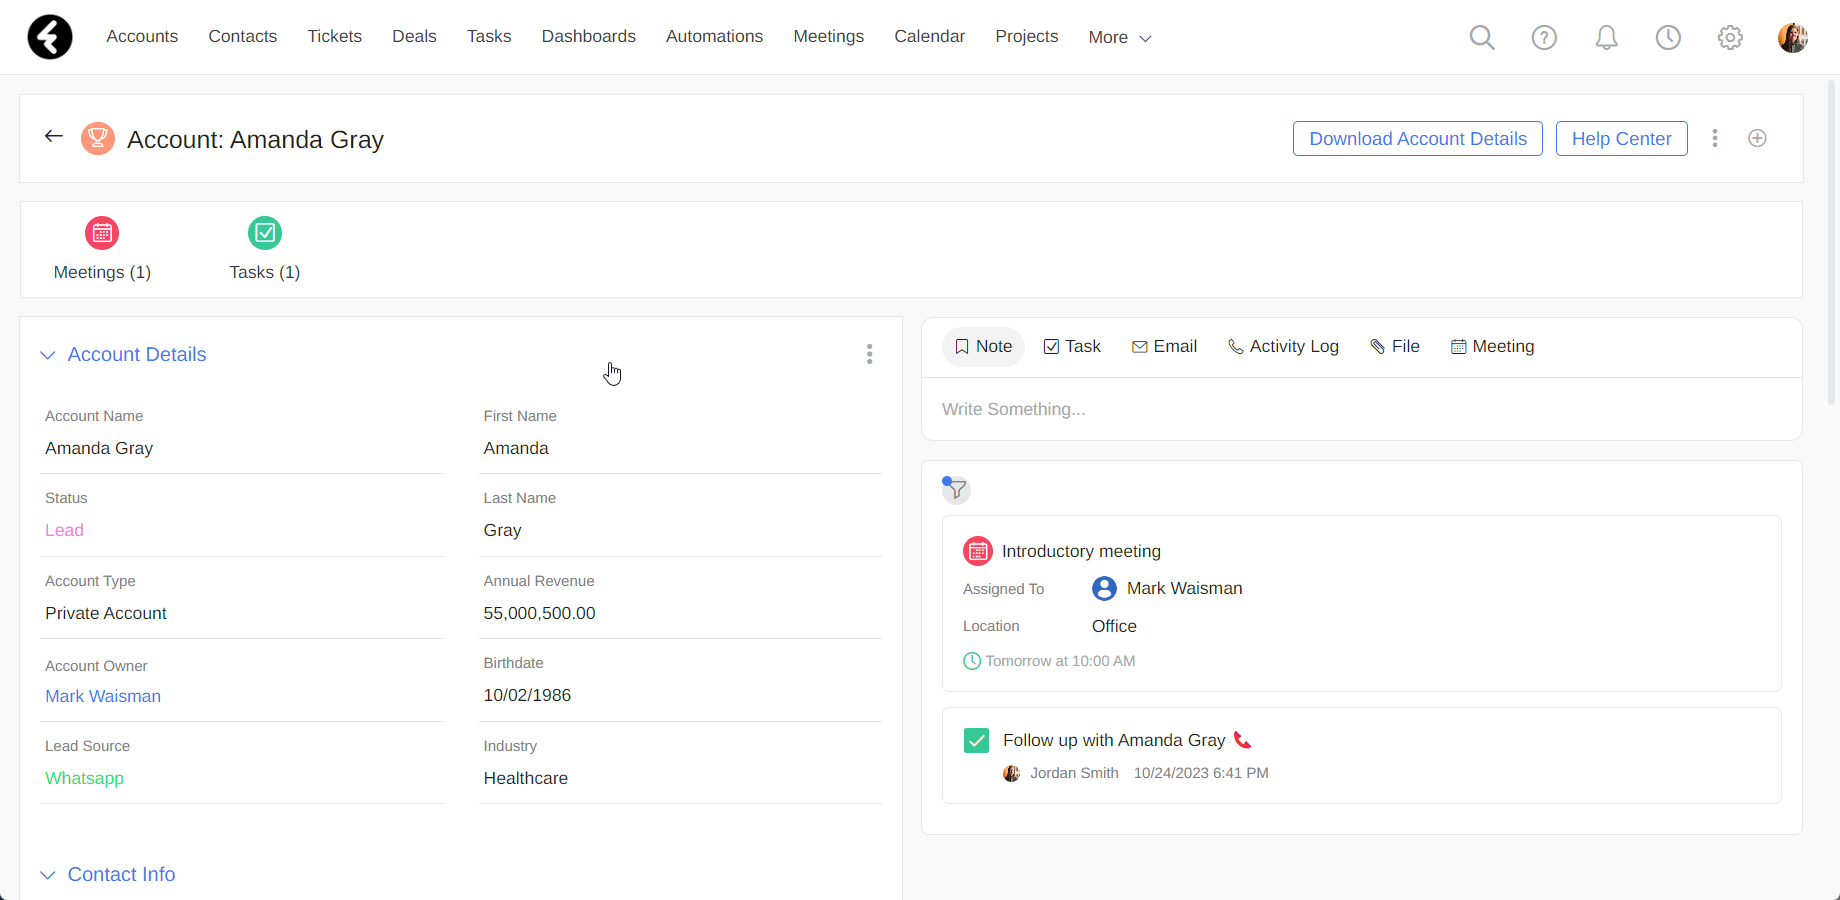
You can also copy any field’s value. Simply hover over the field and then click the copy icon. The text Copied will appear to let you know you’ve successfully copied the value, which you can now easily paste anywhere.
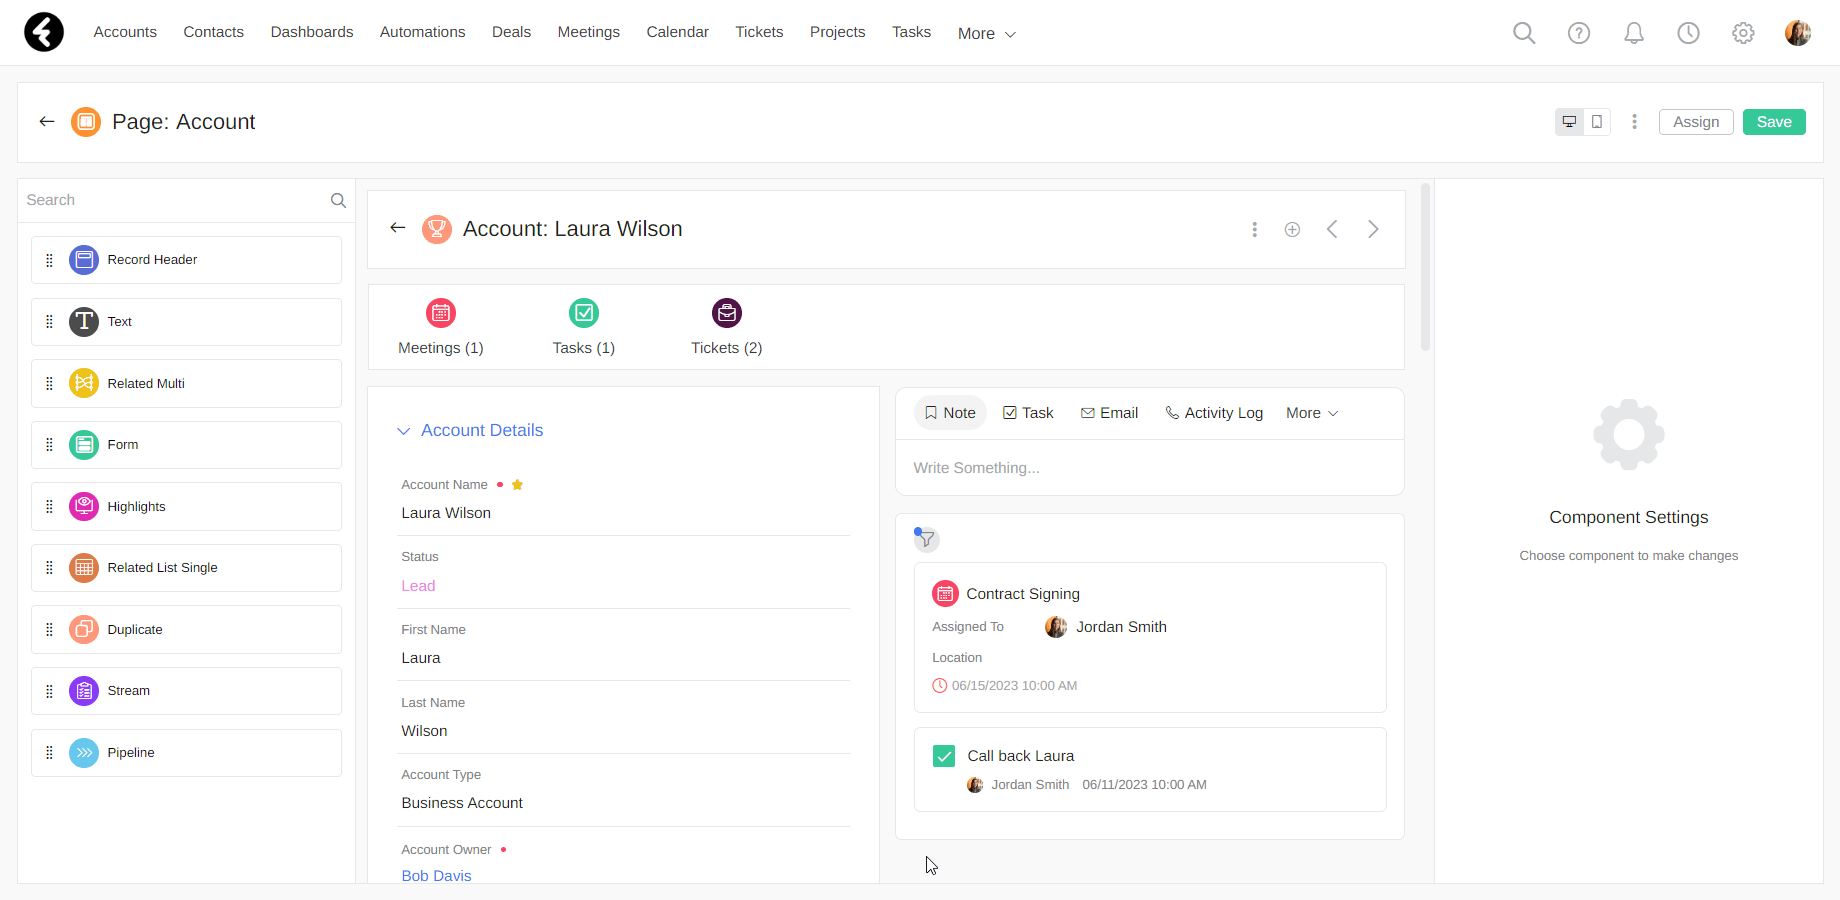
Stream
The streams is located on the right side of the account record. With the stream, you can add notes and files related to the account, send emails and SMS messages, and create tasks.
To learn more about streams in the system, go to the following article.
.png)
Related records
From each account record, you can create and view records related to it, for example: you can add a meeting with the account or view their contacts and so on.
By clicking on one of the related records, you will see its details and be able to access it directly.
.png)
Editing account forms
You can easily customize the accounts page so that it only displays items which are relevant to your business. Additionally, you can add new fields to the form or edit the existing fields.
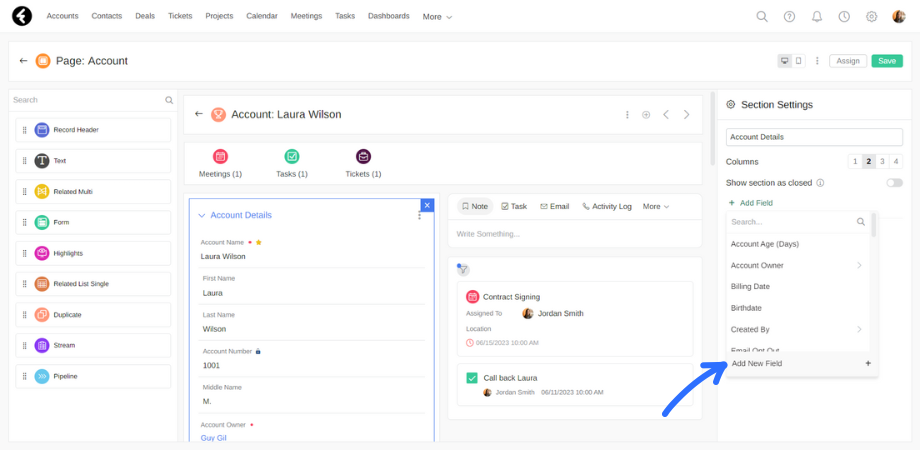
Editing the accounts page
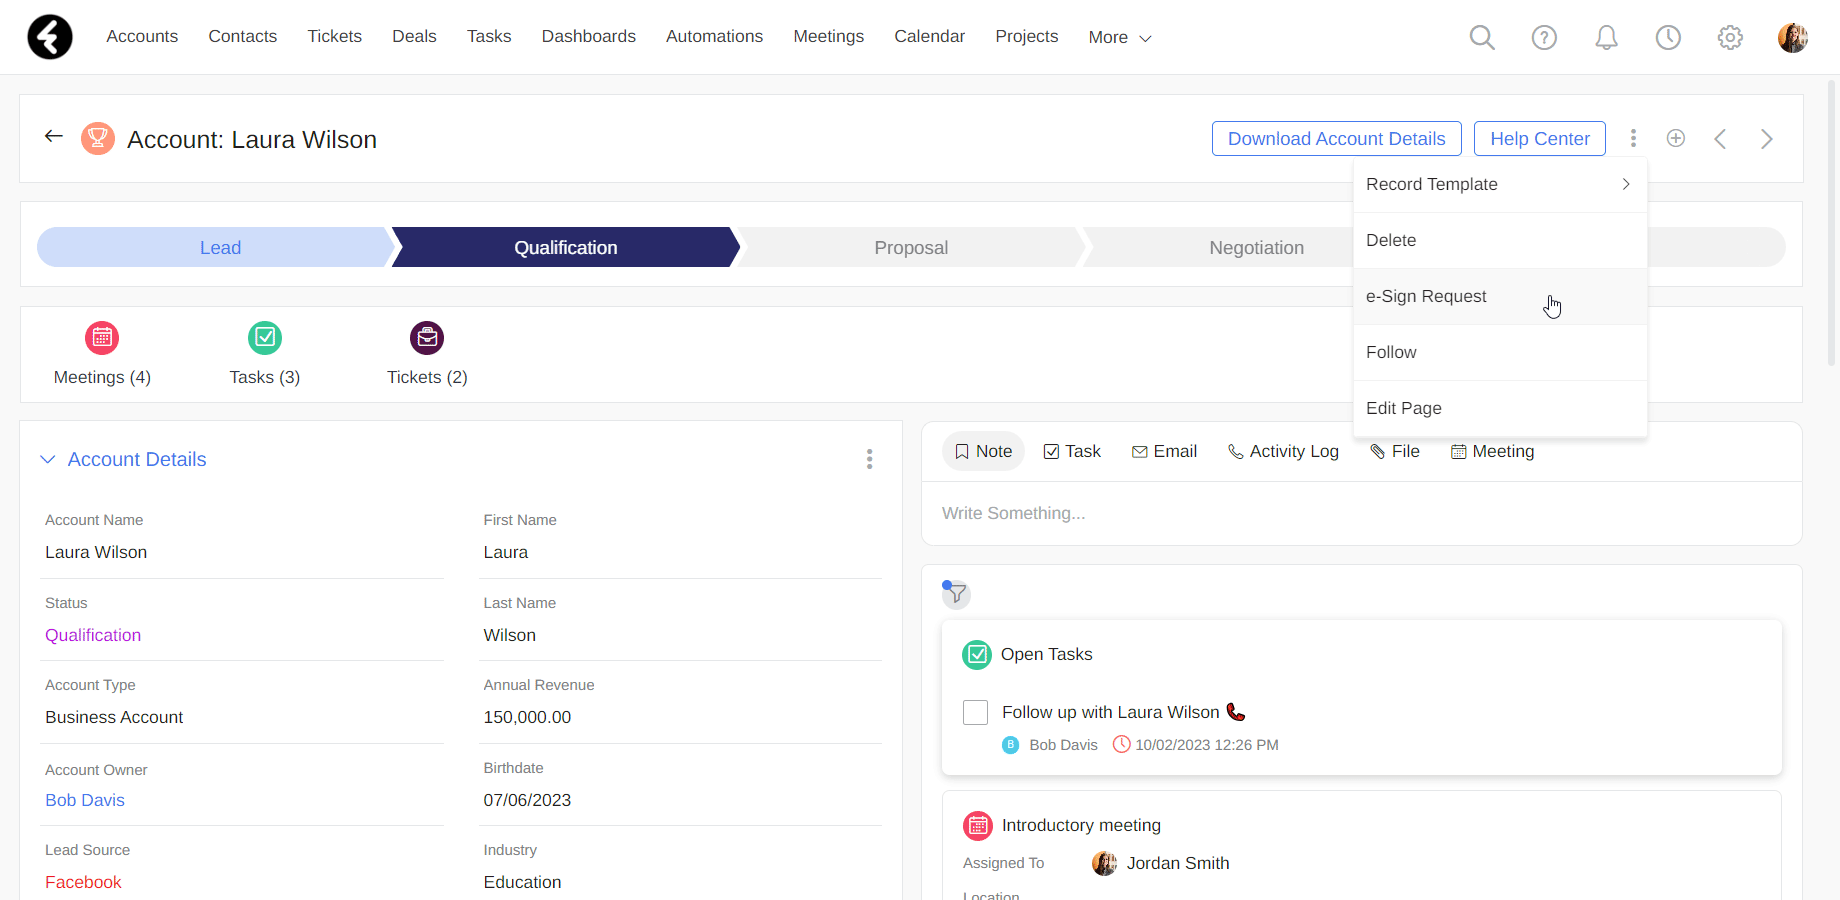
By editing the accounts page, you can choose which components will be displayed and set each component's individual settings. To access the page editor, first open a random record within the Accounts object. If you don’t have an existing record, create a new one using the Add button on the top right. Now use the three dot menu on the top right of the record’s page and choose the Edit Page option.

You have now opened the page editor for the accounts page. Here you can add, remove, reorder, and change the settings of every component. You can search for and then drag in components from the left menu to add them to the page. To edit an existing component, simply click on it and then use its settings on the right of the page. If you’d like to delete a component, click on the blue X in its top left corner.
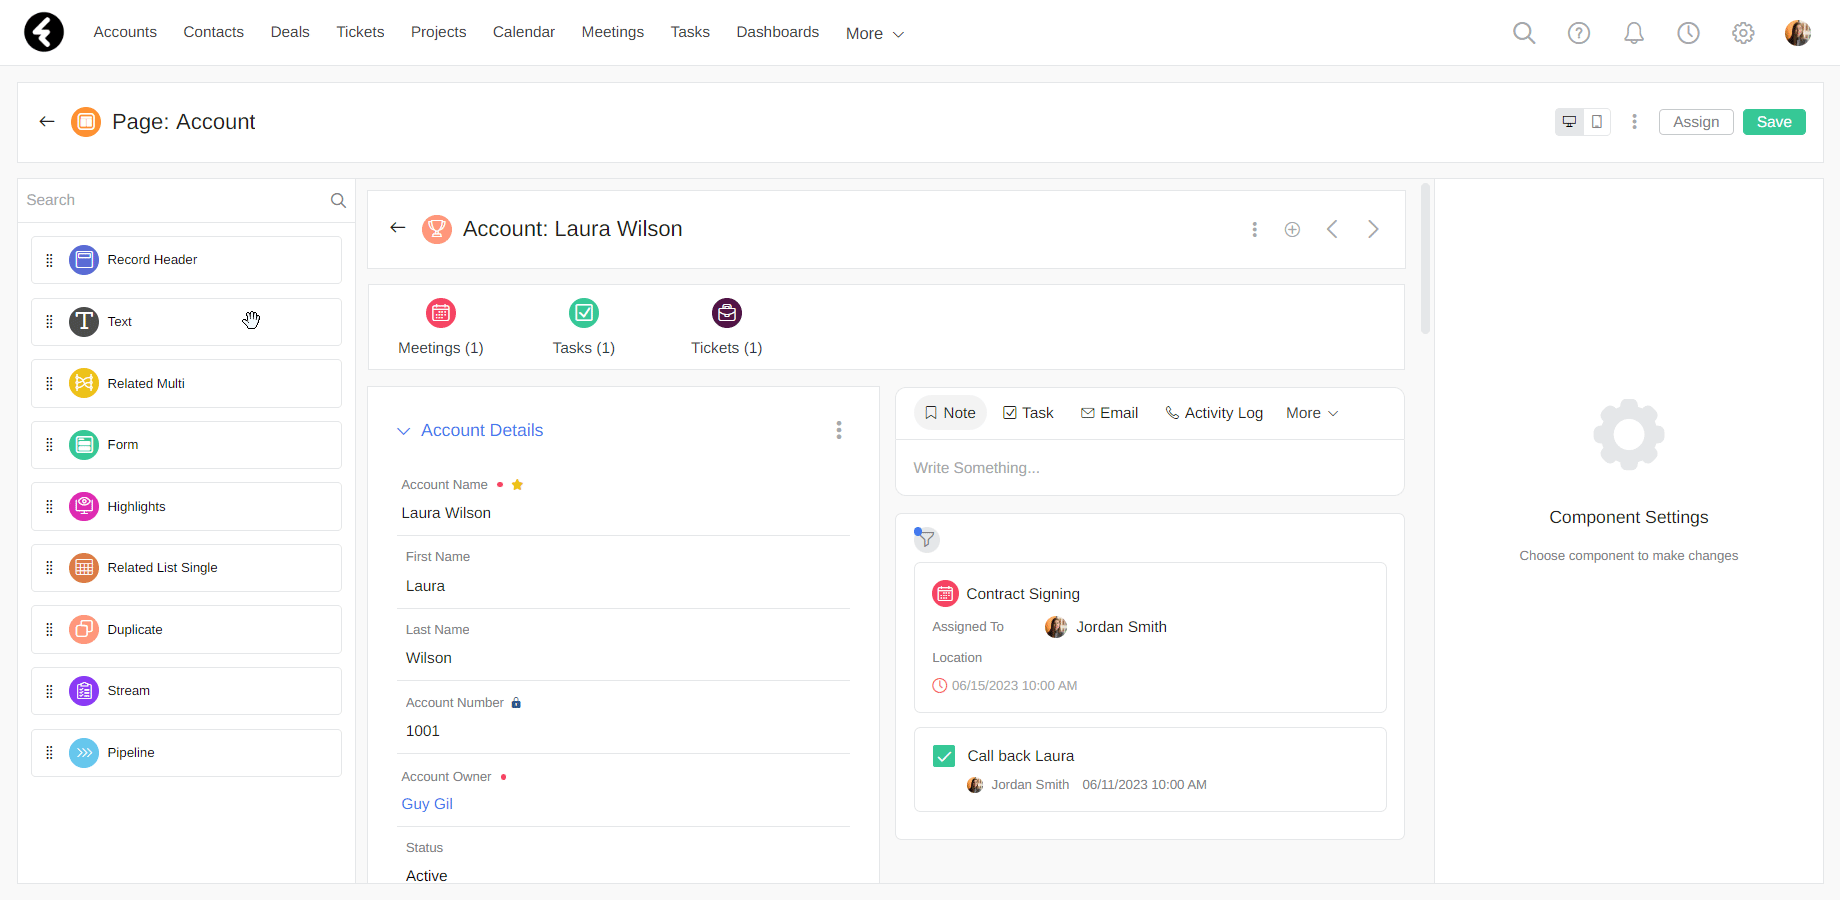
Adding new fields
An account’s fields are displayed within its form. As a form is a component, you can access and edit it using the Edit Page option explained above. Each form is made up of sections, which contain and group fields. To add a new field to a form, you’ll need to choose and edit the relevant section within the form.
For example, you can add the Middle Name field to the Account Details section. To start, hover over the Account Details section of the form component. Once you see a blue outline around the section, click it to open its settings on the right. Now click the green + Add Field option, search for the Middle Name field, and click on it to add it to the selected section.
The Add Field dropdown list contains all the existing fields within the accounts object. You can also choose to create and add new fields, simply click the Add New Field option at the bottom of the list. To learn how to add and edit new fields, click here.
Editing existing fields
To edit the account’s existing fields, you can either use the page editor or the object studio. To open the page editor, click the Edit Page option explained above and then simply click on the field you’d like to edit, for example the Status field. This will open the Field Settings menu on the right side of the page. There you can click the green Edit button to open and then edit the status field’s individual settings, such as the name, default value, or status options.
To use the object studio, start by clicking the settings gear on the top right of the page, and then choose the Object Studio section from the top menu. This will open a list of all the objects within the system; Choose the Account object from the list. On the bottom half of the page you’ll see the Record Fields option. Click on it to show a list of all the fields which belong to the account object.
Using the Record Fields list, you can choose any existing field and change its settings. For example, you can change the options in the status field. First click on the Status option from the fields list, which will open the status fields setting page. You can change the name of the status field, set a default value, or change the options within the field.
The status field is a picklist field; It provides a dropdown list of options which can be set as the status. You may wish to change the options within this field. For example, you can add the New status option using the Add Option button and set its color to blue. Next delete the default option Lead by clicking the X icon. You can then reorder the options using drag and drop so that New is at the top of the list.
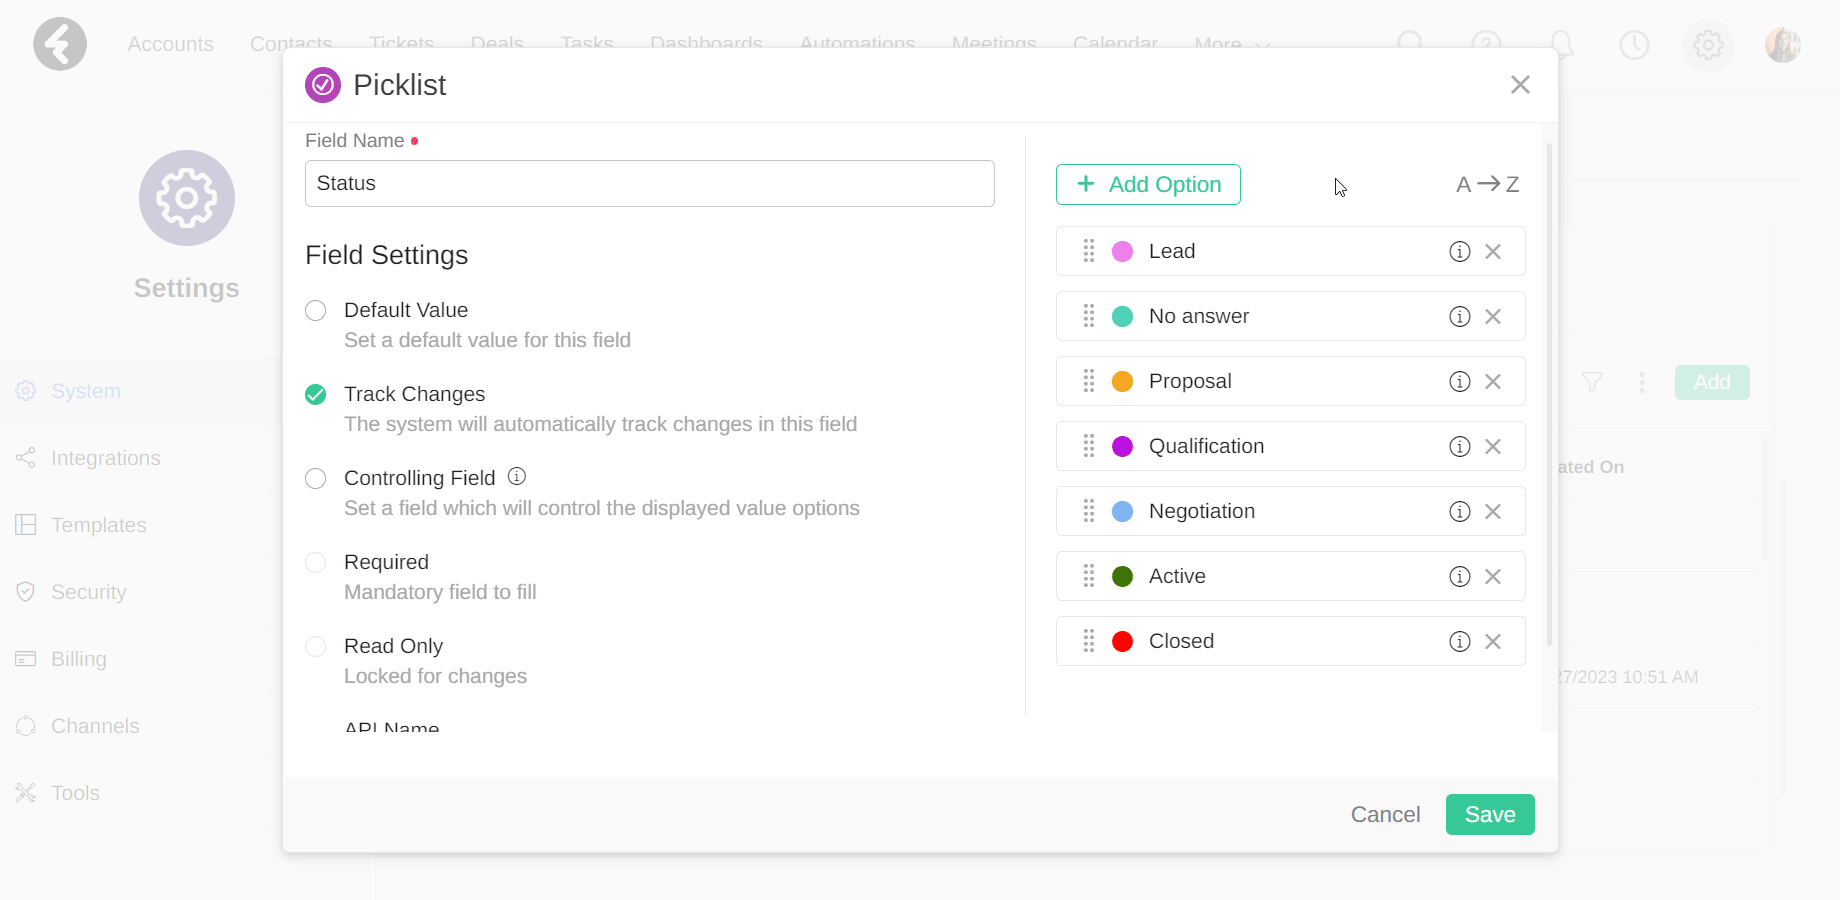
Be sure to click Save once you're done. To learn more about picklist fields, click here.