Webhook automations
Automation set up
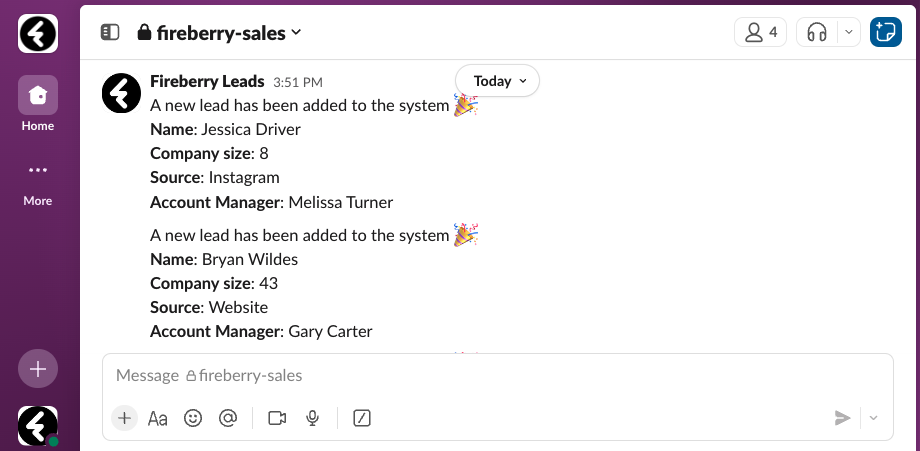
You can use an automation to automatically send information from Fireberry to a third party using a webhook. This is very helpful when you’d like to send information to messaging channels, send contacts to mailing systems, and so much more. For example, you can send out a message to your sales team channel on a messaging platform, such as Slack, every time a lead is added to the system. This will keep them up to date on new leads as quickly as possible.
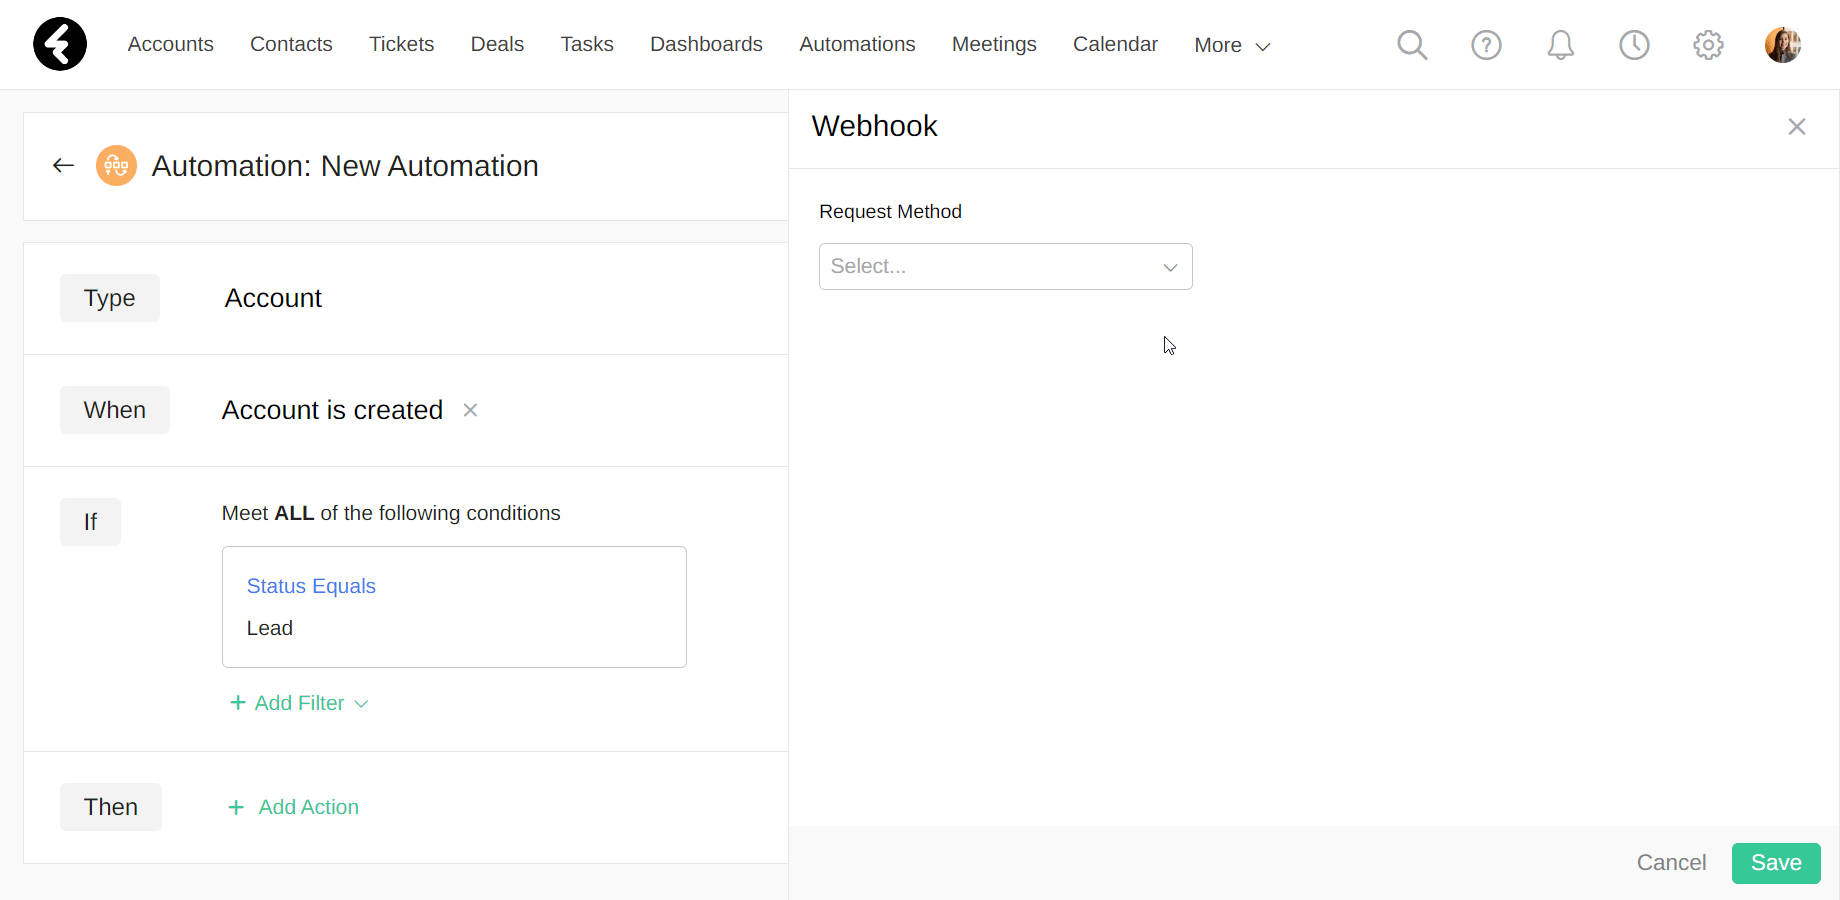
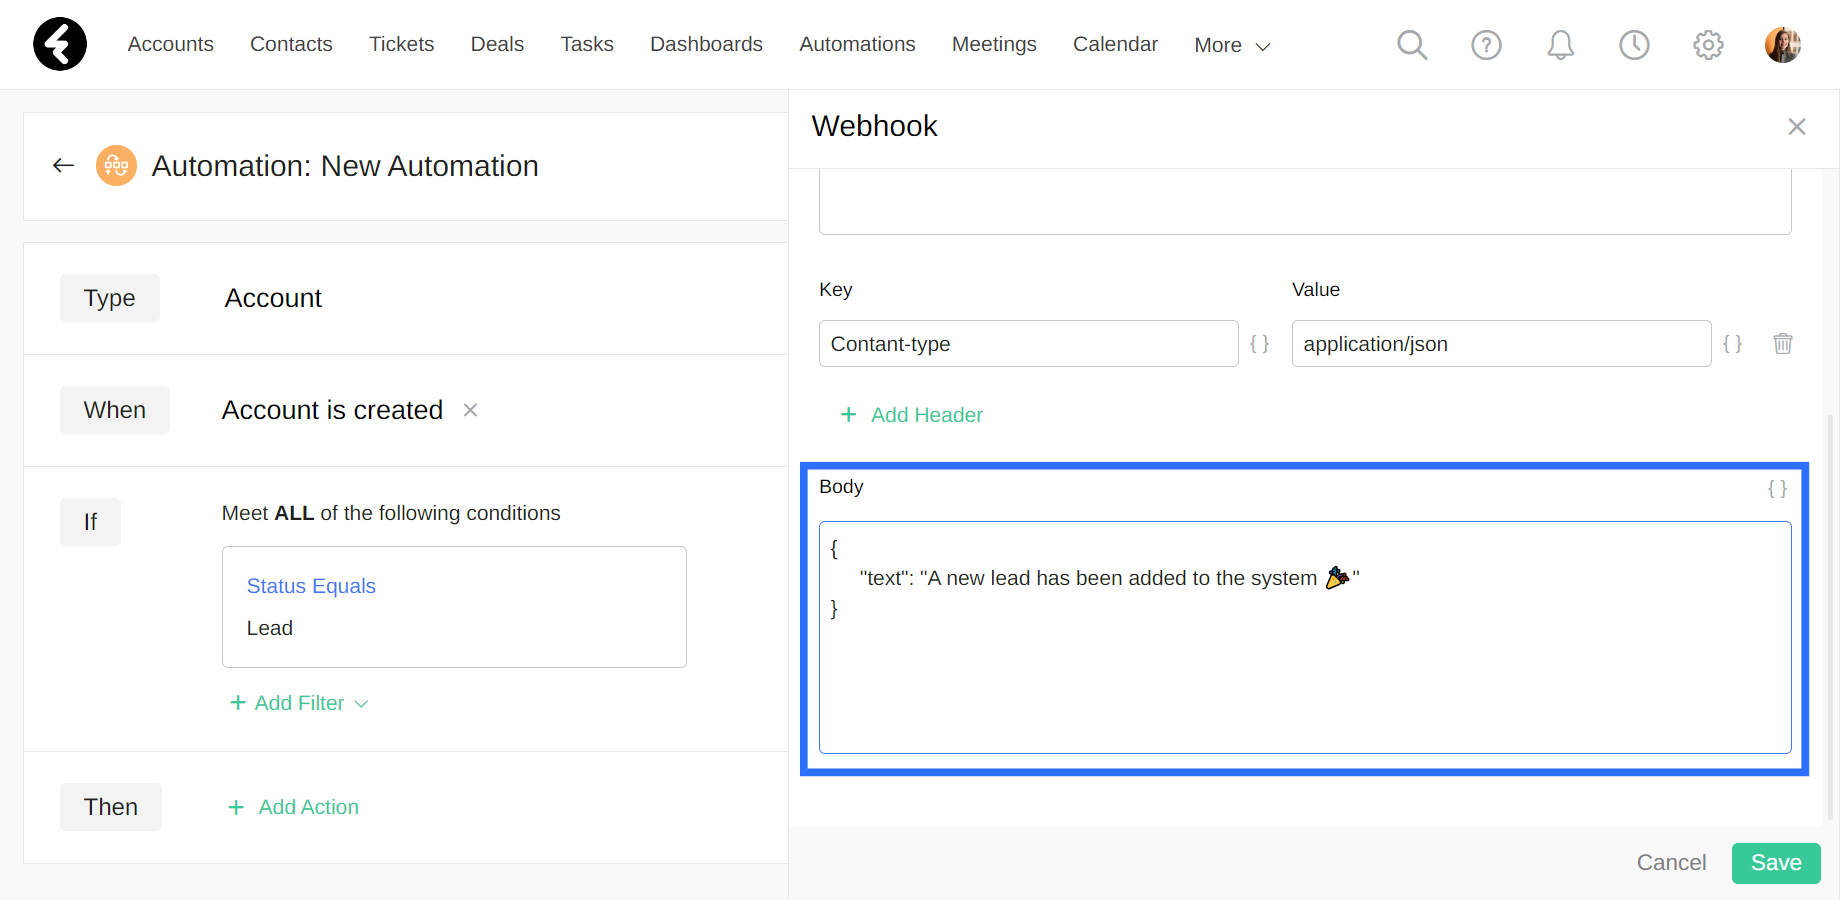
To start, create an automation where the Type is set to Account and the When is set to Account is created. Set the If filter so the field is set to Status, the operator is set to Equals, and the value is set to Lead. Next click + Add Action under Then and select the Webhook option. A dialog box will appear on the right side of the page where you can set the various parts of the request, which are each explained in detail below.
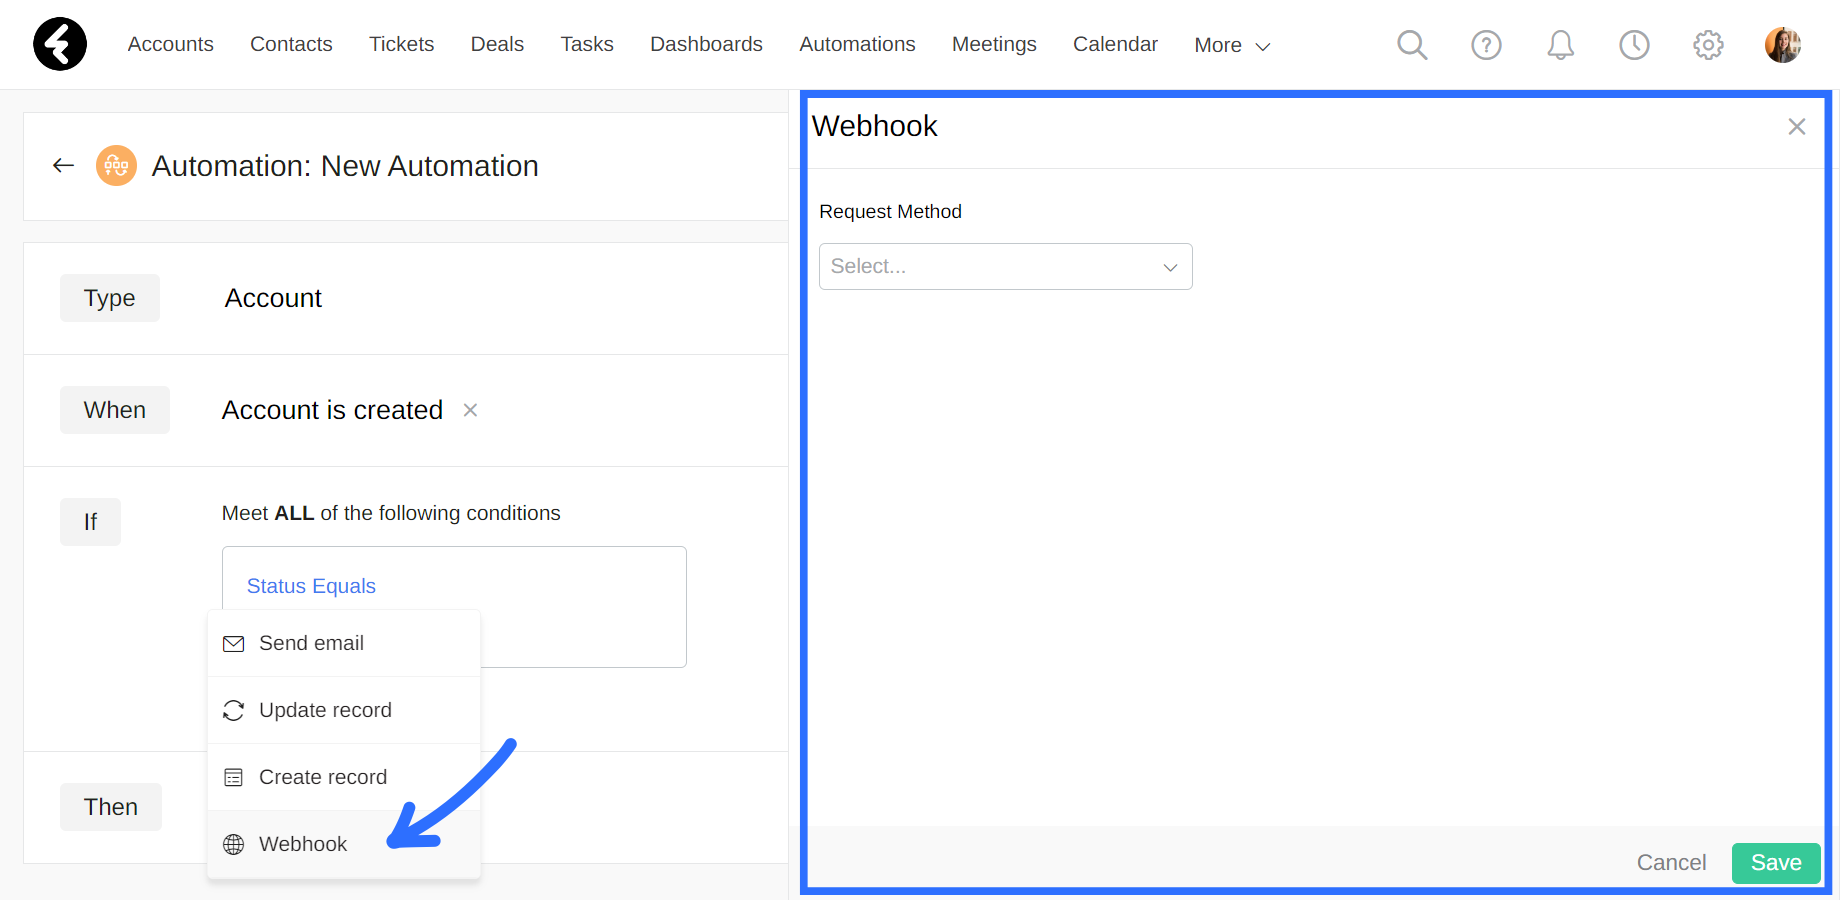
Request Method
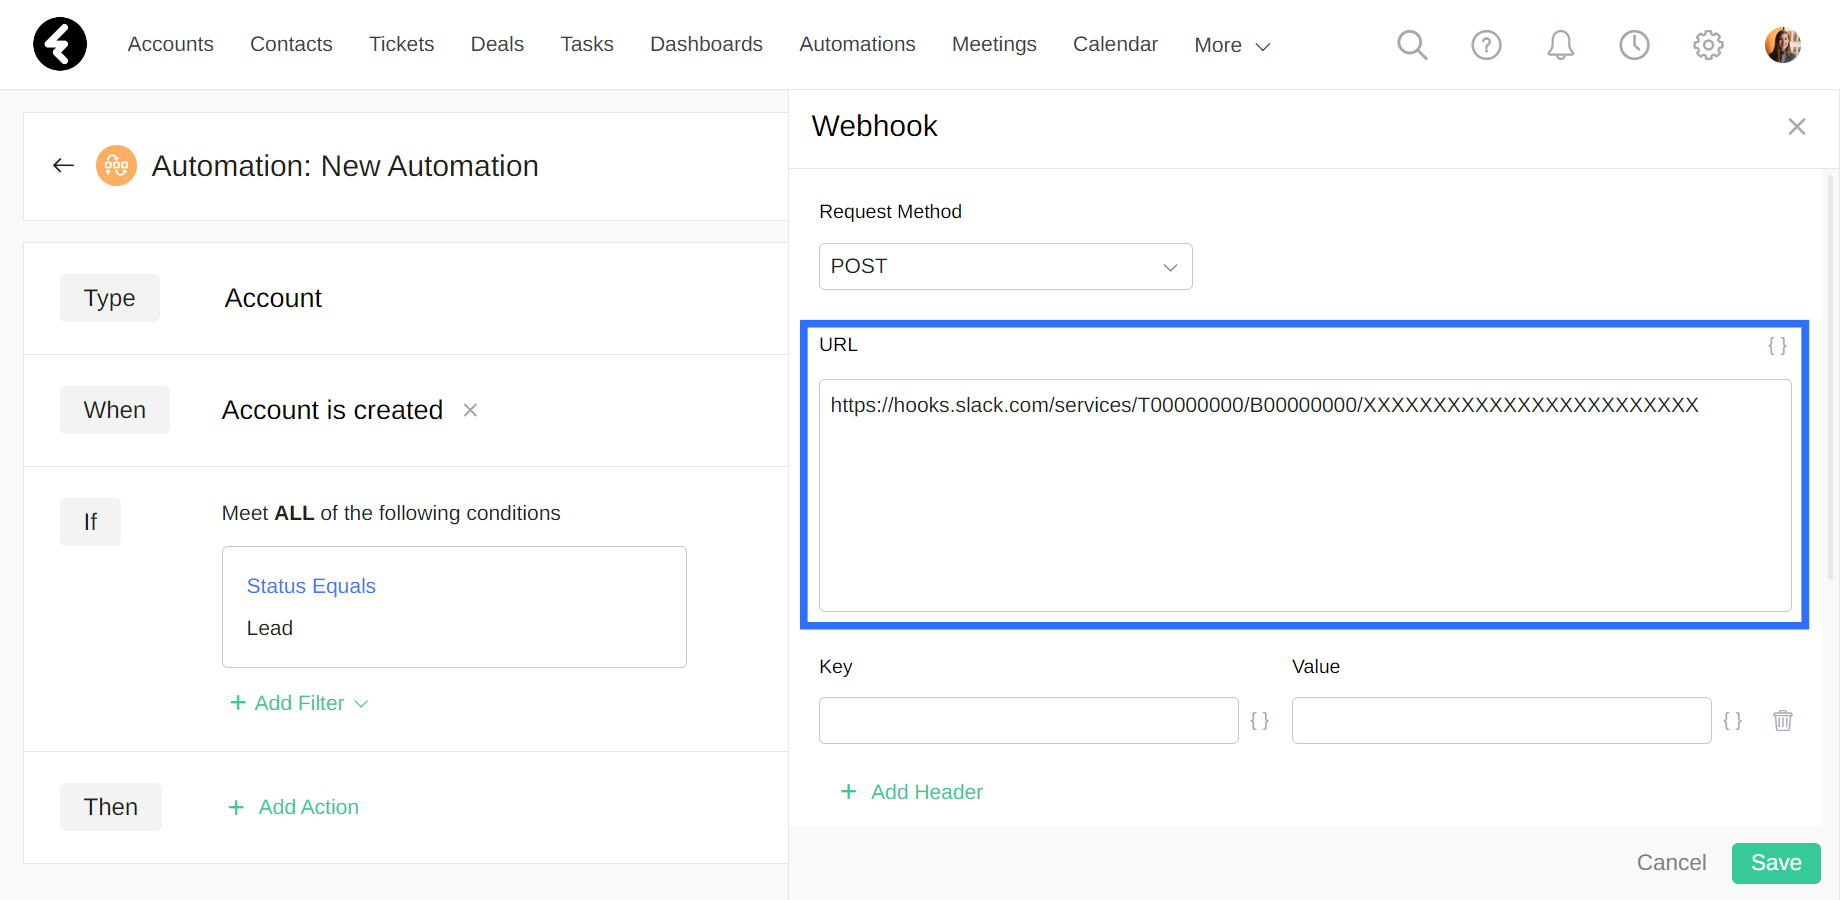
The first step of creating a webhook is selecting the method for the request. Check which method the receiving third party would like you to use. You can choose from five different options: POST, GET, PUT, DELETE, and PATCH. Once you know the relevant request method, click the Select… box under Request Method and choose one of the five options. If you’d like to change the selected method, simply click on it to open the dropdown menu and then select a new method.
URL
The URL sets where the request will be sent to. It must include the full build of a standard URL and start with the scheme. https:// is recommended as it ensures the most secure transfer of data. Each third party will have their own details and requirements for the URL.
Header (Key Value)
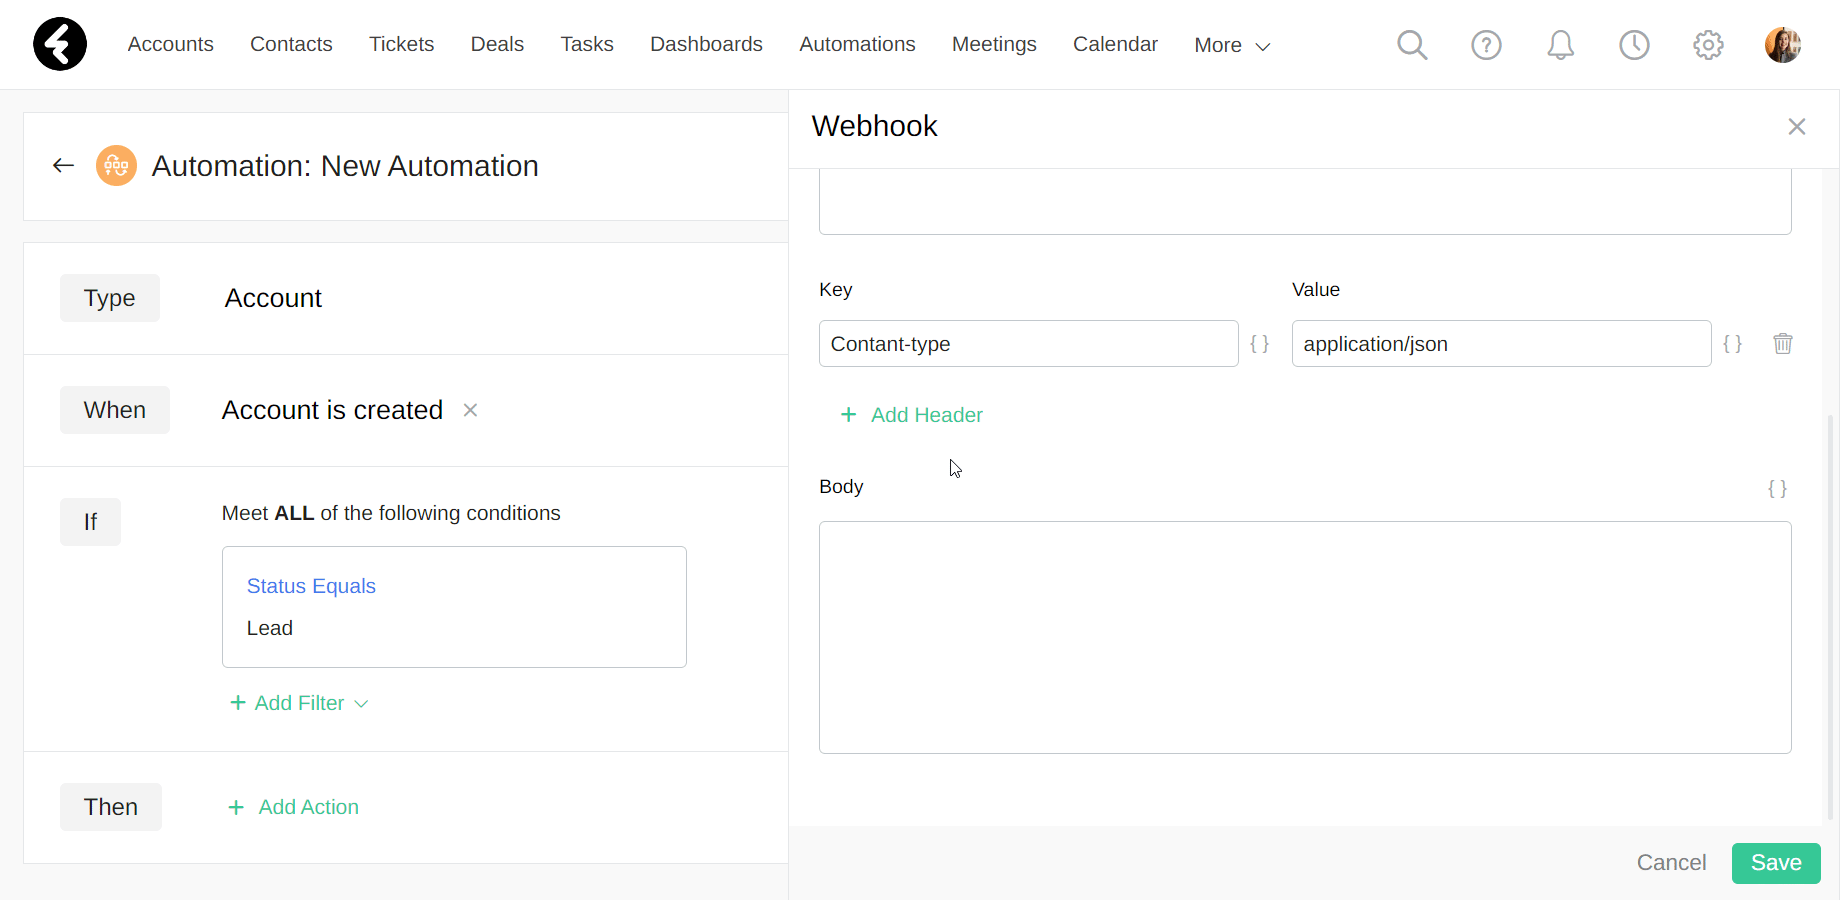
Using the header, you can specify key value pairs which will be sent to the URL. You can add as many parameters as you want by clicking + Add Header. To remove an existing row, simply click the trash icon on the right. Most webhooks require the header to include a Content-Type, such as JSON or PHP, and some sort of authorization or API token to confirm that the user is authorized.
Body
The body is typically used to send the bulk of the data, and is frequently done in JSON format. You can type free text you’d like into the body section. The exact format of the data, such as the amount of brackets used, is dependent on the requirements of the receiving third party. Be sure to meet these requirements to ensure your webhook sends successfully.
If you’d like help setting up a webhook, our partners would be happy to help. Click here to find the right partner for you.
Example - Slack
One useful webhook option mentioned above is sending out messages in Slack. Below we’ll detail how you’d set up each section of a webhook in order to send out a message to a specific Slack channel each time a new lead account is added to the system. First make sure the rest of your automation is set up according to the instructions at the top of this article. Then use the following instructions, which are based on the requirements Slack specifies here.
- Request Method: Based on Slack’s requirements, select the POST option from the dropdown menu.
- URL: Slack includes instructions for how to extract an authorized URL for incoming webhooks which will send messages to a specific channel here. Copy the specified URL and paste it into the URL section.
- Header: One of Slack’s requirements is sending the data in JSON format. In the header you can define this by setting a key value pair where the key is Content-type and the value is application/json.
- Body: Use the body section to set the message which will be sent. As mentioned above, the message should be written in JSON format. Set the name to text and the value to whatever you’d like the message to be. Slack’s documentation details more customization options for your message.
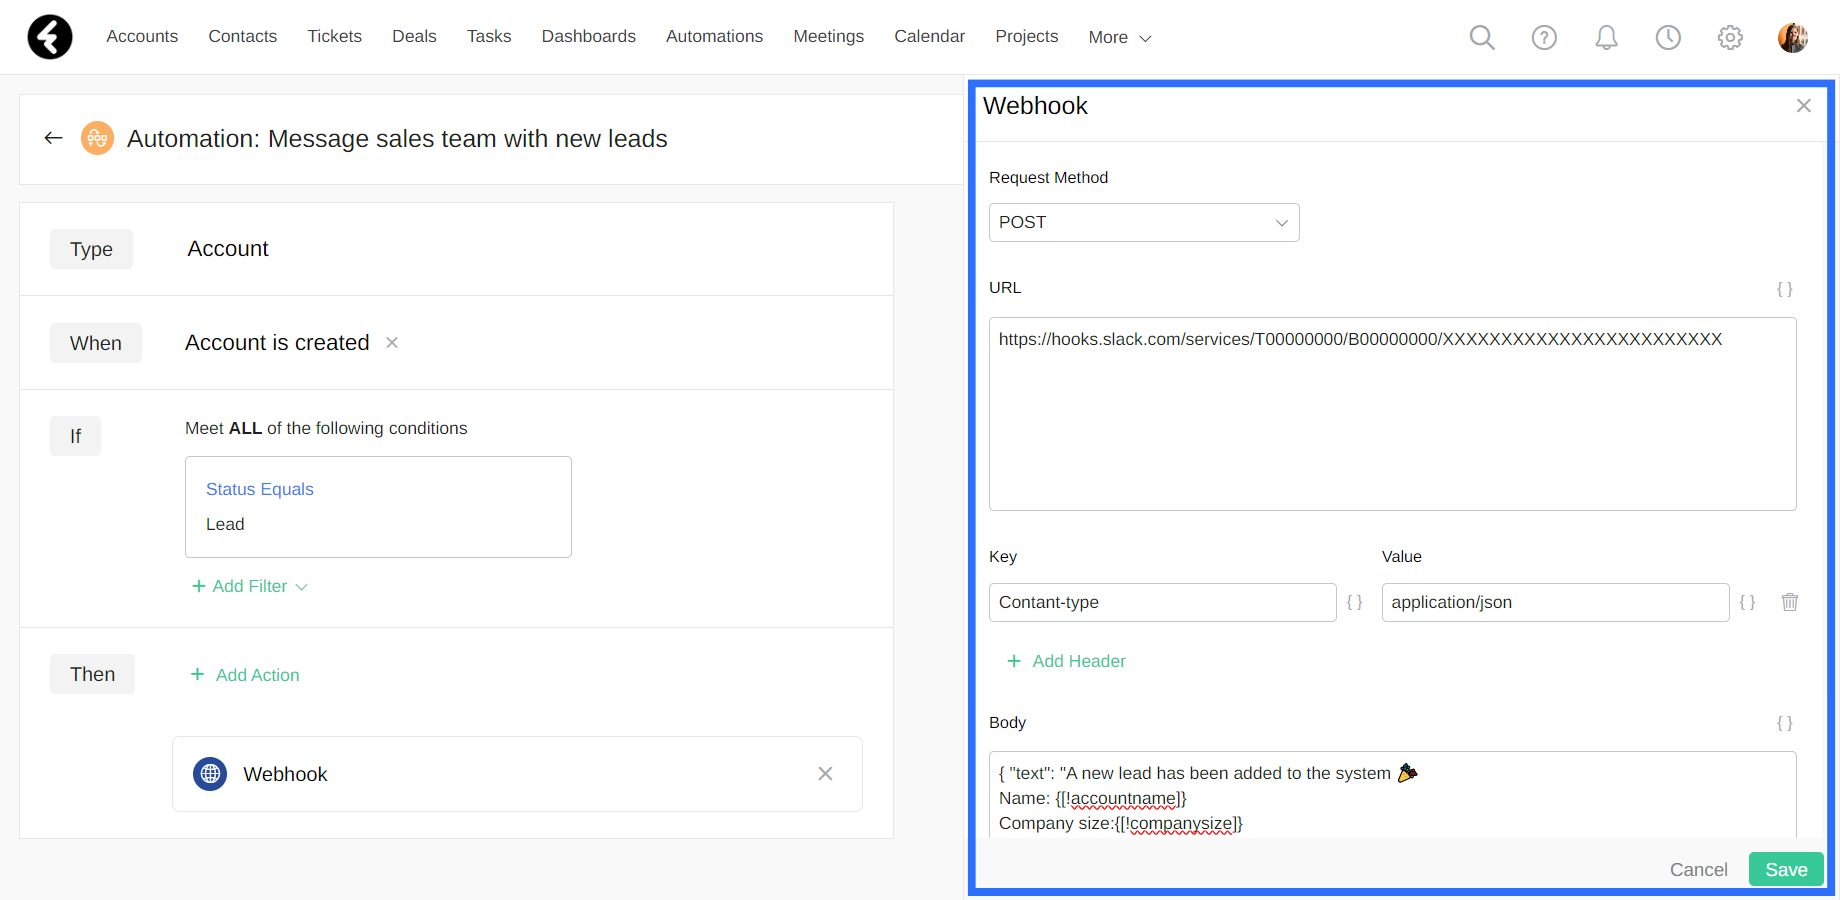
As you can see in the body section, field references are used to provide details to the sales team. The message on Slack will help to update your sales team as quickly as possible and provide them with easy access to specific details. This is one small example of webhooks you can send to Slack, and of all the webhook options available when integrating with third party sites.
Failed webhooks
If a webhook action within an automation receives several consecutive error responses from the receiving URL, this automation will be set to Draft. To notify you about this, an email will be sent to both the creator of the automation and your primary system user, which you can learn about here. By setting the automation to draft, the system ensures that your workflow will run properly and protect your server. It also ensures that you're updated about issues which may exist in your receiving URL, or in the parameters you’ve set for the webhook.
Automations will be set to draft if one of the following two conditions are met:
- Within 24 hours: The automation will be set to draft if it receives 1,000 consecutive error responses.
- In over 24 hours: The automation will be set to draft if it receives five consecutive error responses.